Tuesday, August 19, 2014

Picture This

At some point we decided that the board and batten we put on our living room wall wasn't enough. No, it needed more.

For two years in our apartment we barely touched the walls and in our own home I think we've just been uncertain about pictures. We don't have a lot of practice hanging things and we put all that time into painting every room...

So after putting up a meager selection of things we finally decided to jump in and do something a little bigger.

Enter, the Picture Wall.

The Picture Wall has been employed by many a DIYer to fill awkward spaces, bring excitement to a boring wall, show off all of the exciting places they've visited, or simply copy other currently trendy DIYers...

Anywho, Meredith found an awesome clearance sale on some nicely sized white frames (they were like $4 a pop!) at Michael's and snapped up a few in a couple different sizes. This whole project was actually a bit of a whirlwind since the sale was only for that weekend and we wanted to make sure we liked the set up and number of frames before the sale ended. That way if we needed a few more we could still grab them at the same sale price.

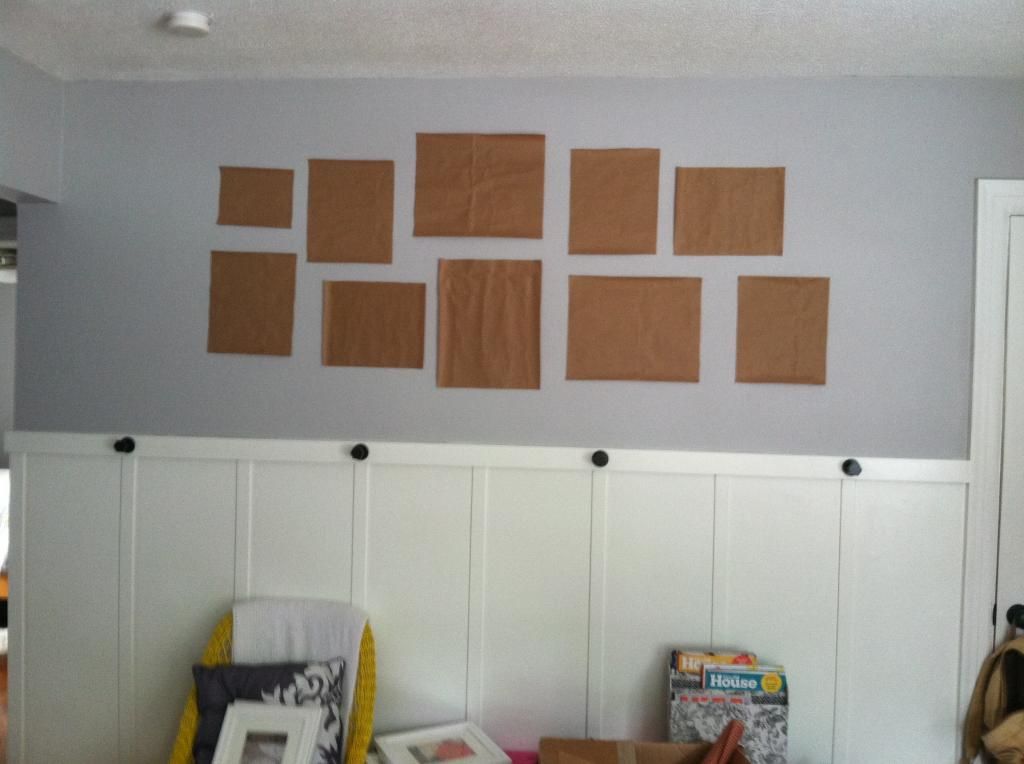
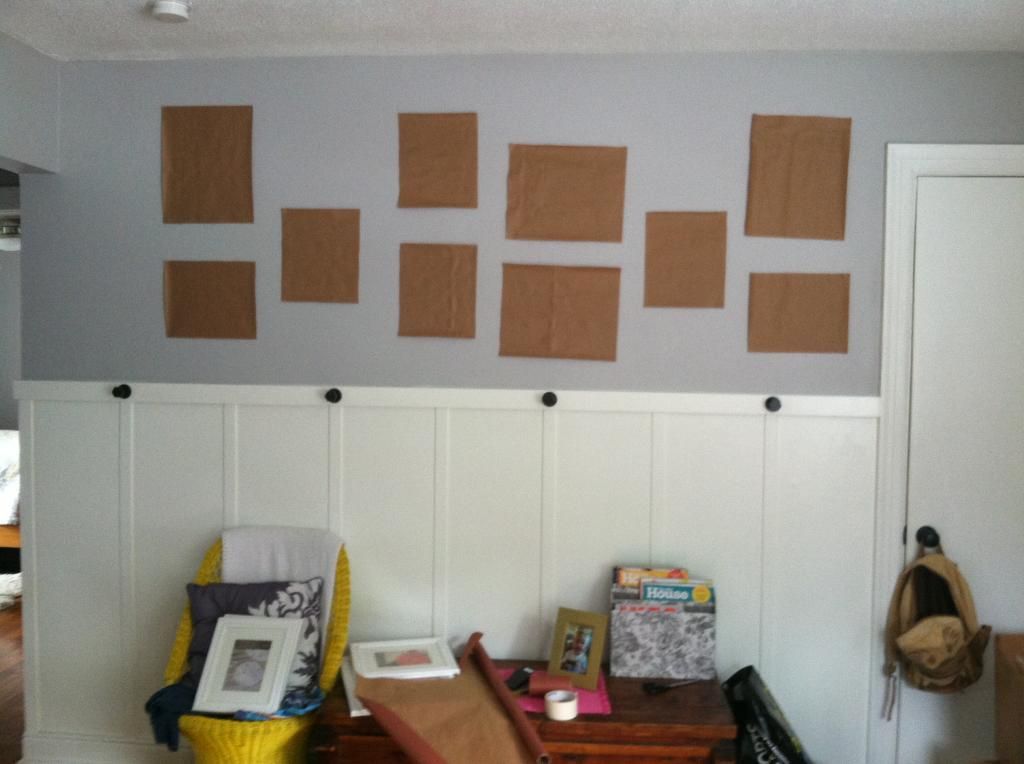
We started by tracing the frames onto brown paper and cutting out a bunch of them as templates. We taped them to the wall in various arrangements to get a feel for what we liked.


We quickly realized this would be harder than it looked.

What was this supposed to be?

A little better.


After trying numerous different options, including a more "random" style (which Meredith did not approve of), at least one that we dismissed because it looked too much like a gallery wall, and a couple that looked (quote) "too much like a cloud", we settled on a fairly basic design that we felt used the space well and fit in with the surroundings too.
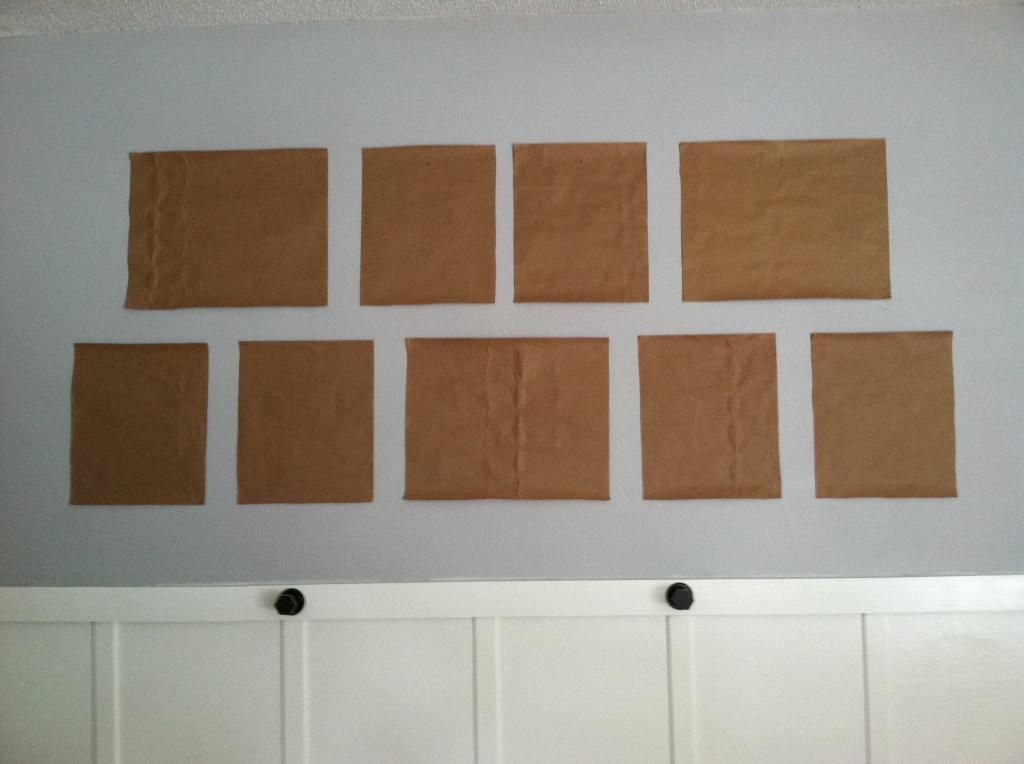


This design did require us to buy some more frames (I think just 2 more of the smaller size) but without them it just didn't fill the space like we felt it needed too.

Once we had an arrangement we liked we set to measuring everything, checking our spacing, leveling things out, and marking nail holes on the paper (They're not centered between the ceiling and the Board & Batten because we still want to add crown moulding). I hammered nails in with the paper templates still up and then just ripped the templates off... like a boss.


We put the frames up right away even though we didn't have pictures to go in them yet because, you know, why not?
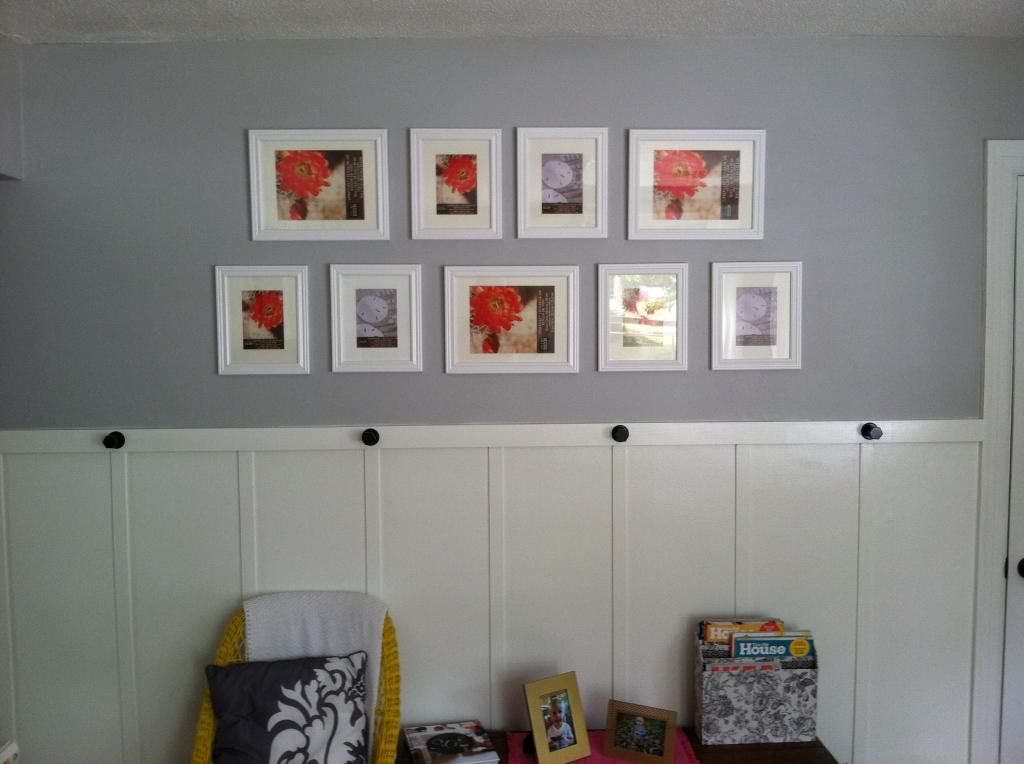


Yay! No blank wall anymore! We picked through our family photos until we had a selection we liked, uploaded them to the Target website, and had them printed out in the store.
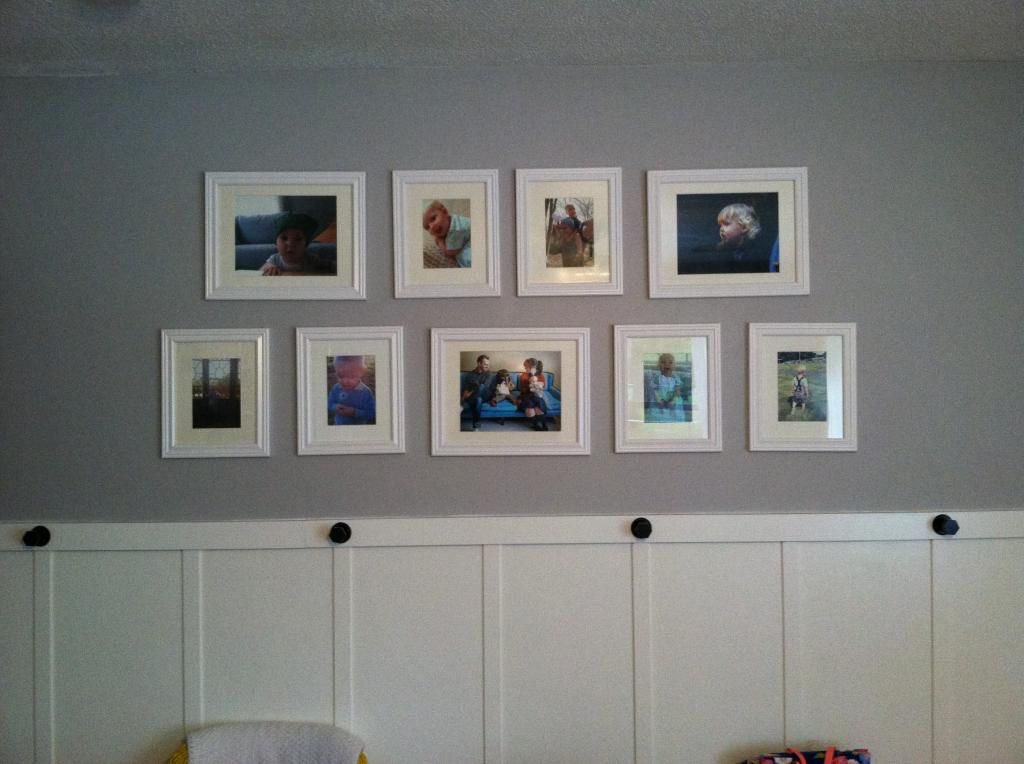


I think the total cost of this project (including printing the pictures) clocks in at a little over $50 which is pretty decent considering it would have been over a hundred bucks if those frames had been regularly priced! We both like the fact that with the current arrangement we can add to it if we want to without it looking overly crowded but it also still looks pretty full now. We also had no idea arranging them would be so difficult. Every time we moved one to fix one area it would make another area look funny. With this project under our belt maybe we'll start covering the rest of the house with pictures! Or maybe not, but it at least makes us feel a little more confident about picture placement.

Thursday, August 7, 2014

Moody Blues

Blergh-blah-blah-blah.

The above is my brain right now. The summer heat has finally fried it. Maybe that's why perusing snowy, Nordic-themed items has been so soothing. Also, taking a big step and changing the paint color in Grayson's room from this:

 
Apparently we dislike this color so much
we didn't even take a real "after" shot.
 

to this:


feels very cool and refreshing. (Also, sorry, these pictures are in no way "styled" and the lighting is terrible. We were in one of those "Just...take pictures! Get it done!" moods.)

It looks a little dark now, but we think that once we add some light, airy curtains and accent things, it'll lighten the feel of the room. 

We really lucked out with this paint, we grabbed it a few weekends ago when Ace Hardware had their "Buy one gallon, get one gallon free!" deal. (We also picked up the white we used to finish our Board and Batten)

It's the first time we've used a Clark & Kensington brand paint to do a room (we're usually Behr people. Aahh! Bear People!) and, while we did notice some differences, for the most part, we liked it. 


When we painted this room yellow a few months ago, we were painting over a pinky-beige that the sellers had used for every room in the house (we called it "band-aid beige"). Yellow over beige? No problem! Oh, how naive we were. It took us three coats, two whole gallons of paint and there were still spots where the beige showed through. But by that point we had already decided that we had chosen the wrong color and were not willing to invest in more of it just to finish. Neither were we willing to jump right in to painting it an entirely different color. So, the room stayed butter yellow for a few months while we saved to replenish our painting budget. 

Finding a new color was fairly easy. We had toyed around with the idea of a blue-green room before, but decided against it in favor of the brighter yellow. Well, this time we trusted our instinct and, when we got our free gallon from Ace, had them color match Plumage by Martha Stewart.


It looks a little washed out here, but on the walls, as you can see, it's quite bold. 

Clark & Kensington is not "no VOC" , only "low VOC" which we don't love (Behr is "no VOC") but the coverage of this paint was A-ma-zing. One gallon, two coats did....the entire room.


I did a dance. 

Aside: we left that ugly, jagged strip of unpainted wall around the ceiling on purpose. Experience has taught us that we are not the tidiest of painters (even with tape) around the ceiling and, since we will be putting up crown molding in here anyway, we opted to leave a little seam. Yes, it's tacky and unattractive, but we thought it was preferable to a smudgy ceiling. For us, anyway. Not recommending it as a "new look". 

In addition to new paint, we also have some awesome mood boards to share! 

My sister-in-law has really been helping to keep us inspired and energetic about Grayson's room. I'm so grateful. There are many days when I open the door and think, "Did the toys give birth to MORE toys last night while we slept? I will never conquer this room. Toys, you've won." 

But then I pull up these Mood Boards and I feel re-energized. 


The first two are kind of what we are going for now and the third one is updated a bit for when Alice is a little older and they're sharing a room. It's nice to see how the look can evolve. 

We have already made an Ikea run for those curtains and a sheepskin. And we are planning another - I need that duvet cover!  

It's exciting to see this room coming together. Grayson likes everyone spending so much time in his room and he also appreciates all the Frozen songs I sing while I'm in there. 

...Actually, that's a lie. 

He always (every time!) says: "I'm just Grayson and you're just Mamma and don't sing that song."

How long do you think it will be before we, as a society, can say "let it go" without bursting into song?

My money's on 1,000 years...

Tuesday, July 22, 2014

And We're Baaack!

Wow, I don't know where that impromptu hiatus came from. Well actually I kind of do. Let's call it our "holy cow this hot weather completely sapped any will power to get anything done out of us" hiatus. But now it's over! Hooray! For now? Dun dun dun!

Excuse my awkwardness. I haven't done this in a while and I'm a tad rusty.

So anywho, this is really just an update to tell you that we're getting back into the swing of things here. There are a few things that we've done that we'll be sharing in the next few days and we also have some things that we're in the middle of and will share as soon as we've completed.

What type of things you ask? Well, I can't tell you or it would spoil the surprise. But I can leave you with some teasers.


Hmm, our son, a picture, and a blank wall... I wonder what we could have done?


What's this? Butter yellow walls we've never liked?


Boards?! What are those for?


Tune in next time to find out what happens, same bat-time, same bat-channel!

Friday, June 27, 2014

Five for Friday: Instructables Edition

I spend a fair amount of time over at a site called instructables. If you don't know about instructables, you are definitely missing out. It's a site full of instructions (or instructables) on how to do, well, just about anything. From leather shoes for children to roasting pigs (caution: not for the weak of stomach but man do these guys know how to party) to 3D printed fingerprint scanning garage door access points this site has pretty much anything you might want to know about, all done by other folks around the world who just felt like sharing the different ways they've figured out how to do things. I even have my own page where I share various projects I've completed.

This Five for Friday I wanted to share five projects from instructables that I would love to do around our house.


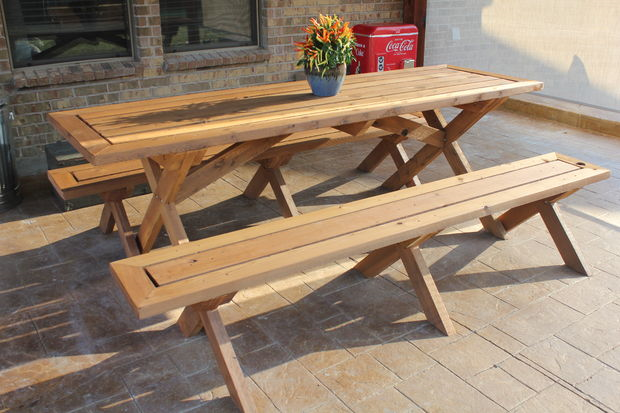
Picnic Table


I would love some outdoor furniture. Of course, most of the sets we like are over two hundred bucks, which isn't ridiculous I suppose, it's just not in the budget right now. So, a picnic table is a great compromise. It might not be quite as "cool" or "fashionable" but it's classic and built to get beat to death by families and weather. It's also way more affordable.


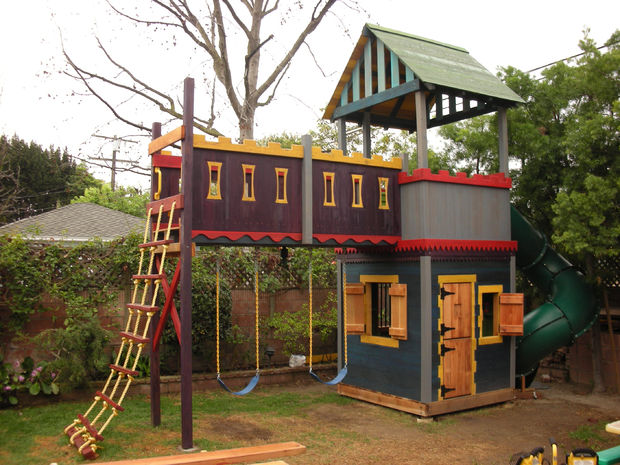
Playground/Swingset


Okay, so I wouldn't necessarily build this exact playground. But it's certainly inspirational! And it provides a great jumping off point for building one myself, even if it doesn't end up being this grand. This is something that probably won't happen anytime in the too-near future; mostly because our yard jungle needs to be tamed first but I do think I would do my kids a disservice to not have some kind of swingset for them.


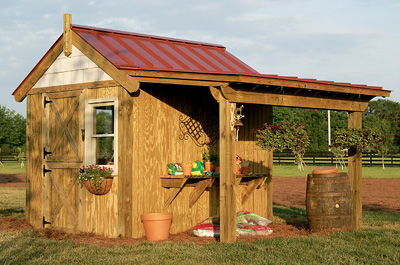
Shed


Isn't this the cutest shed! This looks like a rugged structure from which I could work on manly projects. This is the next BIG project I want to complete. I really don't want to keep my tools and lawnmower and weed eater in the corner of the yard under a tarp anymore. I also love the idea of having a shed with an overhang roof like this so that I could work outside but still be in the shade, and if I ever get a riding lawnmower I could park it under there.


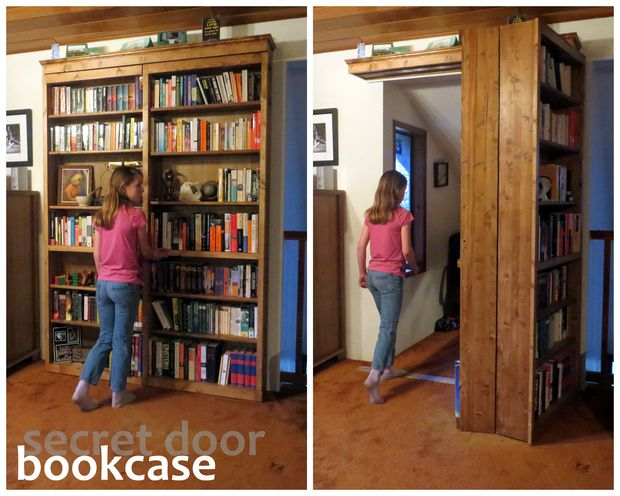
Secret Door


This one is more of a joke... for now. There's just no place in our house to really utilize a secret door. However, in some future house I fully intend on creating some sort of hidey-hole nook or passageway that I can hide with a bookcase door or some other mysterious and secretive entryway.


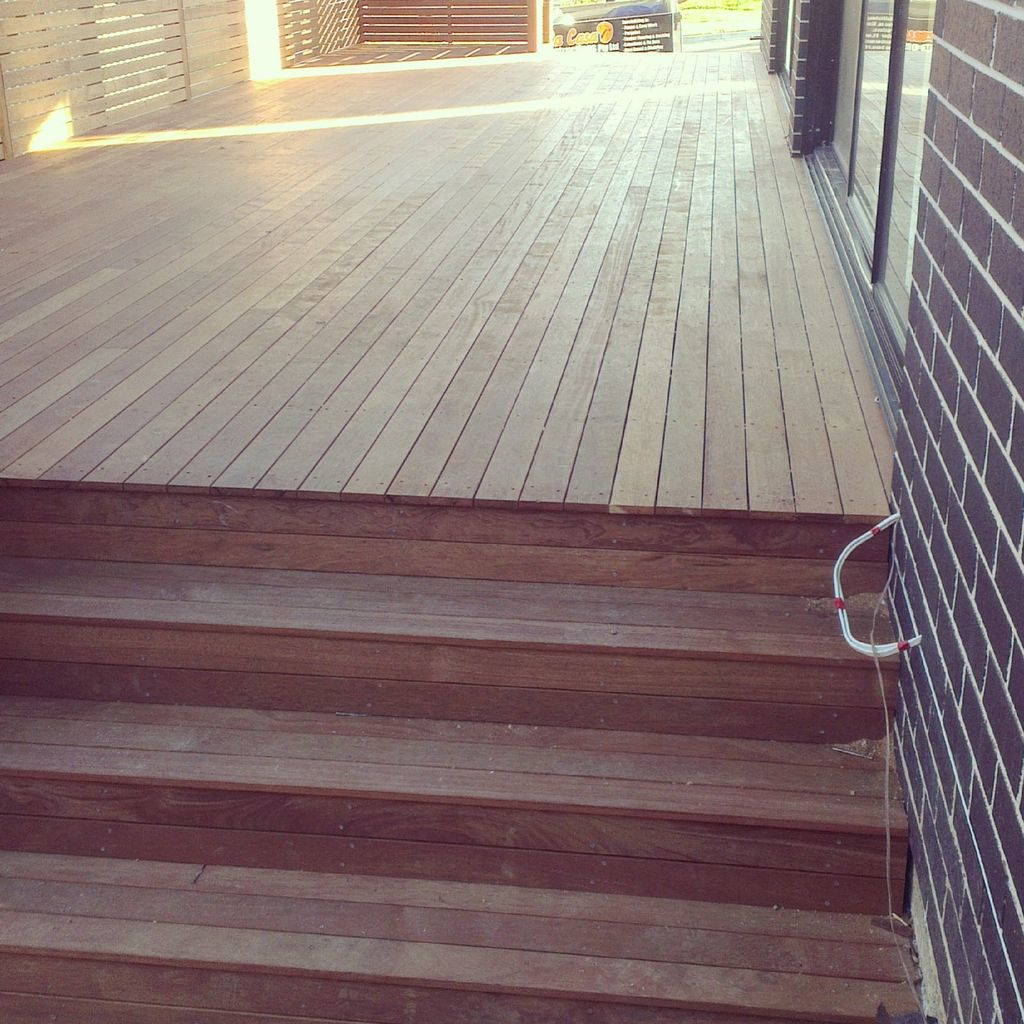
Deck


We really feel like a deck would add TONS of value to our home, and I don't just mean resale value. In a small house, every square inch is precious and putting some useful ones in the back yard would be great. Besides, both of our kids seem to love the outdoors (though Grayson tends to like digging it up while Alice just enjoys staring at it) and it would be great to have somewhere outside where we could sit and watch to make sure they don't eat too much grass and dirt relax while they enjoyed the great outdoors.


Most of these projects are kind of big outside projects since that's sort of what's been running through my brain a lot lately. I may continue to hijack the Five for Friday post every once in a while to feature more instructables in the future. Next time maybe I'll feature some smaller projects, potentially more décor focused. We'll see. In the meantime, I hope you enjoyed this (first) edition of Five Instructables for Friday!

Wednesday, June 25, 2014

Take A Dip

This is one of those Projects That Almost Wasn't. Not quite dramatic enough to make the Pinterest Fail page... but it definitely didn't work out exactly the way I had intended.

Our house came outfitted with these lights:


Bland. 

Meh. 

They're fine. Whatever. 

They could be lots worse:


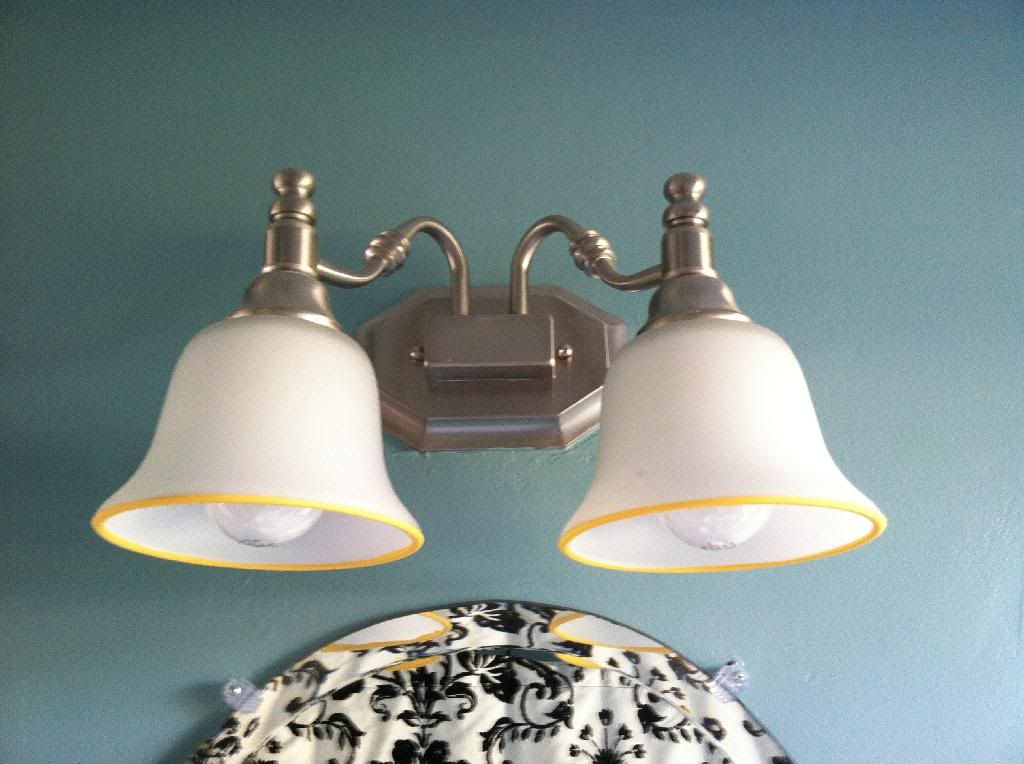
We have a double set in the bathroom that I gave the teeny-tiniest update to:


Just dipped the rims in some yellow craft paint. I think they're kinda cute. 

Our hallway also has one of these light; a single one:


Now, I think this light is kind of odd to begin with. It looks stuck there, almost like an afterthought. Which it may well have been when someone realized that the space needed a light but the ceiling space is taken up by the door to the attic.


One day, if we put in stairs, we will get rid of the attic door and replace it with a real ceiling and run wiring for an actual hall light. But that is a good ways off. We've casually looked at wall mounted lights to replace this one, but we haven't seen anything that we really loved. To me, a lot of them just look like a porch light that you put inside. 

So, while we're waiting, I decided this light needed a tiny tweak. I thought it would look cool to dip the shade in white 
paint, similar to the bathroom light but...more!


I assumed that I could just dip the shade into the gallon of white latex-based paint that we had kicking around in the back of the closet. But...


...the shade was too fat. 

So, I thought, I'll pour the paint into a wider container (aka: a glass pie plate, cause...why not?).


It didn't coat as much of it as I had originally wanted, but I was just going with whatever worked at this point. (Inside I was already thinking, "I have ruined this lamp shade. It was fine bland and now I am making it aggressively unattractive.) 

My plan had been to hold the shade until the paint was set enough to leave it upside down on the table without it dripping. 

Well, no dice. 

If I had been smart, or just patient, I would have waited until Joseph was home so there was an extra pair of hands for lamp holding/child-minding.

But, lest you forget, I like to do things NOW! (Because my interests are mercurial and I am easily distracted.) 

So, thinking the paint was probably set "enough", I put the shade down so that I could change a diaper/fix a snack/play Firemen. 

Spoiler: it was not. 


When I checked on it a little while later, this is what I found:


I promptly texted Joseph:

Me: AHHHH! I can't do this! I ruined our boring light! And everything is painty and I'm a terrible person!

(Or something like that.)

I also sent him the above picture. 

He sent back:

Joseph: I'm confused because what you said sounds like it didn't turn out but the picture looks awesome.


...

How sweet. 

To me, it looked like Albino Cthulhu was eating my lamp shade.


Rrraawwrr! Nom-nom-nom-lamp...

I decided to just let it dry fully and then see what I could do. 

I knew I was going to have to remove the paint that had run down the inside of the shade; I didn't want to have swapped out a bland lamp for a fire hazard.  Once the paint was dry, I tried just peeling the drips off to see what happened. 

Oh, the magic of latex paint on glass; they came off perfectly. I still wasn't sold on the drippy look, no matter what my enabler supportive husband said. So, on a whim, I took a paring knife and, veeeery carefully, ran it around the top of the rim of paint, just below where the drips started. 

I don't have any pictures of this step because I was pretty sure this was A: not going to work, B: ruin my shade or C: all of the above. 

But, surprise, it did!

Pretty much. 


It's not exactly the "dipped" look I wanted, but it's much better than I thought it was going to look about halfway into this project. 

I hope writing this experience down will help me remember that, in the world of DIY, not everything works out perfectly. And for every amazing thing on Pinterest, there are dozens of "fails".

And we should hold up our mangled, gluey ball of twine (or poorly painted lamp shade) and say, "Yep. I tried. It didn't work.  I'm awesome anyway."


Friday, June 20, 2014

Five for Friday: Need for Swede

Maybe we have Ikea-hangover from our impromptu trip last Sunday:


The boys had fun with the sinks, while Alice just soaked in the wonder of it all:


Maybe all this Viking talk is going to our heads. 

Or maybe we're just super excited about Amy Pohler's new show.

Whatever the reason, this Friday, we've got Sweden on the brain. Now, unless you're throwing a theme party or getting in touch with your Scandanavian roots, you may say "Hey, now, I appreciate pickled herring and meatballs as much as the next person, but my life is in no way missing out on Swedish things." And we would say, "Ah, but you're wrong!" And we've made a list to help you realize how much you (and everyone else) needs more Swedes! (Or, rather, things from Sweden. You probably don't need more "Swedes", it just flowed with "needs" better. But, they do seem like a lovely people. Maybe we do all need more Swedes.) 


Can you make a list of cool Swedish things and not have something with a Dala horse? I submit that you can not. These come in a set of four (there's also a blue one, not pictured) for $42. But they're cute and kind of a subtle Swedish wink. 


Coffe with a Push. This is a twist on the traditional Swedish game Fia med Knuff, which is similar to Parcheesi. Joseph does not enjoy Parcheesi (he says there's too much left to chance and not enough strategy. My Magic Husband Decoder says he played once and didn't do very well. But, I could be wrong, sometimes it's faulty.) so, when we all get together to play this game, he's going to be in charge of making the coffee and Swedish Cinnamon Rolls (this game comes with a recipe!)


I would frame this "tea towel" and hang it on the wall. Or sew a bunch together into a quilt that I would huddle under while drinking glogg and reading Elsa Beskow books.

Or maybe I would just use it as a tea towel. But I would pat it affectionately, so that it would know it was my favorite. 


Arrows, they're so hot right now. But this is the first time I've seen them as wall hooks. It's a good look for them. 


Swedish Fish


Okay, this one is kind of a joke...

But after looking through all this Swedish stuff, how could I not want to go buy a giant bag and eat them by the handful? Maybe that's just me...
In Swedish they're called "pastellfiskar" (literally: pastel fish) and the red ones are apparently lingonberry flavored - I had always assumed they were cherry. Who knew!
Disappointingly, the ones you can buy in every grocery store and Target are made in Canada, but you can buy authentic Pastellfiskar at Ikea. 

Wasn't that fun? 
I don't know about you, but I'm feeling more cultured. And, also, more blond. 

Sadly, both of these are illusions. 

Any other suggestions on expanding our cultural horizons? Favorite Hungarian wall-hangings or Peruvian pastries? Please share!
 

Wednesday, June 18, 2014

Chalk It Up

"Chalk it up....chalk it up, you'll never stop..."

(Apologies to the Stones. And to anyone who heard me singing that while I worked on this project.)

We posted this picture on Instagram last week:


With the caption, "Consider our tickets for the Chalkboard Bandwagon purchased". 

Well, that was our ticket and this is our souvenir:


Our Awkward Wall is now our Chalk Board Wall!

A few weeks back we asked you guys some "Awkward Questions" and discussed our options for this weird little space. We got some different suggestions, but, ultimately, we just couldn't resist the siren call of the chalkboard paint. I mean, all the cool kids are doing it. 

All the cool kids also have tutorials on how to do it, which is great, so we'll keep the how-to portion of this post brief. 

(The directions on the can are pretty straight forward, as well.)

Essentially, we wiped down the wall with a damp rag (to get rid of any lingering dust or splotches that might keep the paint from adhering) then went over it again with a dry cloth. 


When it was fully dry, we applied the chalkboard paint very thinly with a two inch brush. A small roller would probably have worked well, but we didn't have one on hand and it's such a little space, we didn't feel like it was worth it to go out and purchase one. But if you've got one, great! 

Here's what it looked like after one coat:  


Lookin' good....

Well, maybe not...


The directions say you can recoat in four hours, so that's what we did! We were careful, since we were just using the brush and not a foam roller, to keep our brushstrokes going the same direction, up and down, to avoid overworking the paint and leaving splotchy marks. We also worked from top to bottom, so we weren't leaning against wet paint while we worked on the top. 

And here it is after the second coat: 


Much better. 

We assumed we'd be doing a third coat but, it looked so good after two, we called it done. 

A few things we noticed about the paint itself: it's pretty thin. We were expecting the consistency to be similar to regular house paint, but it was much waterier. Which meant we had to be mindful of not loading up the brush with too much paint so we wouldn't drip. Also, probably because it's so thin, it dries very quickly. The container says it "dries to the touch in 30 minutes" but we noticed it drying while we were still painting, probably less than ten minutes, which is why we were very careful about working in one direction. 

After the second coat was fully dry, it was time to "prep" or "condition" the chalk board. (This makes the board more "eraser-friendly". If you don't condition first, the chalkboard can just kind of soak up the chalk while you're drawing and it much more difficult, sometimes impossible, to fully erase. Conditioning it gives the new, "thirsty" chalkboard something to soak up first and keeps your drawings from "sticking"; almost like oiling a pan.)

Anyway, we grabbed some white chalk (you can use any color, but we thought white was a little less messy.) and, for easier clean up, we threw down an old sheet to catch some of the chalk dust. All you do to condition your chalkboard is rub the chalk aaaallll over it. We did it once vertically:


And once horizontally:


Til we had a beautiful blizzard happening. (It took about two full pieces of chalk.) 


And then took a soft rag (we actually used a dust cloth) and rubbed all that chalk in. 


This was messy. There was lots of chalk dust. It was not enjoyable. 

But it went quickly and the clean up was a breeze (just ball up sheet, throw in washer) and then...


...it was done!

And you know I just had to break it in...


What? Do dishes while my kids nap? Pay some bills? Nah, I'm just gonna doodle over here in the corner. 

And then someone else wanted to test it, as well. 


"This is Saturn," he told me. "And here are it's rings. They go round and round and round and round..."

Yeah, we're having a good time.