Showing posts with label Outside. Show all posts

Tuesday, September 2, 2014

Numerous Shades of Grey (and a Little Gold)

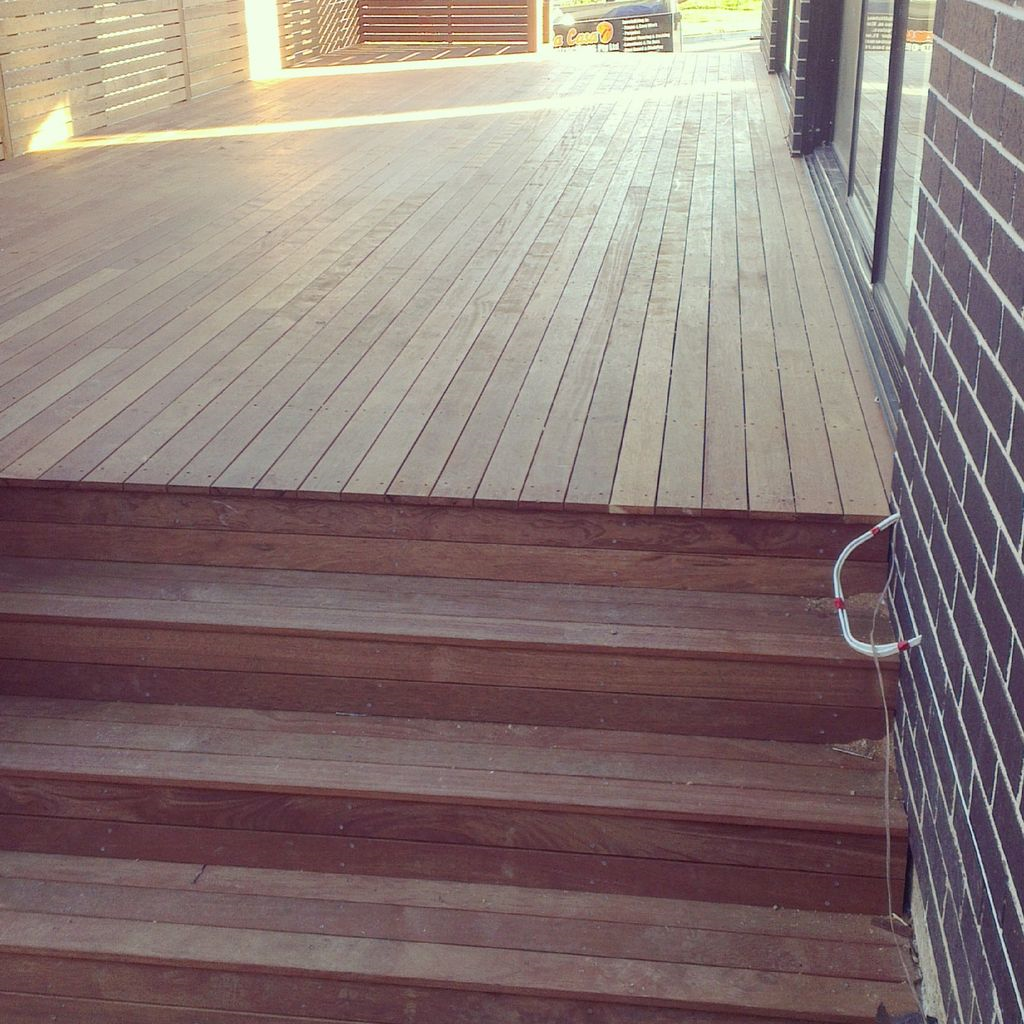
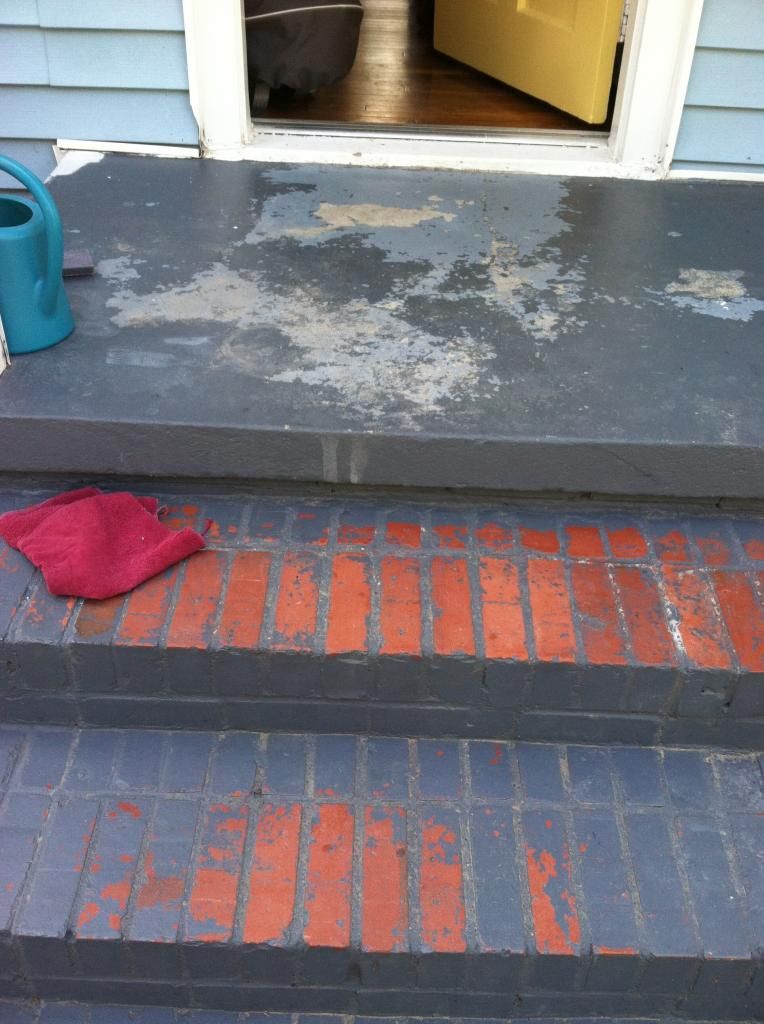
If the door is the "smile of the house", our porch was that one ugly black hair that sprouts from your chin that you always forget to pluck the night before a hot date or big job interview.


Gross, right?

Well, not anymore!


We were originally going to strip the brick to match the foundation, but after consulting various sources (and trying our hand at a couple) we realized that it would never fully be paint-free and so we'd just end up painting it again anyway.


Score one for rational laziness.

It took us some deliberating to decide on a color, though. Gray (if you haven't noticed by now...which is impossible) is our go-to "paint all the things" color, but because the cracking, peeling paint was a shade of gray (fine as a color, maybe, but looking at it on our porch made me want to get a tetanus shot), I wasn't feeling very pro-gray. 

Joseph suggested a nice, lighter gray. Specifically Pearl Gray in Behr's Masonry, Stucco, & Brick Paint. (side note: we actually got the guy at Home Depot to mix us a gallon of Pearl Gray in the Behr Porch and Patio Floor Paint since he said the other was meant for exterior walls and not high traffic areas.)


Well, this gray, which looked like a lovely pale shade on the sample, appeared blindingly white once we applied it to the steps.
 

It actually hurt to look at. 

No kidding. 

I tried to take a picture but it just came out looking like the surface of the sun. 

We packed up the remaining 3/4 of a gallon and went back to Home Depot. Thankfully we previously learned that Home Depot will tint your already purchased paint fo' freeee, so we asked them to tone it down a little. I think we used a swatch of French Gray (pic) for color matching. 

Much nicer. 

The stoop is the original blindingly light color (we decided in small doses it was alright), while the steps got a fresh coat of the new, more muted gray. Which, let's face it, is still pretty bright. 

Then....I decided the top needed some pizazz. If you know me at all, you will know that I am not a pizazz person. (I raise an eyebrow when people add those "cha-cha-chas" into "Happy Birthday". My favorite color...is gray.) Pizazz and I are not friends, or even acquaintances, but I've been spending a lot of time stalking reading Mandi's blog Vintage revivals and she has pizazz in spades! Some of it must have rubbed off on my brain because our front porch all of a sudden seemed to be crying out for something bold! Something exciting! Something that could be done in an afternoon with a paint pen! 

So, I straight up stole Mandi's wallpaper sharpie idea. 


Because Joseph says we should have more pictures of "us doing stuff" on our blog, here is a picture of me, in what I call my "sexy outfit", using a yard stick. It's crazy up in here. But back to the porch...


And I am not sorry. 

I love it.


So much. 


The only thing I changed from her tutorial is that mine are based on a spacing of 7 inches


and 10 inches


(instead of 6 1/2") because...that was easier for my math-hating brain. 

(Also, in case you ever read our blog and go, "Hey, where are their kids while they're doing this stuff?"


They're right here! Helping...in their own way.)

How it will hold up outside remains to be seen. The paint pen I used is oil-based (not water-based) and says it can be used on concrete, but doesn't say anything about outside projects. Or foot traffic. Probably because who draws on their porch??

We do. 

And we like it that way. 

Confession: I am now a little paint pen crazy. I'm thiiiis close to using it for an accent wall in our bedroom... My cautious self is trying to talk me down. "Too trendy," it says. "You'll hate it in a year." 

My new-found inner pizazz (who sounds a lot like Ms. Frizzle, now that I think about it) is encouraging me to "Take chances!" And "Make mistakes!"

Hmm...we'll see how this goes down...

Friday, June 27, 2014

Five for Friday: Instructables Edition

I spend a fair amount of time over at a site called instructables. If you don't know about instructables, you are definitely missing out. It's a site full of instructions (or instructables) on how to do, well, just about anything. From leather shoes for children to roasting pigs (caution: not for the weak of stomach but man do these guys know how to party) to 3D printed fingerprint scanning garage door access points this site has pretty much anything you might want to know about, all done by other folks around the world who just felt like sharing the different ways they've figured out how to do things. I even have my own page where I share various projects I've completed.

This Five for Friday I wanted to share five projects from instructables that I would love to do around our house.


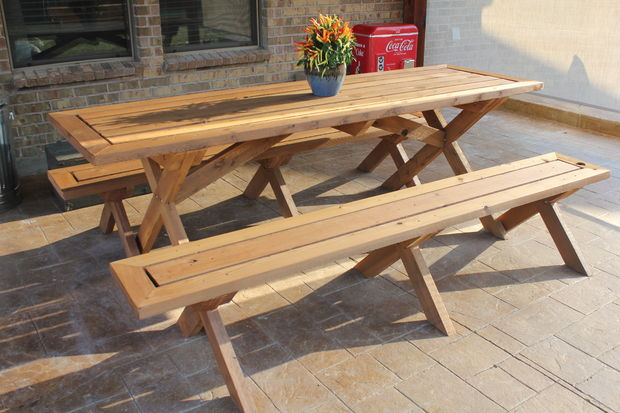
Picnic Table


I would love some outdoor furniture. Of course, most of the sets we like are over two hundred bucks, which isn't ridiculous I suppose, it's just not in the budget right now. So, a picnic table is a great compromise. It might not be quite as "cool" or "fashionable" but it's classic and built to get beat to death by families and weather. It's also way more affordable.


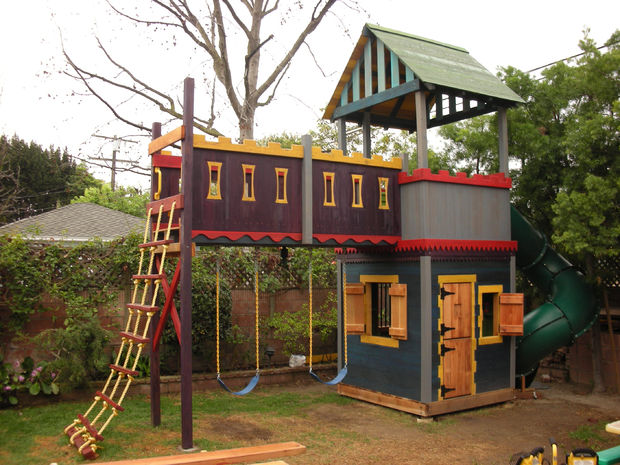
Playground/Swingset


Okay, so I wouldn't necessarily build this exact playground. But it's certainly inspirational! And it provides a great jumping off point for building one myself, even if it doesn't end up being this grand. This is something that probably won't happen anytime in the too-near future; mostly because our yard jungle needs to be tamed first but I do think I would do my kids a disservice to not have some kind of swingset for them.


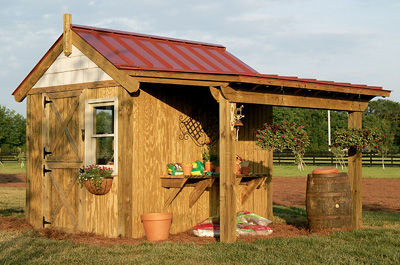
Shed


Isn't this the cutest shed! This looks like a rugged structure from which I could work on manly projects. This is the next BIG project I want to complete. I really don't want to keep my tools and lawnmower and weed eater in the corner of the yard under a tarp anymore. I also love the idea of having a shed with an overhang roof like this so that I could work outside but still be in the shade, and if I ever get a riding lawnmower I could park it under there.


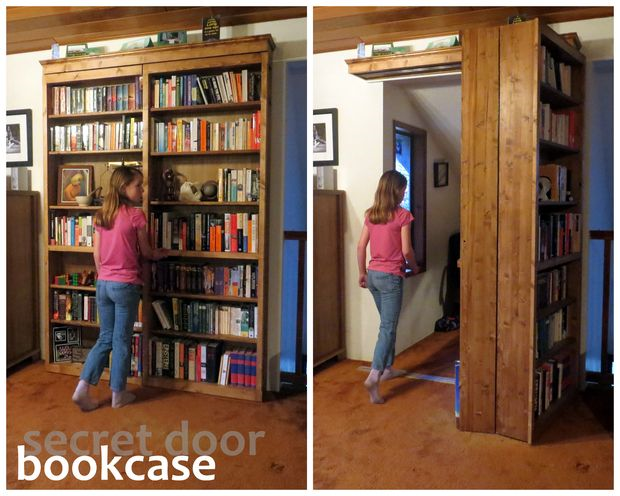
Secret Door


This one is more of a joke... for now. There's just no place in our house to really utilize a secret door. However, in some future house I fully intend on creating some sort of hidey-hole nook or passageway that I can hide with a bookcase door or some other mysterious and secretive entryway.

Deck


We really feel like a deck would add TONS of value to our home, and I don't just mean resale value. In a small house, every square inch is precious and putting some useful ones in the back yard would be great. Besides, both of our kids seem to love the outdoors (though Grayson tends to like digging it up while Alice just enjoys staring at it) and it would be great to have somewhere outside where we could sit and watch to make sure they don't eat too much grass and dirt relax while they enjoyed the great outdoors.


Most of these projects are kind of big outside projects since that's sort of what's been running through my brain a lot lately. I may continue to hijack the Five for Friday post every once in a while to feature more instructables in the future. Next time maybe I'll feature some smaller projects, potentially more décor focused. We'll see. In the meantime, I hope you enjoyed this (first) edition of Five Instructables for Friday!

Wednesday, June 4, 2014

Lawnmower Man

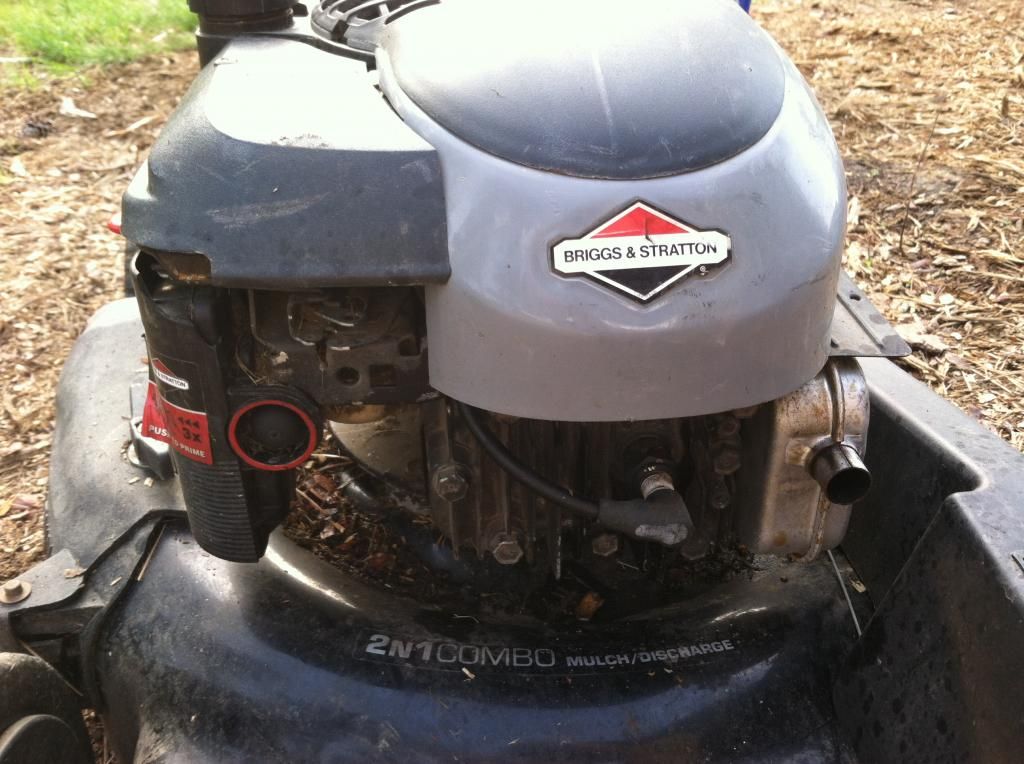
So, in preparation for my birthday party this past weekend I got to have a fun little freak out moment adventure definitely out of my usual comfort zone. Due to various busyness/laziness I had skipped mowing the lawn the weekend before so it was looking rough. One night during the week I decided I best get on it and pulled my old lawnmower out. It was a freebie from an uncle who was upgrading but it runs great and he even gave me a new blade since the one he had on it was pretty worn out. Either way, when I went to start it up the starter cord snapped. All I could think was that I was glad I hadn't waited until the last minute since now I had some time to do something about it.

I headed over to Home Depot and picked up a new starter cord for $4. To be honest I'm still kind of surprised they're so cheap. I had to ask an employee where they were because they were on a back end cap, like two aisles away from the lawnmowers.

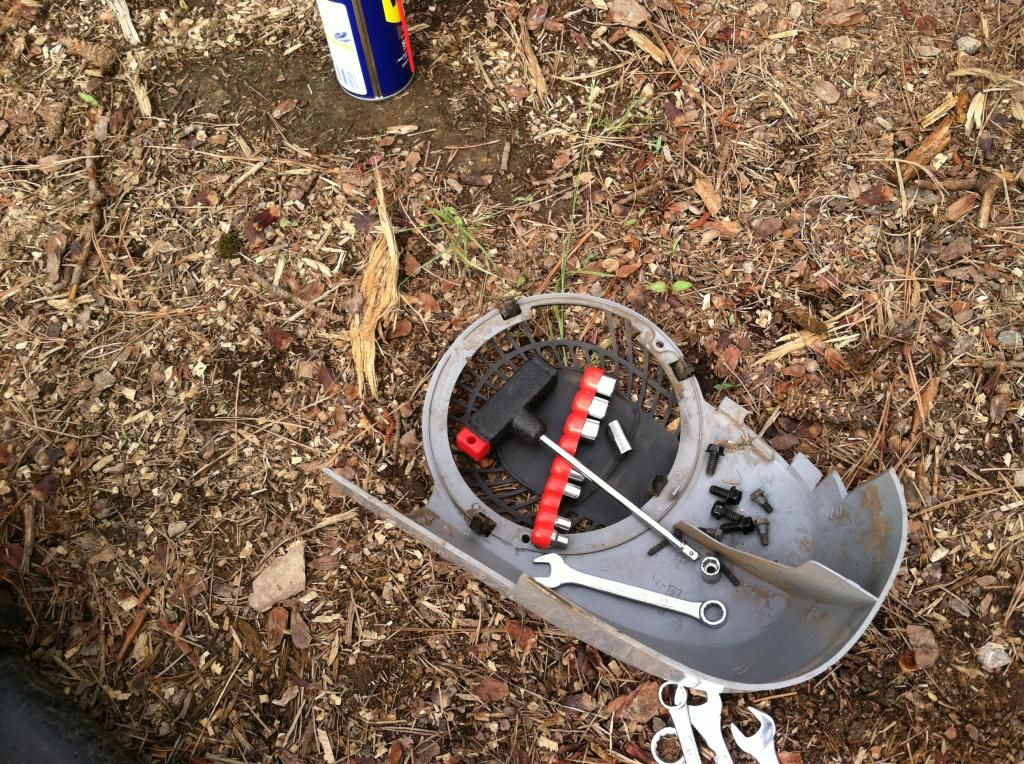
I started by unhooking the spark plug and removing this plastic cover from the top. It was attached with two screws.


Once I had the cover off it provided a handy-dandy place to keep all of the bolts and screws.


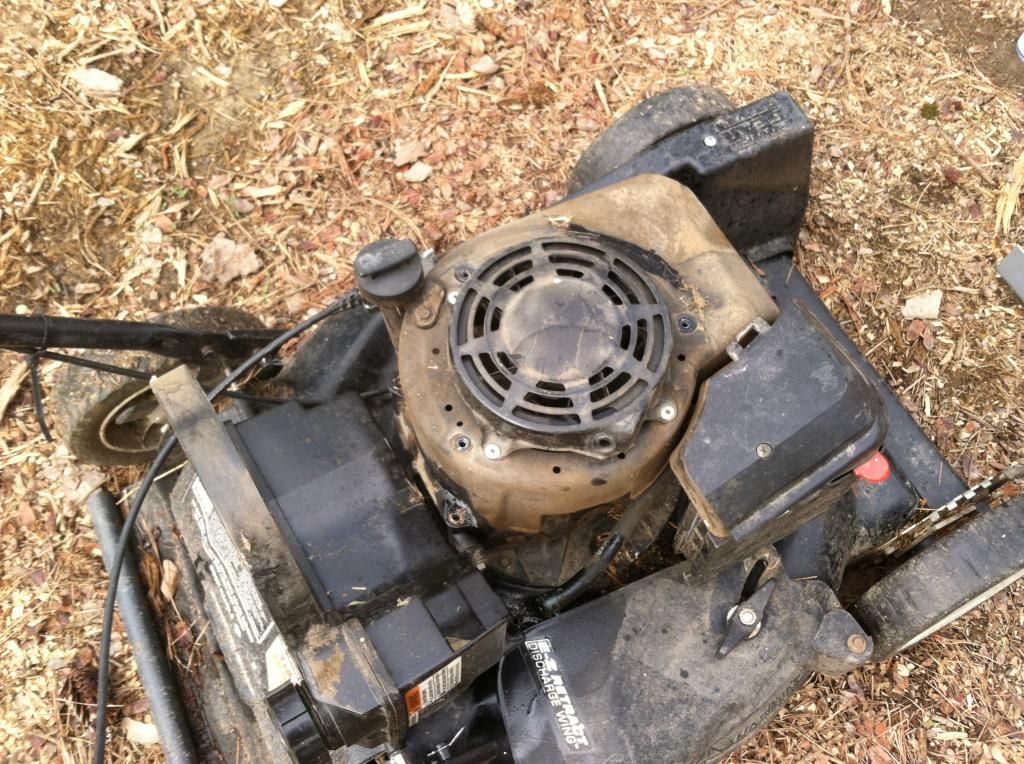
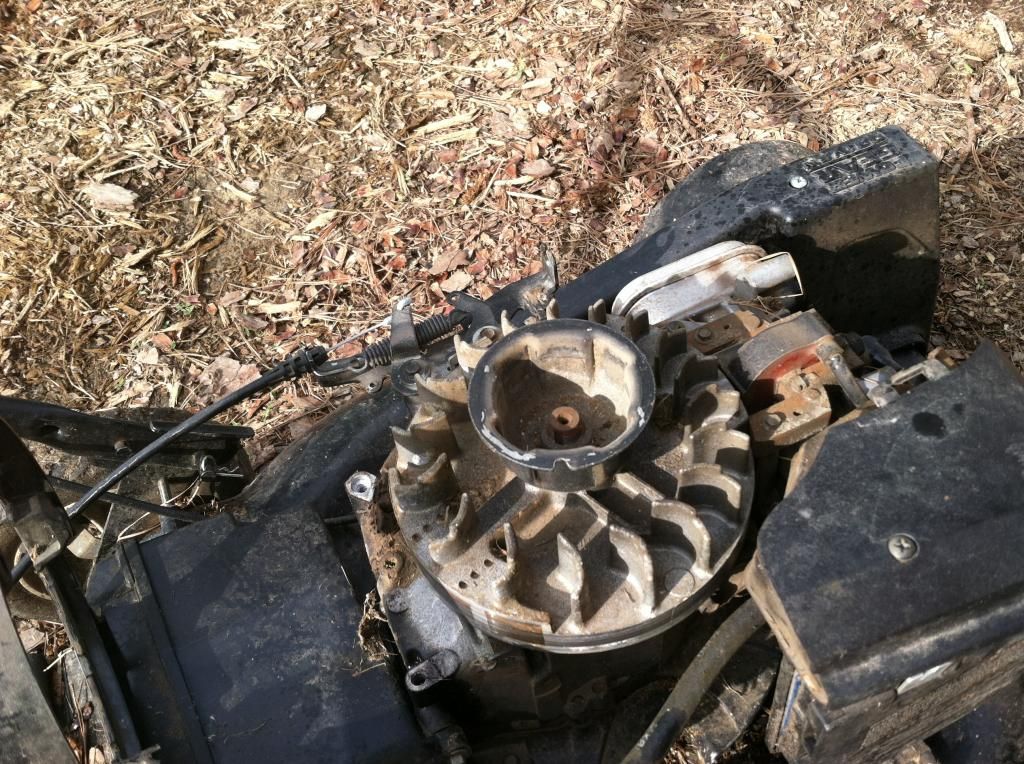
Then I undid the bolts holding the gas tank in place. Once undone it sort of folded down out of the way. The fuel line had to be detached for it to fold completely over (you can see it just above the guard for the discharge shoot) but once it was on its side none of the gas could spill out.


Once that was off I could remove the bolts holding the starter assembly. Here's what it looks like with it off:


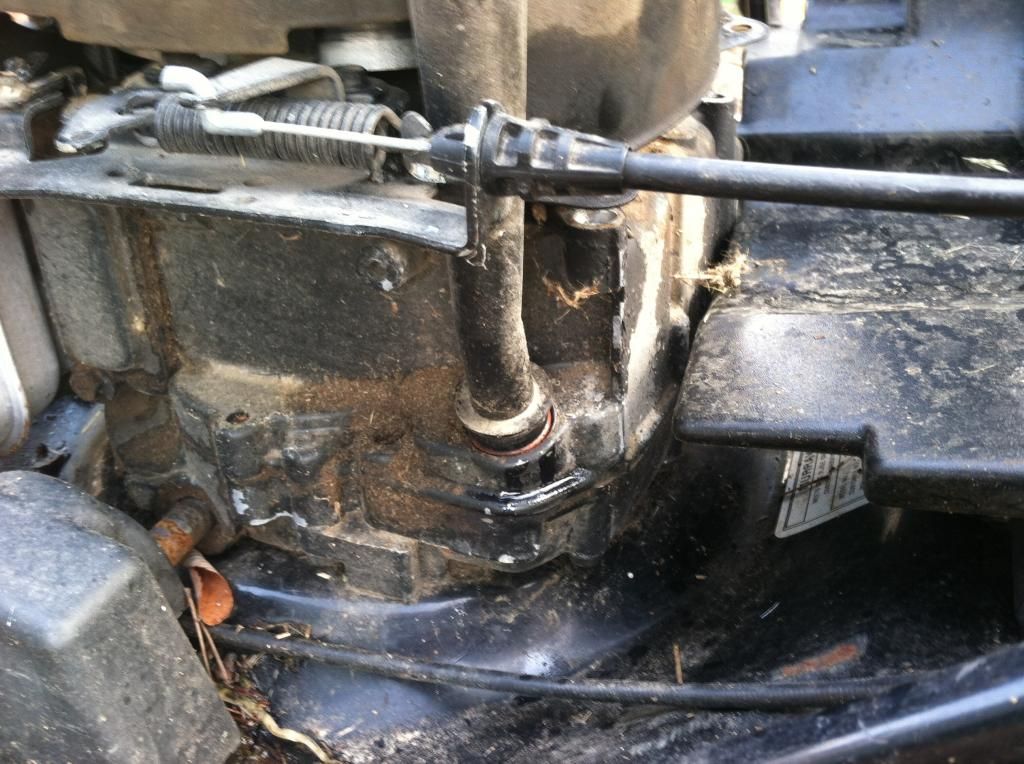
One thing I noticed was that when I pulled this part off it took with it the whole pipe (for lack of the technical term) that holds the oil dipstick. It was basically just seated in there with rubber washers and it just popped right out.


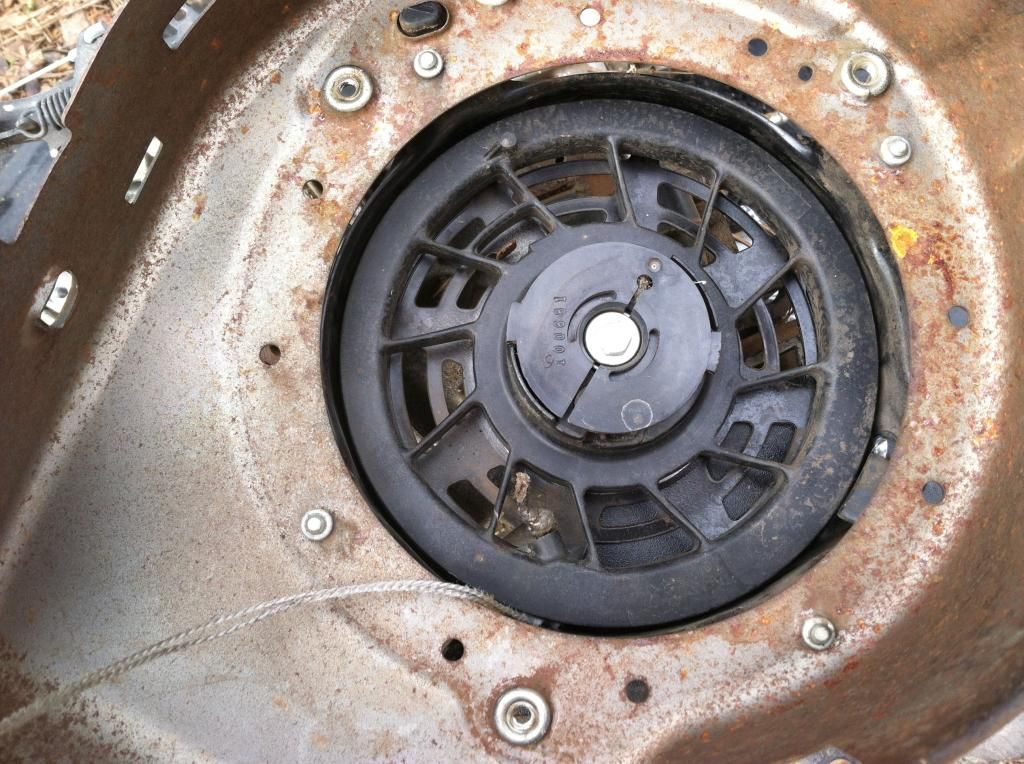
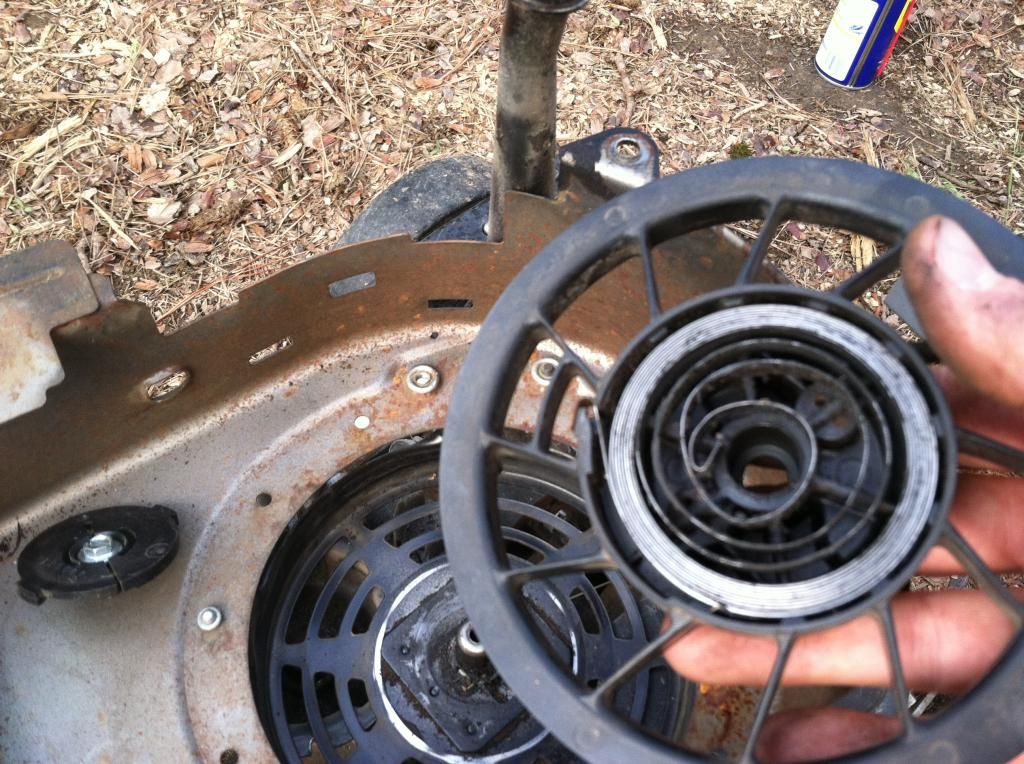
Flip over the starter assembly and it looks like this:


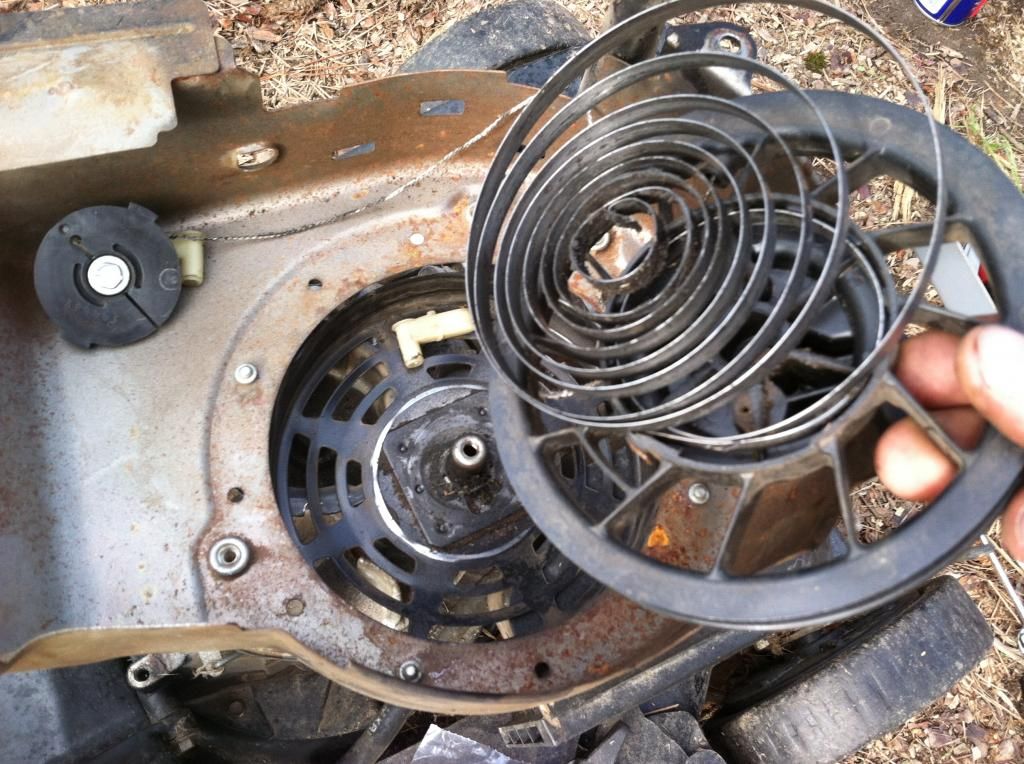
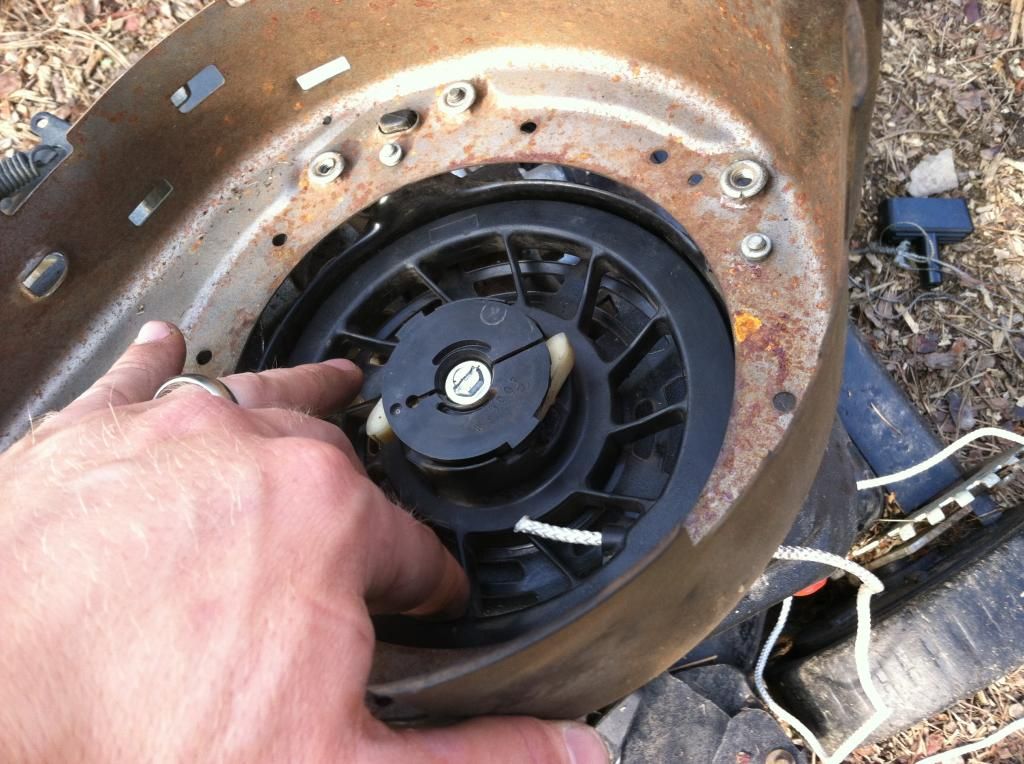
Once I had this piece off I wasn't sure how to actually switch out the cord so I just unscrewed the screw in the middle and pulled it out, which was a terrible idea. I heard a *sproing* and this happened:


Noooooooo!


It wasn't the end of the world though. I just wound it back into the spring housing and screwed it back in place. I did have to make sure that the little bent end of the spring caught on a little tab when I set it in but either through sheer dumb luck or because it wasn't that hard I got it on the first try.


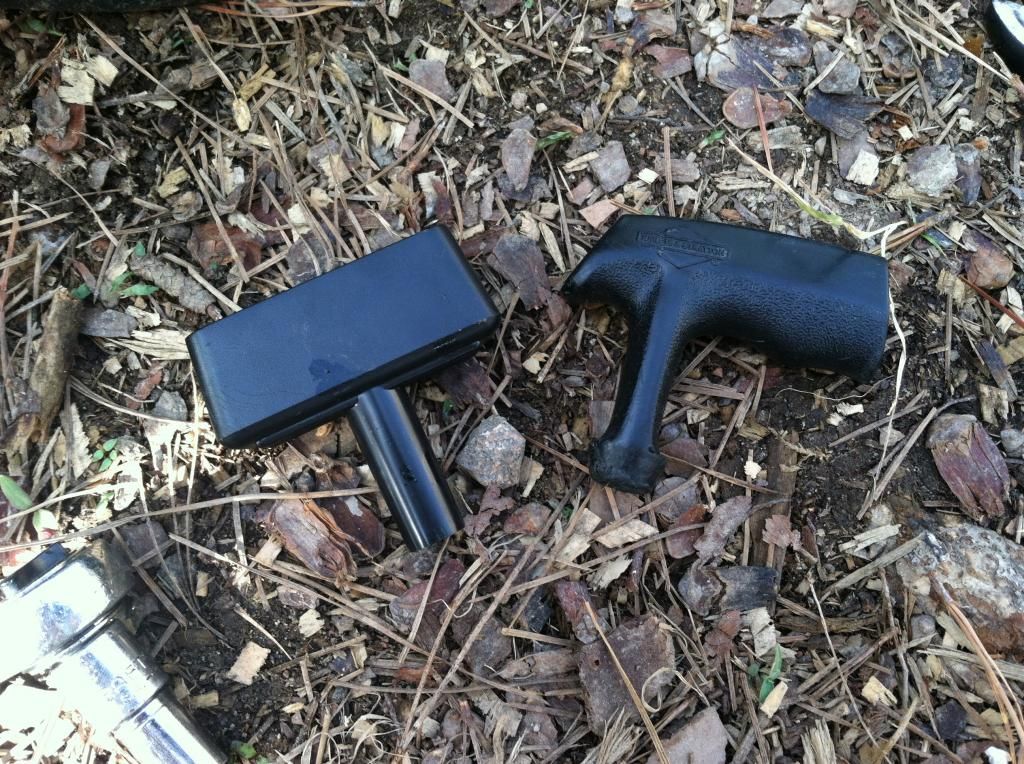
Now that everything was disconnected I pulled the new cord out. It said to measure how long it needed to be, add 6 inches for knotting and then cut the excess off but it was already the right size so, yay! It came with a new handle but frankly it looked downright uncomfortable next to the one I already had.


New < Old


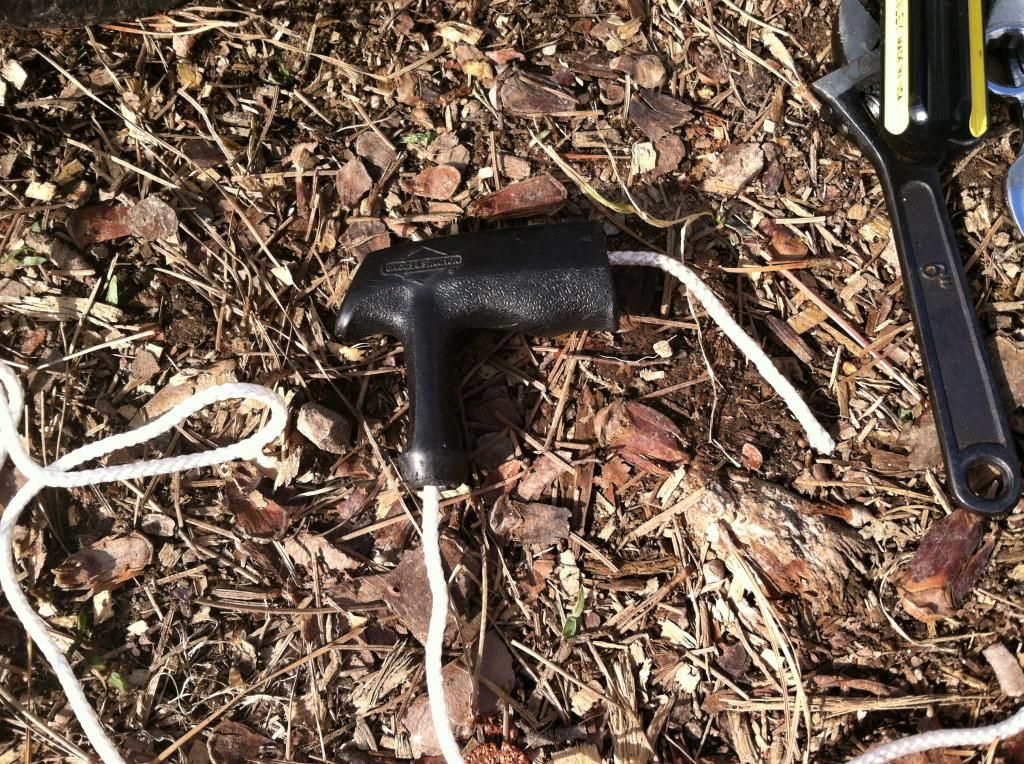
The old one was harder to attach than the new one but it really wasn't so bad. I just kind of jammed the cord in as far as it would go and then ended up having to get a pair of tweezers to reach into the handle and pull it through. After knotting the cord that part was done.


Now back to figuring out how to get this thing attached. I realized that if I held the rotating piece in the middle in the right place I should be able to run the cord from the outside right straight through to the other side.


On the directions that came with the new pull cord it said something vague like, "Wind in a counter-clockwise motion until tight. Then unwind one turn." Well, I wound and I wound and it never seemed to get tight. It got tight-er, but how was I to know what was tight enough? So I took a guess, ran the cord through and knotted it.


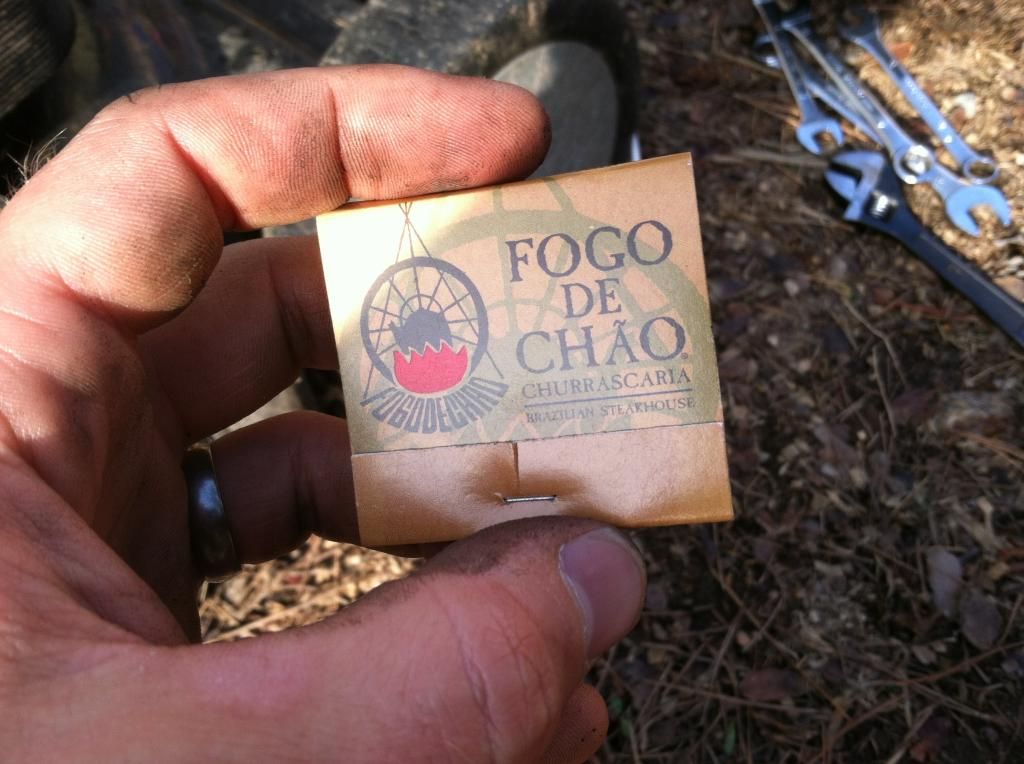
The package suggested using heat to seal the knot. I didn't have a lighter around so I grabbed a pack of matches and tried using those. Fortunately it was breezy and kept blowing out the matches (I'll explain why that was fortunate in a second) so after about eight of them I gave up.


Nothing but the best Brazilian steakhouse matches for my lawnmower!


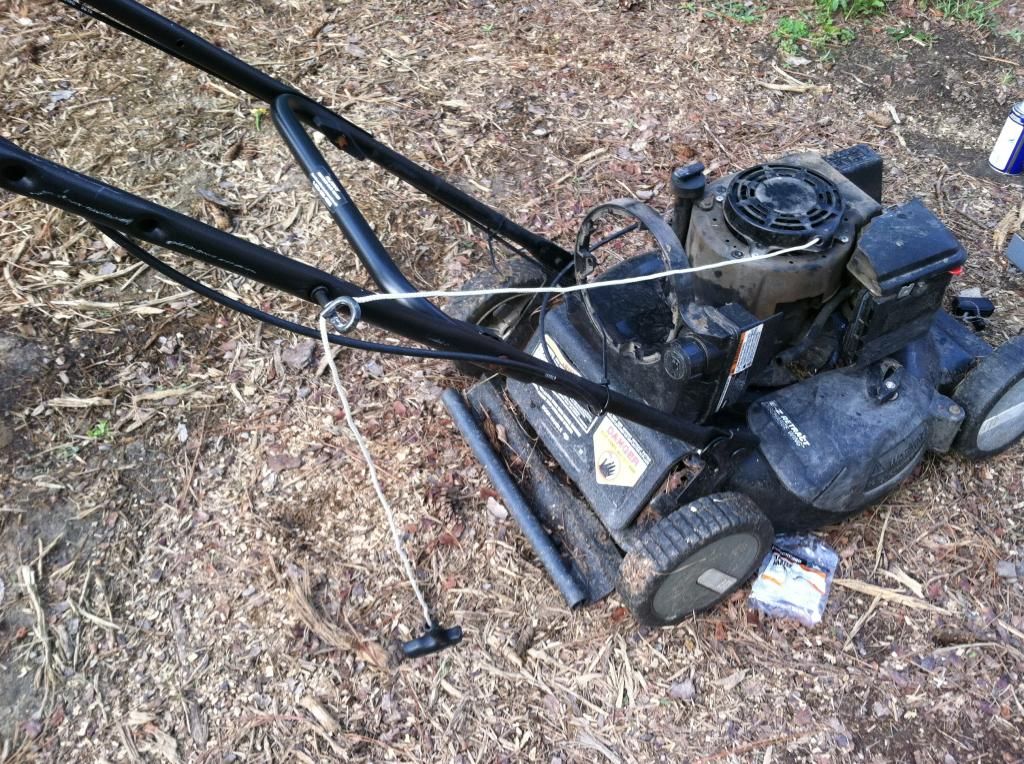
Even though I had already tried sealing the knot something told me not to bother putting everything back together or bolting anything on too tight so I loosely bolted the assembly back in place and draped the cord into the little pull-starter rest and stood back.


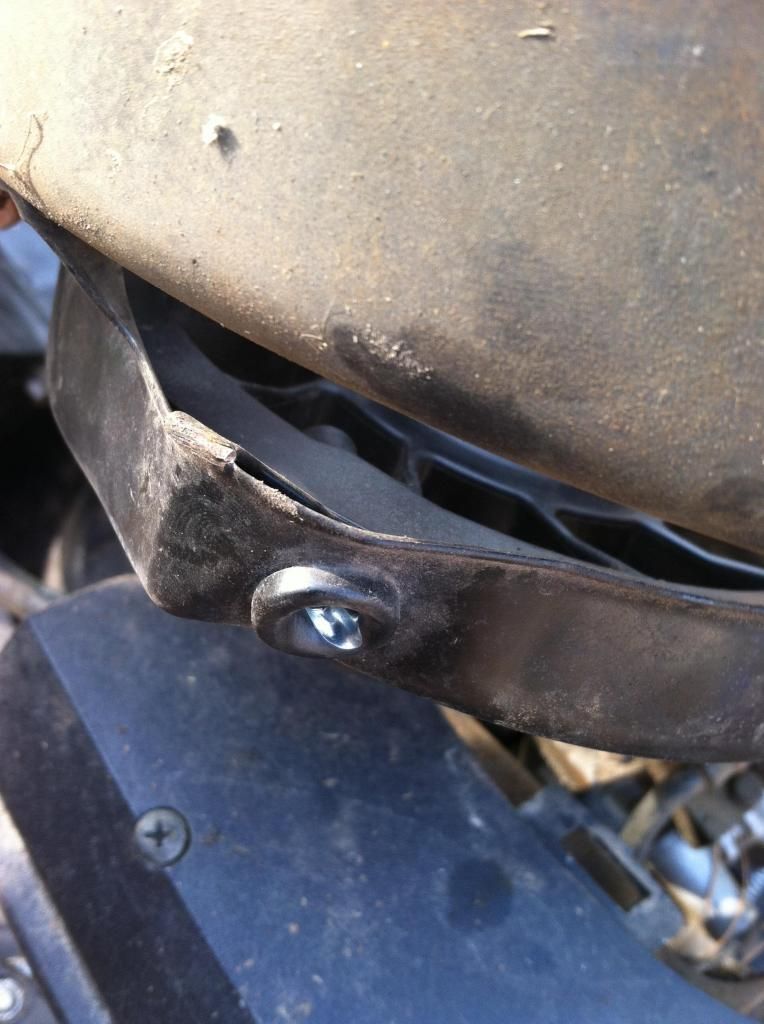
Yeah, that's definitely too much cord. So I took the assembly back off, untied the knot (thank goodness I couldn't seal it with those matches am I right?), wound it about three or four more times (the slack in the line seemed to be equal to about three or four turns) and put the cord back through. Of course, getting it to go back through was about ten times harder than the first time but I finally got it to go through. Once that was done I rechecked the cord length, threaded it through the top "grate thing", and bolted everything back on.


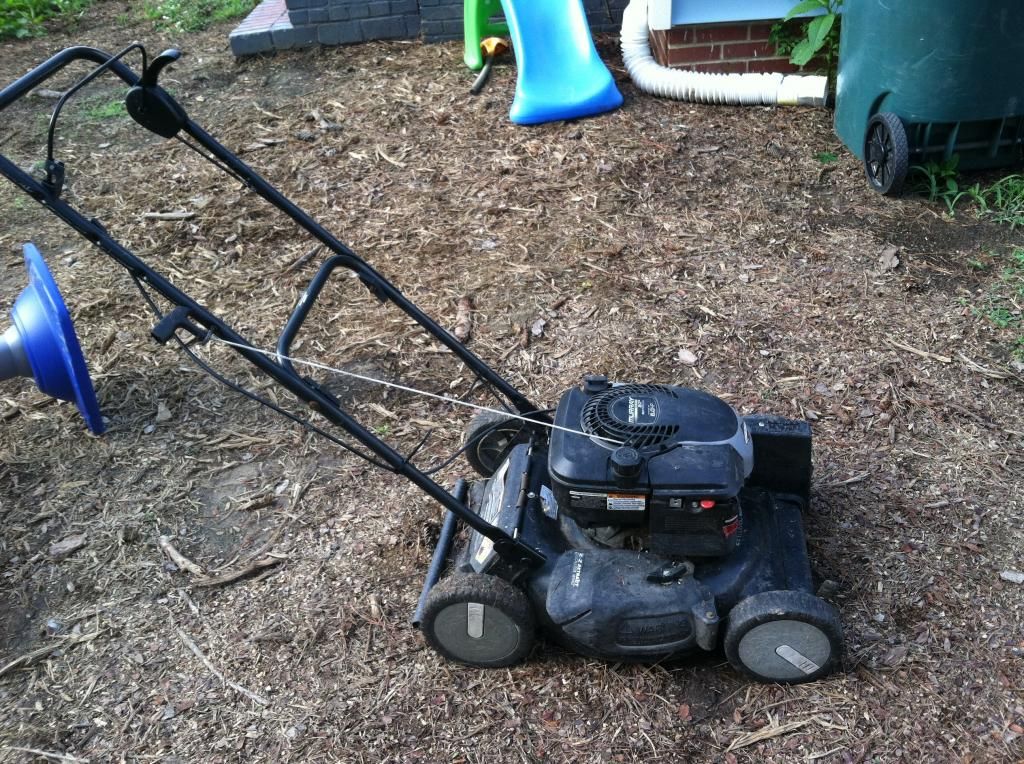
Ta-Da! Good as new and it started right up.


This was definitely one of those projects that intimidated me a little at the get-go but I didn't have the time or the money to take it somewhere and get it fixed and it ended up being easier than I had anticipated by a long shot.

I apologize to anyone who actually knows a thing or two about lawnmower repair for all of the horrible mislabeling of parts I've probably done and for using terms like "grate thing".


So, have you been pushed out of your comfort zone lately? Did it go smoothly or did you come out with a hilarious story you can pass on to all your friends and family for years to come?

Friday, May 30, 2014

Five for Friday: The Great Outdoors


Note: I never thought about needing to say this before, but it just occurred to me that, just for the record, none of the products/links on any Five for Friday posts are affiliated with us. They are purely things we enjoy (or dream of enjoying one day). 


This weekend we are hosting our very first outdoor gathering at this house. Ever.

I'm a little nervous; party planning does not come naturally to me. I'm much more comfortable grouting tile or painting a ceiling. Or vacuuming the crawl space. Or...alphabetizing the DVDs. Am I conveying that I'm pretty much more comfortable doing anything else? Because I am.  

But I love people and I love food (not necessarily in that order...I'm kidding, I'm kidding...mostly) and I love an excuse to shop for things, so I'm hoping I'll get better with practice. 

But while I've been putting off doing things looking for party inspiration, I've come across some awesome, cute or just downright nifty little things that I would love to have for our next outdoor soirée. 


Note: no Infinity Pools or solid gold grills on this list. Keepin' it real. Everything's under $100.


Melamine Dishes


via


This may come as a shock considering that we have two small children, but we don't have any plastic dishes. Like a couple cups, max, and I think they have a penguin and a snowman on them.  We'd love to have some dishes that felt more appropriate for outside use so we didn't have to purchase paper plates every time we host some kind of backyard function.  At $44 for four these are a little pricey but they're soooo gorgeous!


A Fire Pit


via


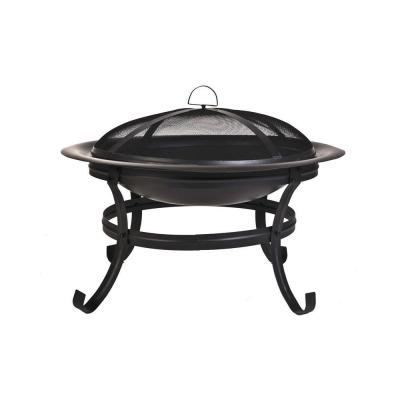
 I know, I know, this one's a little predictable. But I suppose some things are popular for a reason. Firepits have a lot of good reasons: they're cozy, they make a nice centerpiece for an outside gathering, you can use them to roast marshmallows...and the undeniable appeal of just staring at fire...
We know there are literally thousands of links on Pinterest about making your own fire pit (most of them are done very inexpensively, as well) and maybe one day we will, but right now we like the simplicity - and mobility - of a store bought one. Besides, at $89 this is pretty darn affordable.

Enamelware Mugs


via


Are these not perfect for drinking beverages around your fire pit?! Who doesn't love the idea of a cool evening around a fire with some cider or cocoa, but without the stress of breakable ceramic mugs. Also, there's something charmingly "old-school camp outs" about enamelware. It makes me want to find something flannel and curl up with a Nancy Drew. Oops, almost forgot, they're only $14 for a set of two. 


Fancy S'mores

 
via


Okay, so, this is not something you can purchase (though I feel like you should be able to. And have them delivered to your front door while you are marathon-watching Grimm...but that's just me...), they are fairly easy to make and also one of those things that can be done with whatever you have hanging out in your cabinets. Black Sea Salt and Swedish Fish? That works!


Burt's Bees Spray


via


Now, this falls into the category of: Things We Usually Have on Hand, but Have Run Out of, so We Don't Anymore. (Very wordy category.) You all are probably familiar with this product, but if you are not, you should walk right up and introduce yourself. Be forward, Burt digs that. *wink* This stuff smells amazing (very citrusy) and, as someone whom mosquitoes usually view as a buffet, I can tell you it works pretty well. It's also softens your skin, so bonus points for that. $8 for a 4.0 oz spray bottle. 


Ah, nothing as cathartic as making an imaginary shopping list. I should probably go think about party food now...

Oh, look, the driveway really needs weeding. Better do that first... 


Tuesday, May 6, 2014

The Tools of the Trade

Tools. Can't live without 'em. Can't have enough of 'em.

It's certainly not news to anybody, but being a homeowner often means doing repairs yourself because it's stupid expensive to have someone else do them. Anyone can enjoy owning and using tools, but most renters have the distinct advantage of an on-call serviceman who comes with his own tools. (One of the things we loved about apartment living, especially when we found mold creeping out from behind our medicine cabinet. "Um, hello, Building Repair Man? Come help us!) On the other hand, I have the distinct advantage of being able to convince my wife that I need more tools, you know, "for the house", so yeah.

Either way, we've been home owners for close to a year now, so I feel like this is a good time to talk about some tools that have come in handy for us, some tools that I believe I'll need for future work and the reasons for both. Then I might do a little poll to find out what your favorite tools are, or what you find most useful to own. So, without further ado, and in the order they occur to me, here are the tools I've found useful to own:


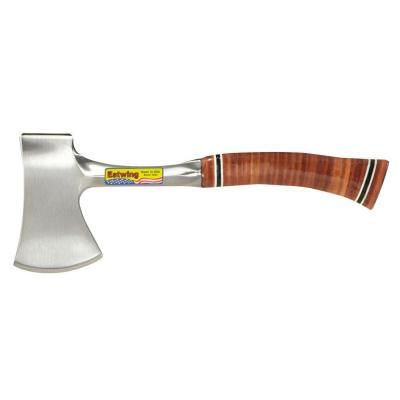
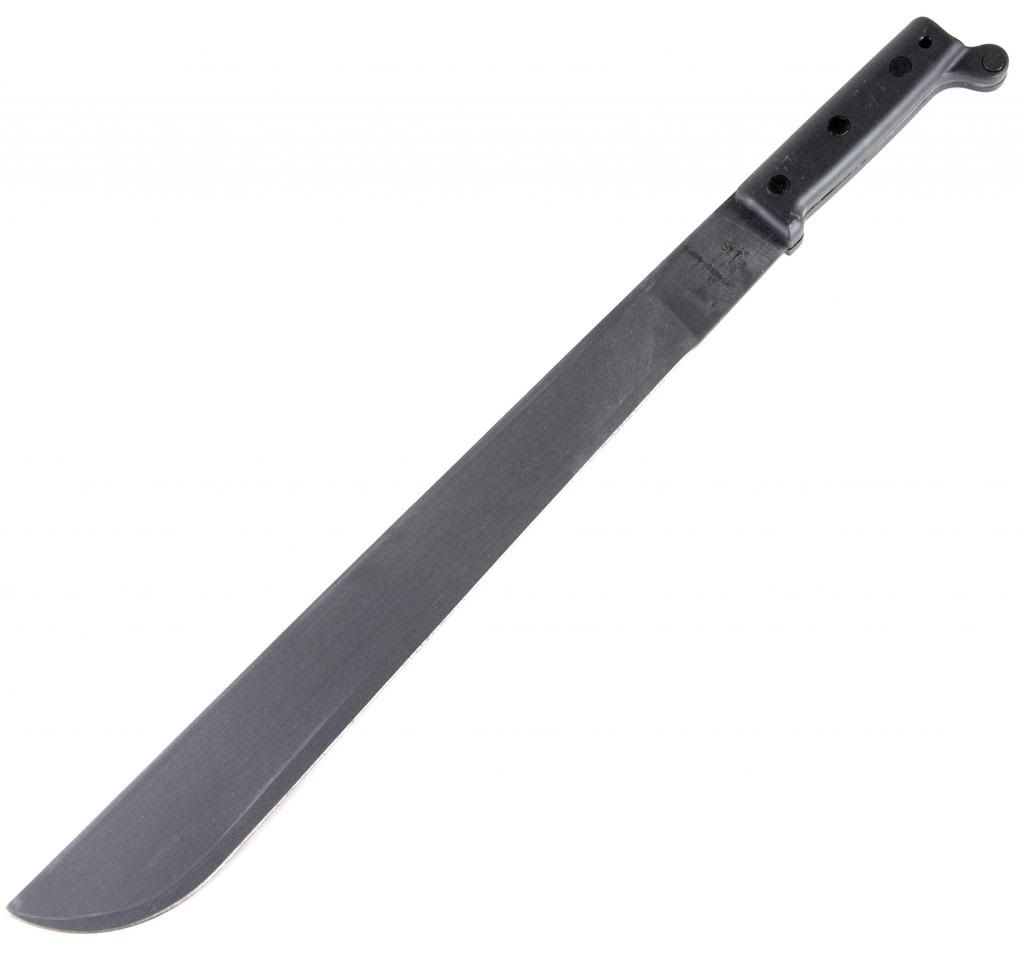
  • A Hatchet and/or Machete - $10-20 each

This hatchet in particular is more like $40, but it's soooo pretty.


These two might seem odd to some, and indeed might not be useful to everyone, but we have this:


I have used these both for their intended purposes and also found other uses for them. For instance, I've used the hatchet to chop down bamboo but I've also used the machete to pry big pieces of slate out of the ground. Sure that seems like the job for a shovel but I didn't have one at the time and the slate wasn't totally buried. If you're looking at a house with some out of control underbrush these two will come in handy and neither is that expensive.


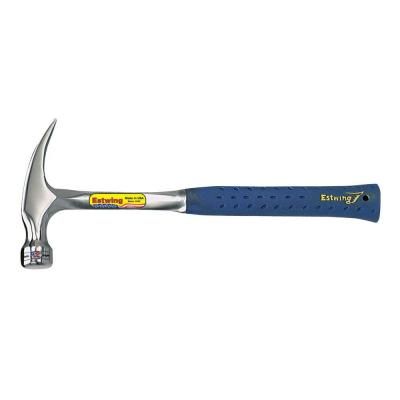
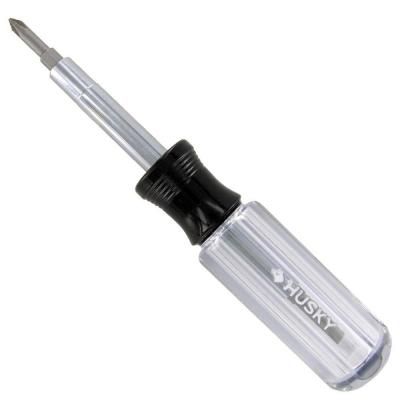
  • A Hammer and Screwdrivers - $10-30 and $1-20 respectively


These two are pretty self-explanatory and probably don't warrant much time or explanation.  If you want to hang any pictures in your house, you need a hammer. You don't need anything big or fancy, just an inexpensive claw hammer (as opposed to his slightly less useful brother: the ball-peen hammer.) If you plan on changing your doorknobs, you'll need a screwdriver and if you want to paint it's much neater to remove switch plates than to tape them. You don't need a large assortment, I'd suggest a small and large in both Phillips head and flat head (which you can buy individually or in a set) or even an all in one like the one pictured.

Also, I feel like these aren't strictly necessary so they won't get their own section, but if you're hanging things, a tape measure and a level are always useful.


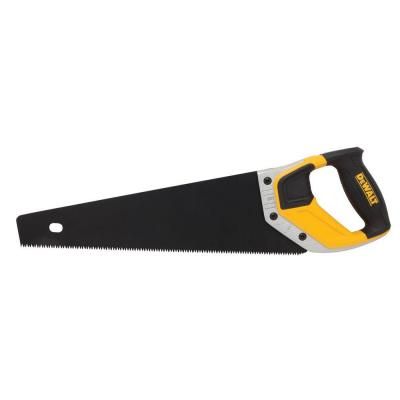
  • A Saw - $10-25


I have a circular saw, a coping saw, a standard handsaw, and a convertible hack/bow saw. All were gifts, which was incredibly fortunate.  Just having a basic hand saw is probably fine, it's pretty versatile.  I've used them on the boards for the mulch beds against the front of the house, the closet shelves, branches/trees, our board & batten, and various other small projects.


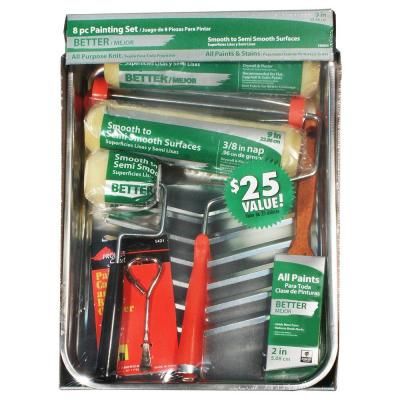
  • Painting Supplies - $10-20 (depending how you buy it)


Obvious. If you're like us, then painting is essential to making a house feel like a home. Not being able to paint our apartment aggravated Meredith to no end and so, naturally, as soon as we bought our house, painting was immediately one of the top priorities. So far we've painted everything except the master closet. Yep, that's right. We don't waste time when it comes to painting. (Though why we've neglected that closet is a mystery. )


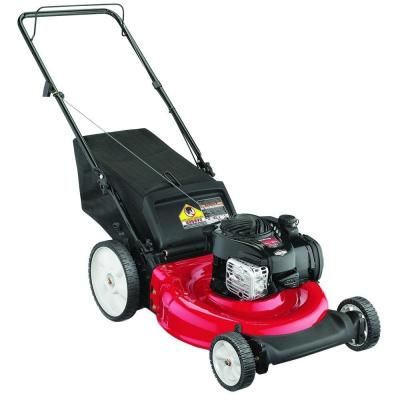
  • Lawnmower - $140-?


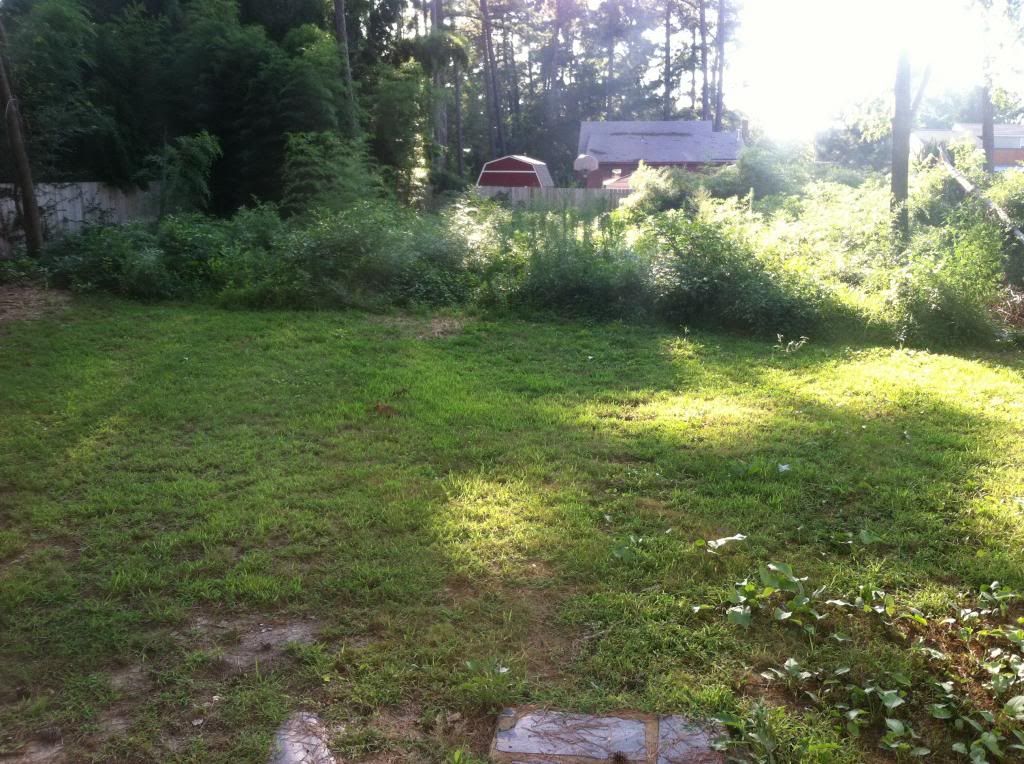
If you have any yard at all this is essential. We went a while before getting one and boy was it difficult to reclaim the yard. Of course we waited because we knew my uncle was getting a new lawnmower and he said we could have his old one, so waiting and fighting the lawn was definitely worth it for a free lawnmower. Also, the difficulty was mostly due to the fact that our yard is full of more than just grass. I'd love to be able to try one of those reel lawn mowers but I don't think it would cut it in our yard.


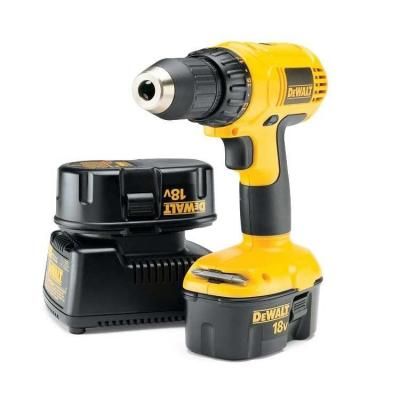
  • A Cordless Drill - $70-?


I went far too long without this. I think I just kept borrowing one. Now that I have one I'm like, wait how did I survive without this? And, honestly, I'm not sure. There are plenty of things you can accomplish without a drill but, seriously, just get one. You will feel so much more capable. 


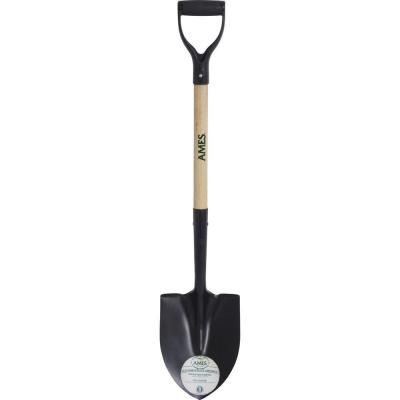
  • A Shovel - $6-40


This is another one that I kept borrowing but have finally acquired for myself. If you plan on doing any type of landscaping you have to have a shovel. They have all kinds of different types but personally I subscribe to the thinking that the only difference is if it's short or long. I guess if I had to choose I'd prefer a round edge but seriously, I don't care if it's a "transfer shovel", a "digging shovel", a "spade", fiberglass or wood handled, with or without a rubber grip, etc. And how the heck can you have a "square point" shovel anyway? Seriously, read the tags at the store. They're ridiculously specific. 


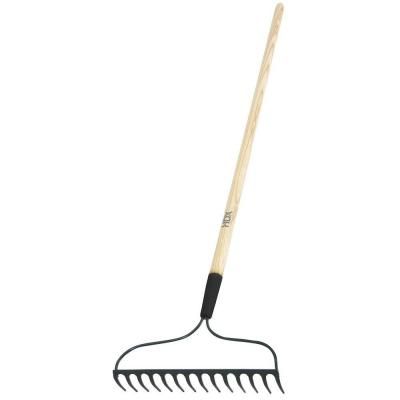
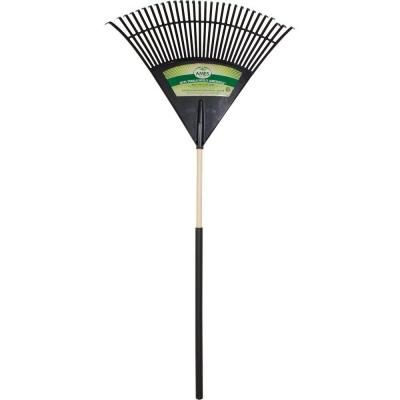
  • Rakes - $7-25


I like leaf rakes and bow rakes. They're both very useful. I've been borrowing some since my father-in-law has extras and these have been lower on the "fun tools" list. Well, let's be honest, they're not really on the "fun tools" list at all. Either way they have still been absolutely necessary for our yard (but will hopefully be less so now that we have significantly fewer trees). 

I think that ended up being long enough that I might make the list of tools I think would be fun useful to own a separate post. So, what tools have you found to be absolutely essential to surviving the rigors of home ownership? Have I forgotten something incredibly important?


(Most of these pictures were borrowed. I am in no way making money off of this, nor am I recommending these specific brands. In some cases they're not even the brand I own. They're used merely as tool examples.)

Wednesday, April 2, 2014

I Been Workin' on the Sidewalk

So, chronologically I'm a bit out of order but I really wanted to include this post for my own posterity's sake and since we're mostly just waiting for grass to grow right now any update about our yard project would be rather underwhelming.


Have you ever watched grass grow? I have.  ...or at least I hope I'm watching it grow.


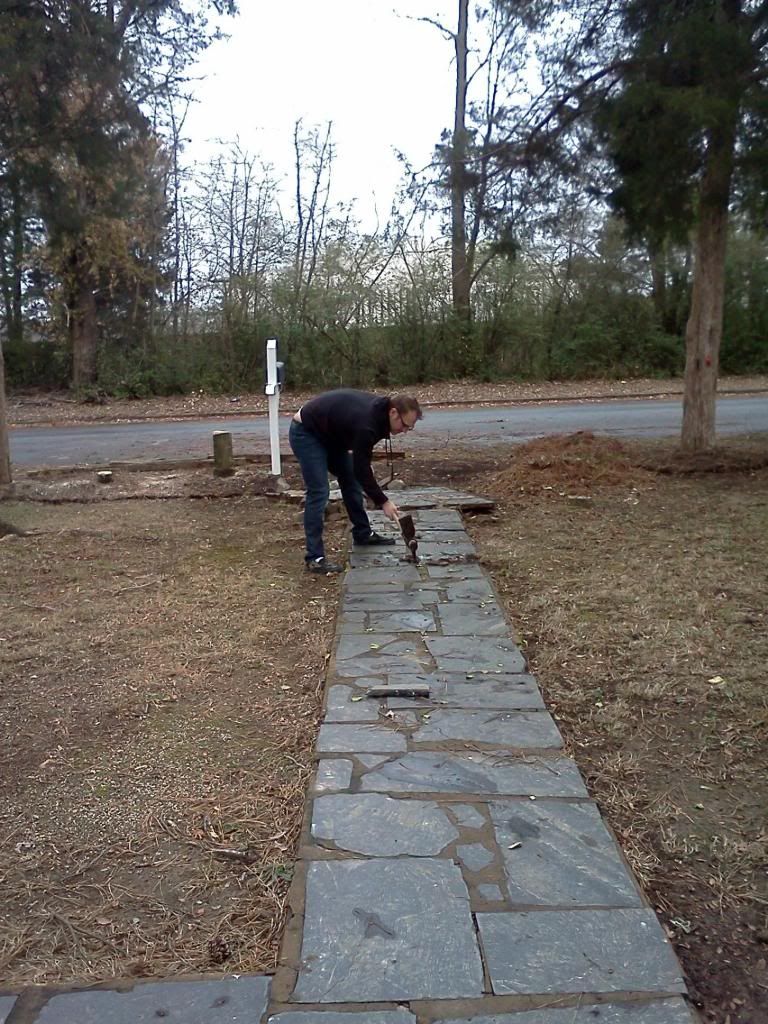
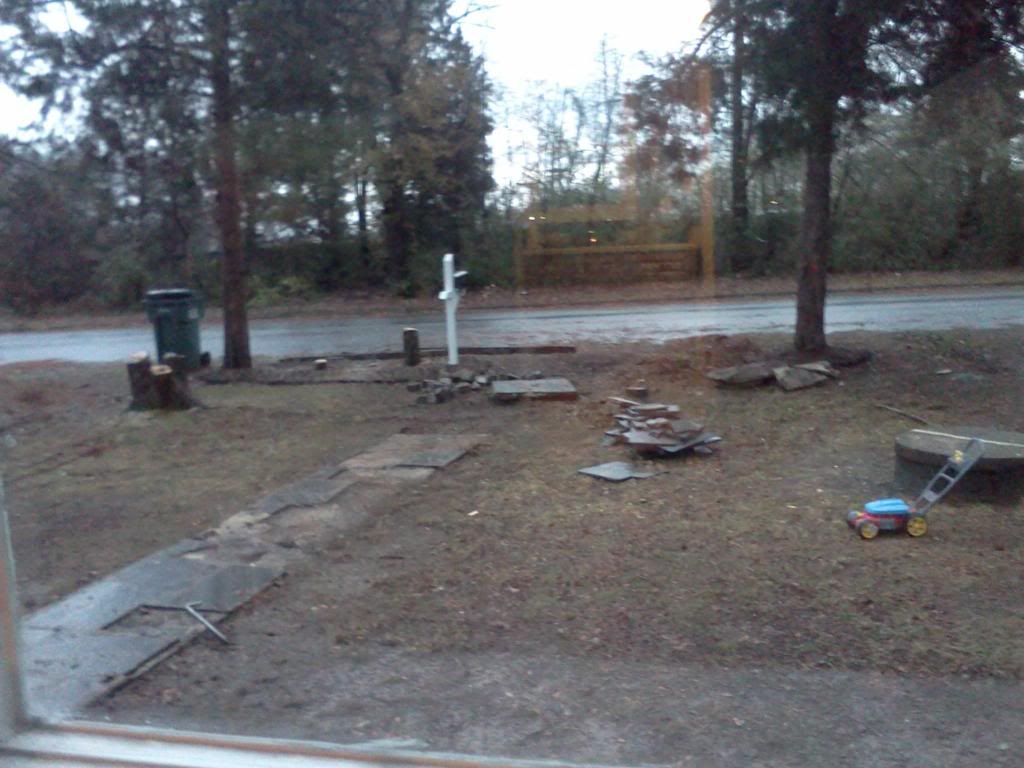
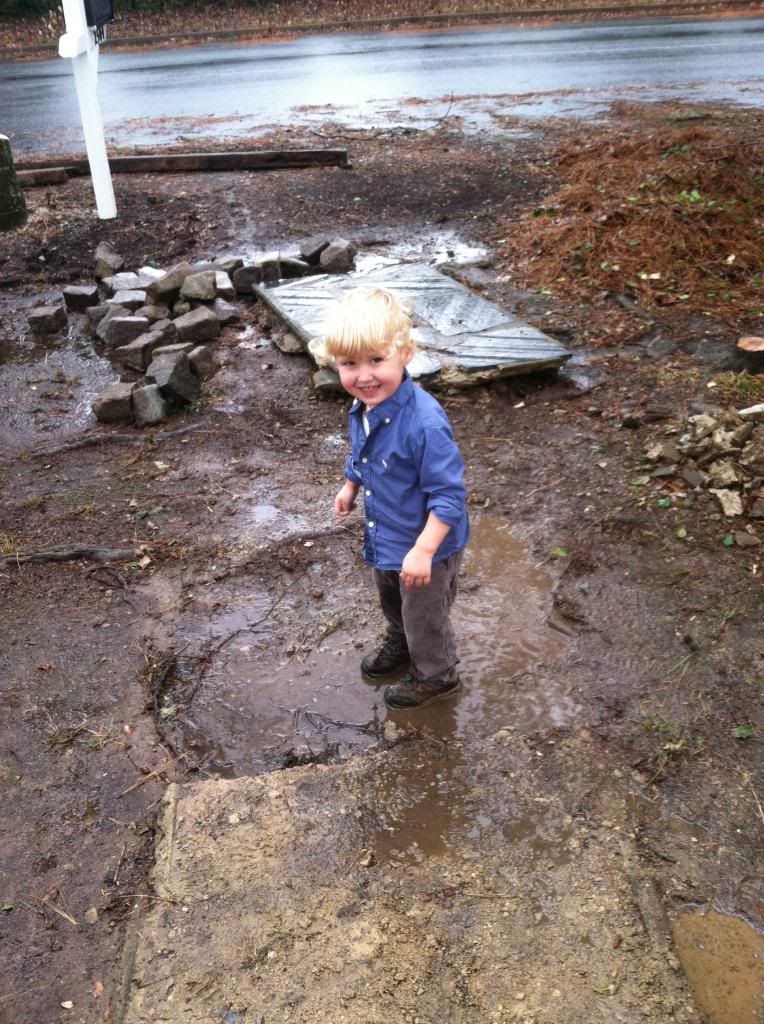
As we already explained in this post we decided to excavate our slate walk. There were lots of non-pictorially documented reasons why. There was the fact that we wanted to raise the level of the yard, the fact that tree roots had caused elements of the walk to not be level, the fact that it was pointed toward the driveway we don't use, the general sloppiness and lack of skill it was originally installed with, and the crumbling edges, loose slate, and general disrepair of its current state. Strike that, EX-current state.


To start off, this project was made easier by the state of our walk. Existing cracks made it come apart easier and loose slate gave me plenty of space to pick-axe the concrete without damaging the slate itself. I started by pulling up all the loose slate. Then working my way from the end of the walk toward the house I just started picking away at it, mostly with the pick side of the pick-axe. This worked pretty well for the end because it was in pretty bad shape and didn't need much strategy. Some of it broke off in huge chunks and, rather than continuing to break it up with the pick I would just prop it up and then tip it over onto other pieces of concrete. Usually the force of the fall and the hardness of the other pieces was enough to break it into smaller pieces. When the slate pieces were lodged in really well I would pick the sides until it crumbled away and then apply leverage under the walk which usually caused the concrete to crack away from the slate. If that didn't work I just had to pick all the way around the slate until I could pop it free. I also used the leverage under the sidewalk to break it up after I had removed the slate as well.


The sidewalk was actually a large L shape and unfortunately the side part that extended toward the old driveway was in much better shape than the main part. I used the same techniques to remove as much slate as I could but it was much harder and I had to fight a lot more to get them out intact. After I had removed a sufficiently large enough section of slate I would take the pick-axe and start picking in a line across the sidewalk. Then I would go back over the line until I had kind of a dotted line across it. Then I would jam the axe (or technically maddox) side under the sidewalk under the line I had done and leverage it until it cracked along where I had picked. If it didn't crack I would pick at the line more until it worked. I had to do this in 1'-2' sections because anything more than that I couldn't move very well. If the section ended up a little big I would use the same method of propping it up and letting it fall over on another piece.


I basically just kept at it until I had demo'ed the whole thing that way. Sometimes I would work at it for a while and get a lot done. Other times I would take out a couple feet when I got home from work. The main length of sidewalk was 32' long with another 15' on the side portion. In total it ended up being a whopping 158 square feet of sidewalk.

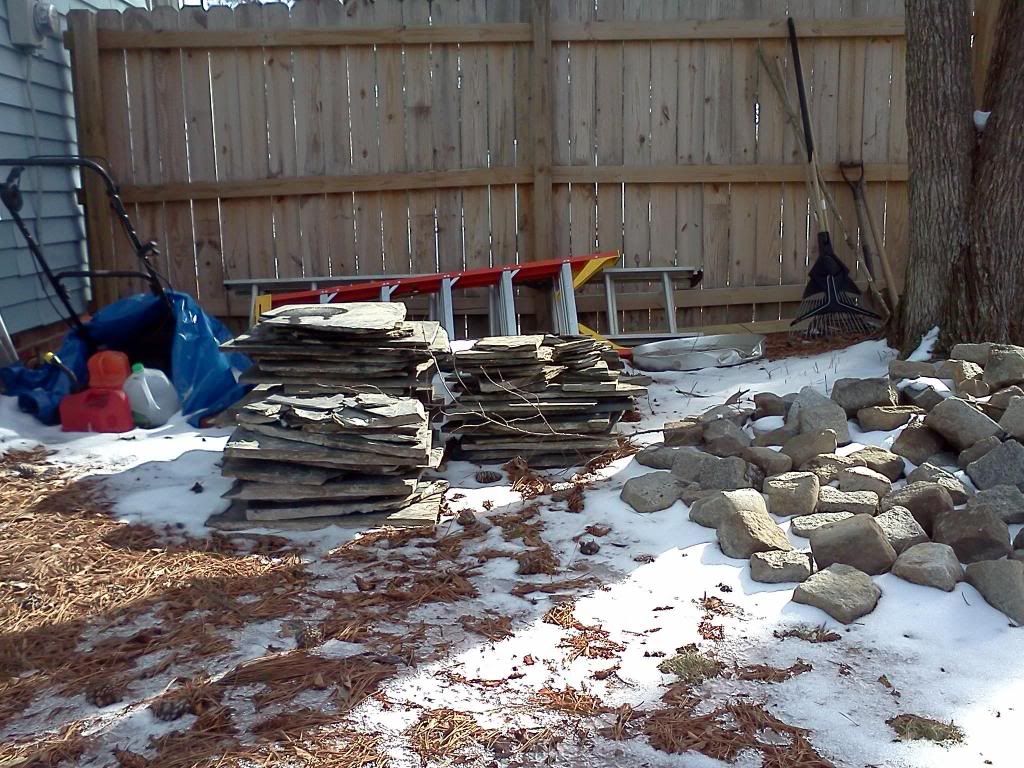
After I was done I was left with quite a lot of slate and concrete rubble. I've spent a fair amount of time on Craigslist and I've always laughed at the listings that appear to be people attempting to get others to haul their junk away for them, but Meredith was reading in This Old House and they recommended using concrete rubble as filler for the bottoms of raised garden beds. So, we figured, heck, what's to lose. I posted it on craigslist and within the first day we had three people asking about it. Half of it was gone that night and the other half the next evening.


Note: Concrete rubble not shown.

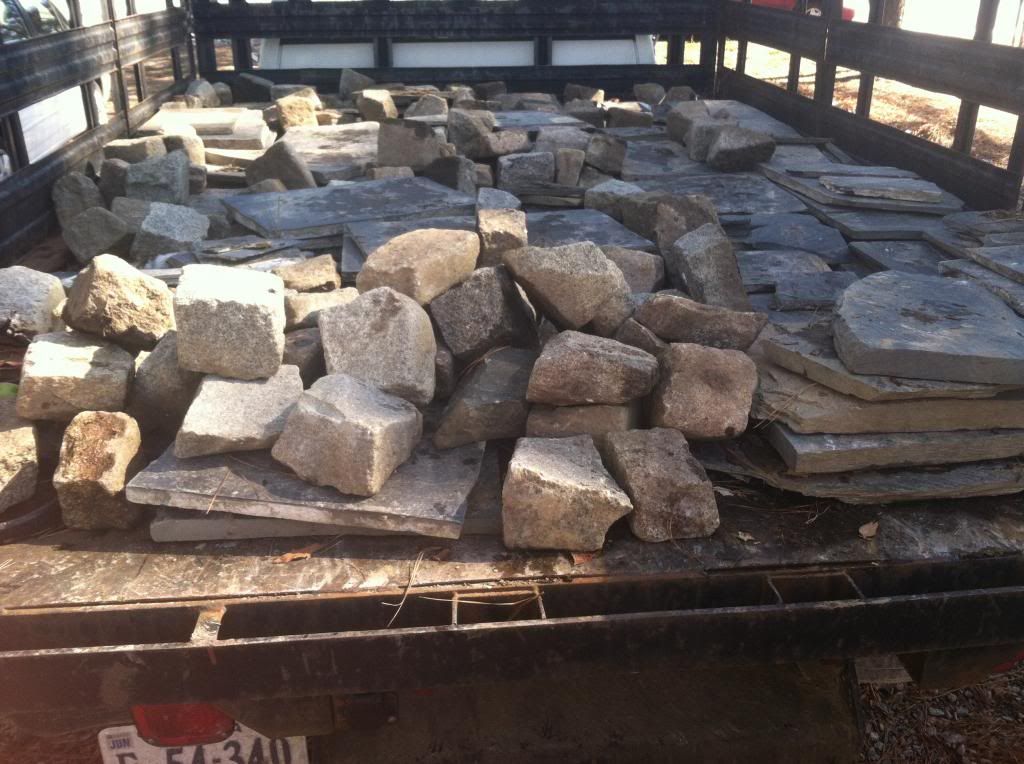
The slate was a different story. On a weekend visit to The Great Big Greenhouse I saw pallets of slate about the same size as what we had going for around $300 so there was no way I wasn't going to make some money off that stuff. We listed it on Craigslist and sure enough we got some bites on that one as well. Several of them fell through before we actually caught one but finally someone showed up and I helped them load it into their truck.


While we were loading it up they asked about the cobblestones we had, which had previously been around the mulch beds around our trees, and I made them a deal on those as well. We had already talked about wanting to find a different solution for those so I was happy to not have to list those separately, or lug them around anymore.


So that's the story of how we got rid of our cracking, crumbling, pointing in the wrong direction sidewalk, AND made a pretty penny doing it! Anyone else have any fun Craigslist stories? Or advice on what to do while waiting for grass to grow? Seriously, we're just twiddling our thumbs here.