Monday, March 17, 2014

Busy Busy Bees

*blows off dust* cough cough hack cough

Well, it has been... a while. To say the least. Does that mean we've been idle? Not in the least! We have been quite busy. Firstly we had a second baby. This is by no means new news (hehe, newnews) but I don't know if we ever really addressed that on the blog here. Her name is Alice and she's a cutie. 

She's looking a bit older than this now, but this goes right along with the uber belated announcement.
 

Right after that Meredith's phone broke. Since we don't have Internet at the house that meant no posting for her. She's on a "temporary" phone but we're getting that fixed soon so she'll be back. 

Alongside that, of course, were the holidays. A time of joy and cheer... packed with the need to get far too much done in far too little time. We made quite a few things so we stayed quite preoccupied. 


Since then things have picked up at work so I've had less time to share as well but we're going to try and get back on the wagon here and get this show on the road. 


There have also been quite a few happenings at our little house that I will attempt to summarize here. If it's something more involved and worth sharing there will probably be a follow up post to explain in more detail later on. Pictures will be sporadic.

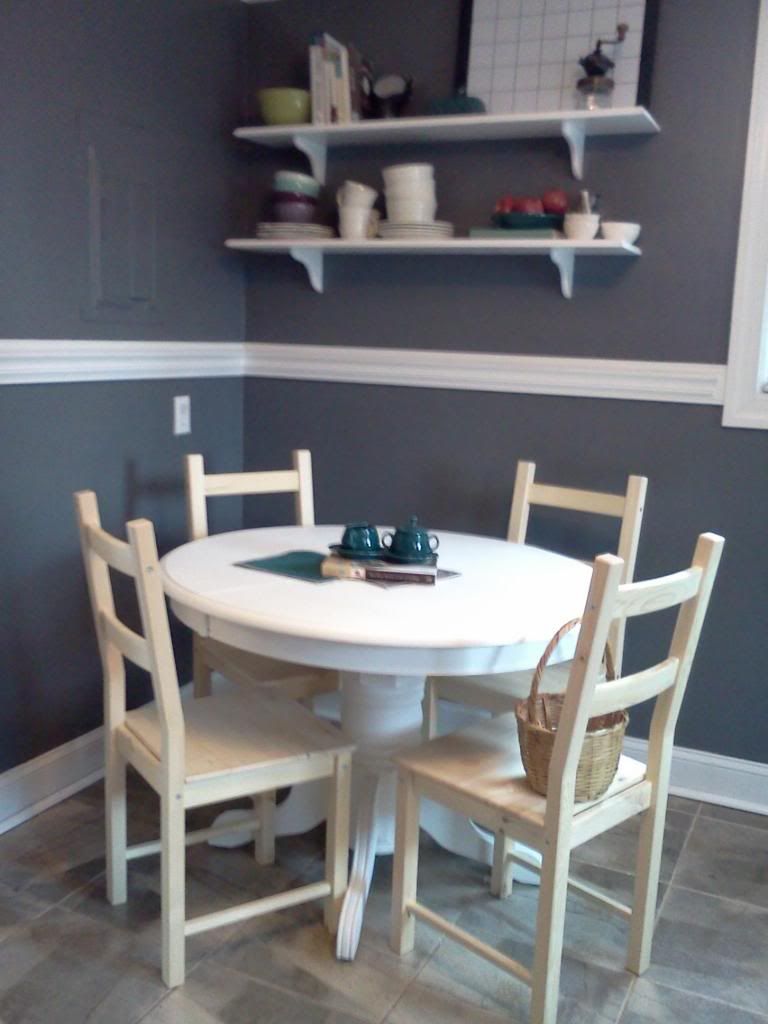
In one of those "this has been listed on Craigslist for so long there's no reason to bother asking, oh wait it is still available" moments we managed to score a sweet pedestal table for $50. We'll have to sand and paint it (which is too bad because the colors are actually kind of cool) but that's not too bad.


We also hung some shelves in our kitchen to provide some more storage space in there as well as a nice way to display things. We bought some 10" lumber that we had cut at the store. Then I used my router to give them this fancy shmancy edge. 


The shelf brackets were only $4 a pop but they're rated to hold 100lbs per pair. I wanted to make extra sure so we have three brackets on the longer shelves. I think it makes them look more substantial anyway. We thought about having four on each but this was where the studs were and we figured having one extra on a stud was probably better than having two extra not on a stud.


Probably the biggest change to our house is the fact that we have wiped the slate clean on our front yard. No really though. That slate walk? I wiped it out. With a pick axe. Every time it rains hard all the water from the road pools in our front yard so we're going to bring in some dirt to raise the level of the yard. First we started by cutting down three more trees that we could handle ourselves with help from some friends and family. This had to be done very carefully since the phone lines were running through one and right next to the others. This should allow more sunshine and help grass to eventually grow. We pulled up what we had done with the mulch beds and raked everything level. Then, over the course of a couple weekends I gradually pick-axed our walk into oblivion. It was already in shabby shape and it would be sunk down into the ground once we added dirt. Next we're having a guy come in and remove several alarming pine trees to rid us of piles of pine needles and the fear of being crushed at every storm. Aaaafter that we can have the dirt brought in.


Grayson having fun in the mud during deconstruction.
 

We also decided to take this opportunity to redefine the borders of the yard and the driveways and give some space back to the yard on both sides. At this point the plan us to have dirt trucked in, spread it out and tamp it down, and then spread winter grass seed and hay.We'll see how it all works out. This is all an experiment for us anyway. After the yard is in better shape well put a sidewalk in. We're leaning towards brick to match the foundation. 

So yeah, lots of crazy things have been happening at our poco casa azul. And there's more to come so stay tuned!


Wednesday, March 5, 2014

We're Yelling Timber

We've been talking about getting trees cut down since we moved in. And as many times as we've thought about taking them down this song has popped into our heads. Why would we want to cut down such wonderful sources of shade you ask? Good question. We have several good answers.


Número Uno:
We like our house in one piece, with a complete roof, and for the trees to stay outside where they belong. 100 foot tall trees (official tree guy estimate) that tower over the house and hang their giant limbs across the length of the roof tend to like to rain on that kind of parade. I don't ever want to be the guy on the news in the morning pointing out the new "skylight" in his attic or how one of his trees really helped "open up the space" in his house.  Of course if any of them fell they could fall away from the house, the problem being that some of them were close enough to the house that even if they fell the opposite direction the root system would have pulled up our foundation with it.

Número Dos:
Pine needles. This seems like a minor problem compared to the potential destruction above, but while it's no where as serious it's also not potential, it's definite. The amount of pine needles these things drop is daunting. The neighbors on one side dealt with the problem by taking the needles around trees and into flower beds. The other neighbors decided it makes a fine ground cover and let it lie. Neither of these options were going to work for us. In addition I've already had to clean out the valleys in our roof 3-4 times and we've only lived here 9 months. That's no bueno. 

Número Tres:
We want a yard. Neither of us require a perfectly manicured lawn (thank goodness) but good drainage and a healthy ground cover are a must. The constant shade and onslaught of pine needles have made it a hostile environment for grass. Because there isn't good ground coverage holding the dirt there the yard has had some erosion. The erosion means big puddles accumulating in the yard and potential moisture problems as the erosion worsens. That's definitely a no-no. 

The Plan:
We came up with a plan to deal with this issue and are partially through implementing it. The steps are simple but not terribly easy.
Step 1: Cut trees down.
Step 2: Bring in more top soil and reseed.
Step 3: Add some drainage at the street edge of the yard.


Step one complete.


But let me rewind a little.


This is Meredith doing the "*sigh* My hero" pose next to the first tree I cut down. It was a dogwood and before you give me the "Oh no not a dogwood!" look, let me just say that it was hideous. No blooms, gnarly, growing into power lines, weirdly placed in the yard kind of hideous. This was officially the first time I ever used a chainsaw and let's just say, I'm hooked.

After this one Meredith's dad and brother came over and helped me take out a gum tree and I had another friend come over and help me take out two holly trees. The yard already looked so much better at this point. Brighter, less overgrown, less pointy leaves and gumballs to step on. Definitely a good choice. But these were all cosmetic and didn't take care of the dangerous ones. For those we needed a pro. We ended up getting three estimates. The first one was Shady Tree Service who we found out about through this post over on Young House Love. When we met William we really liked him and I was immediately rooting for him to win. We got an estimate for a few trees which we believed would make the biggest difference and then got an estimate for all of the pines. Then we got an estimate from another company I won't even bother naming. He guessed at how much taking out just the few we selected would be and then told us he would mail us the quote for those as well as a quote for the whole thing... we never got that quote. The third was Ismael's Tree Service. I was a little put off at the beginning because he marked the trees we talked about with a can of spray paint! I was like, what? I haven't even given him the job yet! But I held my tongue since I figured the trees would be coming down regardless. Besides, he came highly recommended by Meredith's Grandma so I knew he must be alright. When I asked for a quote the number he gave me was shockingly low. When I asked him how he could go so low his response was that he owned all of his own equipment.

As much as I had been rooting for William, Ismael's quote was the same amount of money for twice the amount of trees cut down and he did turn out to be a nice guy. So yeah. We had to go with him.

The images below are not for the faint-hearted tree hugger.


We no longer have a tree in the middle of our driveway. Hooray!


Or two trees in this driveway! (or this driveway at all but that's for another post)


There is no longer a tree within arm's reach of our back porch!


Or two trees up against this fence!


Or in the midst of the fence for that matter. This is not damage caused by Ismael's crew, it's where the previous owner built the fence into the tree. *face palm* I'll be fixing that soon. *adds to list*


Grayson found the whole process thoroughly engrossing.


Thoroughly. 


This tractor has not left this mulch pile since. 


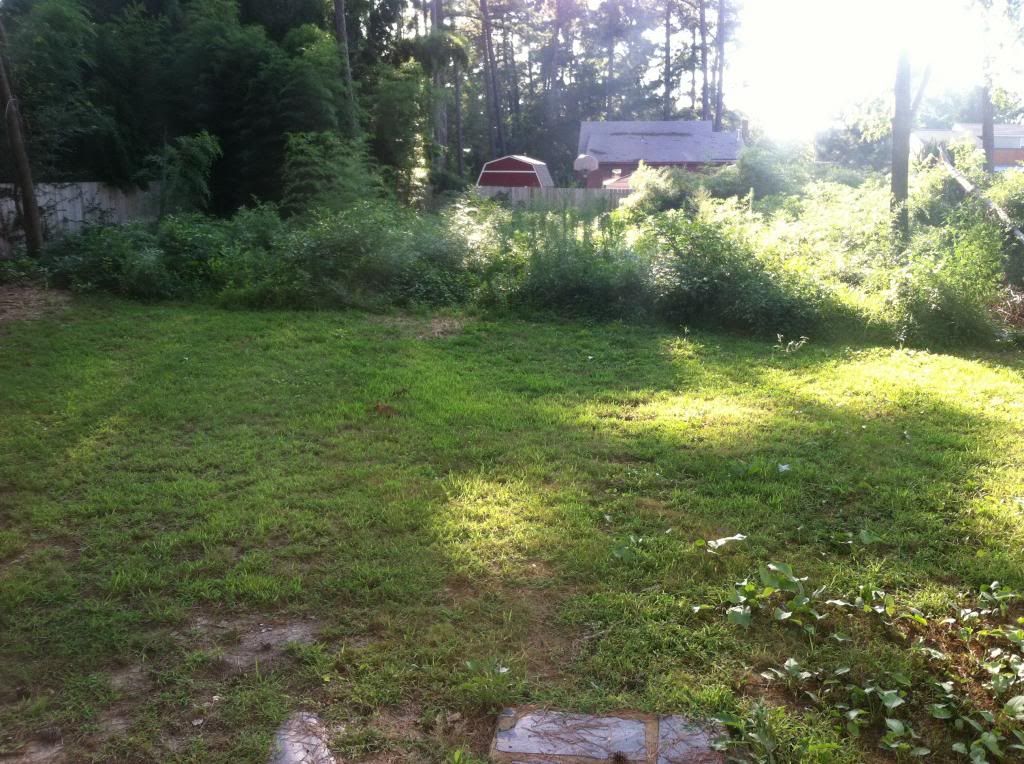
And the "After" shot. Unfortunately it's not very impressive since we haven't brought in that top soil and reseeded the lawn, but you can see that there are no longer any trees bearing down on our little blue house anymore. Also you can see that we didn't just cut everything down. We still left our cedars which we like very much.


So, that was our experience in getting trees cut down. A few thoughts/notes about the process and our results:

Everyone we checked with was licensed and insured. This is definitely important because not only does this cover you if they drop a tree through your house it also covers you if someone cuts their finger off while on your property. If they're not insured you can actually be held liable for that. It's a good idea to also get copies of their license and insurance, That advice comes from a coworker who used to be a framer.

As things progressed we formed the opinion that Ismael was probably cheaper because not only did he own his own equipment but he really seemed to require less equipment in general. Mostly he employed "monkeys" (guys who climb trees) rather than using bucket trucks and other things which add a lot of overhead. In addition to that while all of the estimates included cutting down and removing the trees and grinding the stumps, Williams included removing all of the stump grindings while Ismael's did not. So essentially we got the "economy" deal. Looking back I kind of regret not giving William the chance to counter offer an estimate simply because I did really like him (and because I feel an illogical guilt for not going with the first guy who showed up). If I start to feel too bad about it I just look at my yard, smile, and enjoy it's near treeless state.


Wednesday, February 26, 2014

Batten Up!

That title is a baseball joke, if you couldn't tell. I'm trying to be more sportsy....you know, to appeal to a wider audience.

So, the other week we made an impromptu trip to Ikea. *cue the angelic choir* Let me just say that I am so glad we have to drive an hour and a half to get there, otherwise my shopping would get very dangerous, very quickly. Our mission was to pick up curtains and some (cheap-o) dining chairs. 

Mission accomplished! 

Our unstained chairs around our newly painted Craigslist table.

 
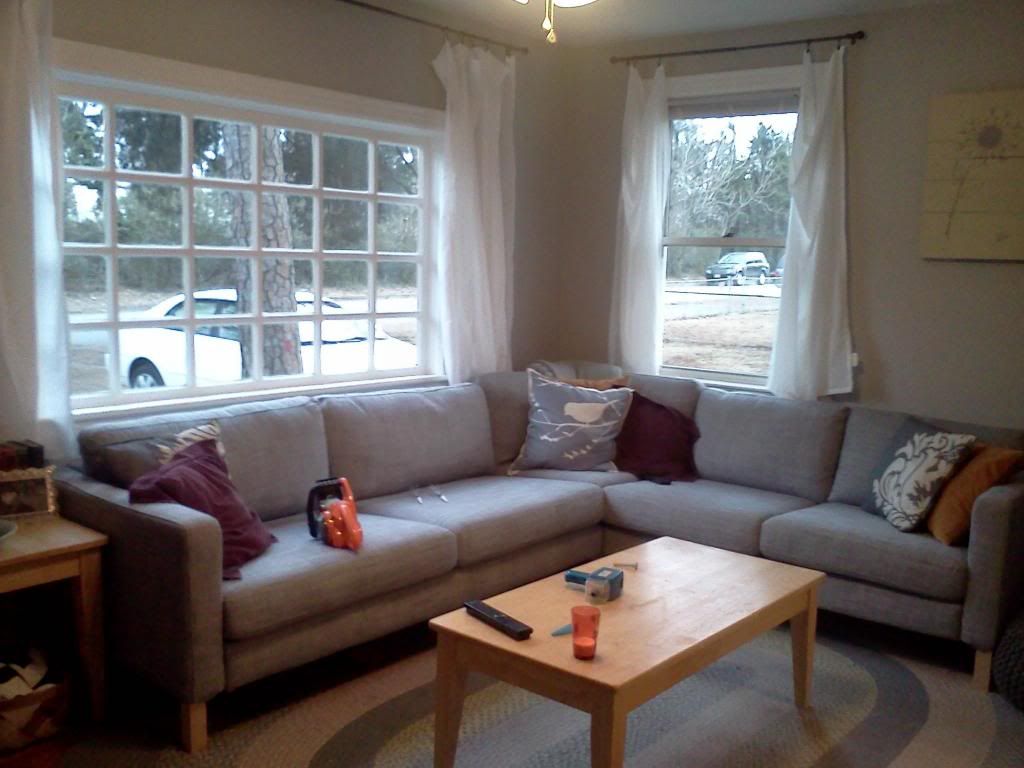
Yes that's a toy chainsaw on our brand new couch.
Yes that's a boy in our brand new curtains.

 
Is it me or do curtains make it seem like you're a real adult? Confession: this is the first time I've ever had curtains. It's a heady experience. I touch them a lot. 

Probably too much. 

Anyway, we also ended up buying a Karlstad sofa (with an Isunda grey cover) because we happened to spot it in the as-is section just as we were leaving. He has a small crack in the frame of the corner piece, but it was an easy fix, and his price was, consequently, quite nice. 

Anyway, once we got the curtains and the couch moved in, our living room looked a little....imbalanced. 


We've talked about several options: a picture wall (like the Young House Love hallway here), honeycomb shelves (like these from A Beautiful Mess) but we just couldn't find the motivation to invest the time. Or money. 

 
Enter: Board and Batten
 

There are so many fantastic B&B tutorials to be found on the Internet that I won't bore you with too much of ours; suffice to say we drew heavily from this one (again from Young House Love) with a dash of this one (from DecorChick). 

To show that we're not completely lazy boggers here's a quick rundown of our process:

Measure the distance and decide on the spacing (the spacing is about 1 part math 1 part preference)


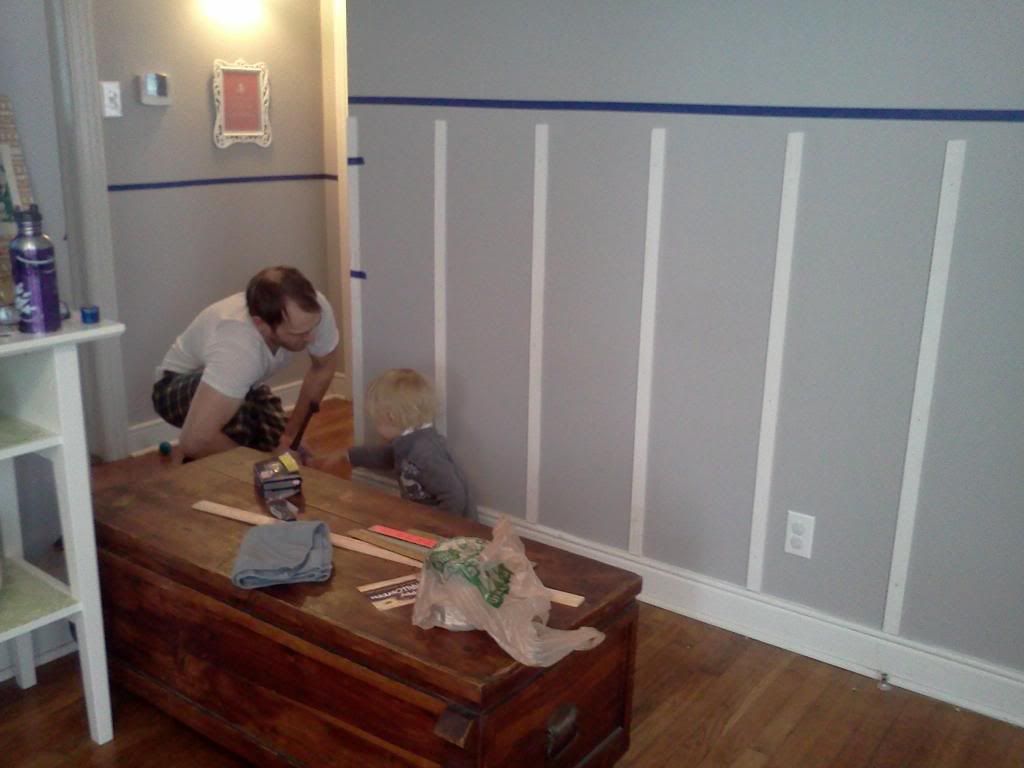
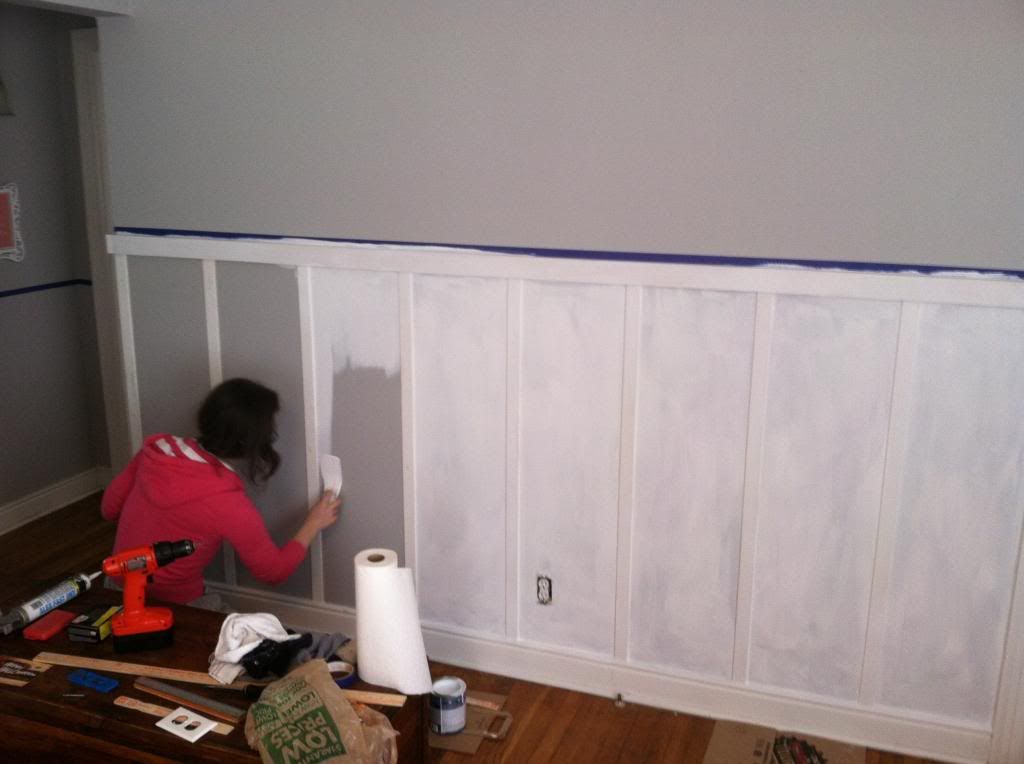
Tape lattice strips in place and then nail them each in (we used a level to make sure they were straight).

Jammie Time!

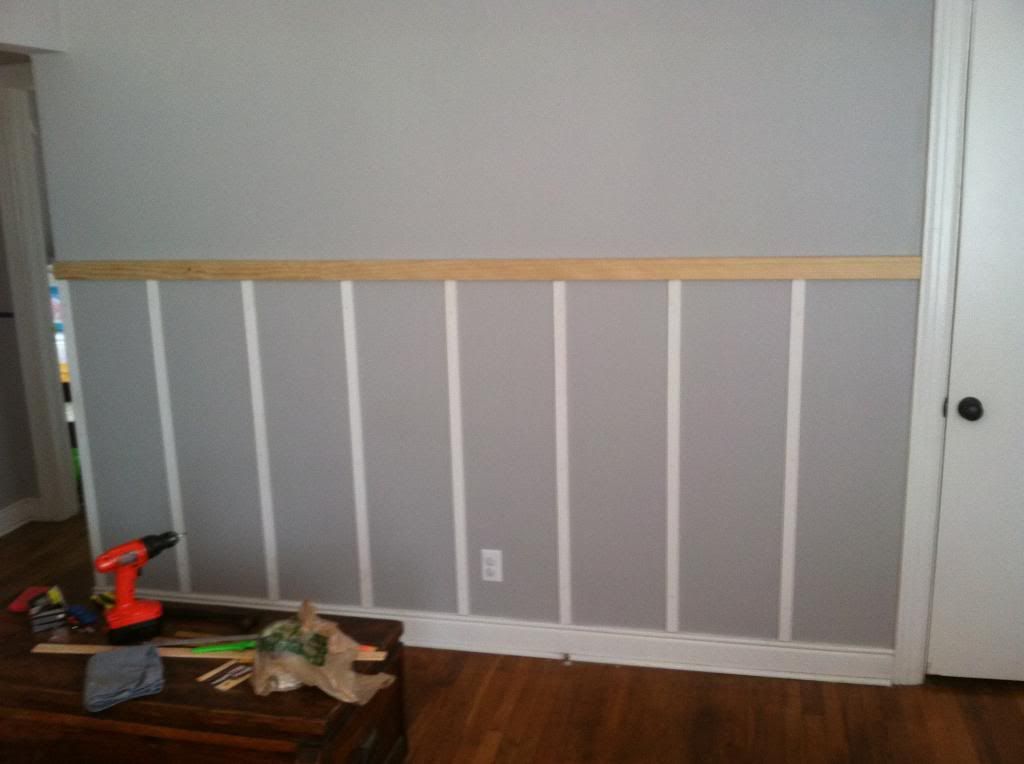
Tape the top board in place to make sure it was straight (once again using the level) and then nail it in.


Caulk.


Paint.


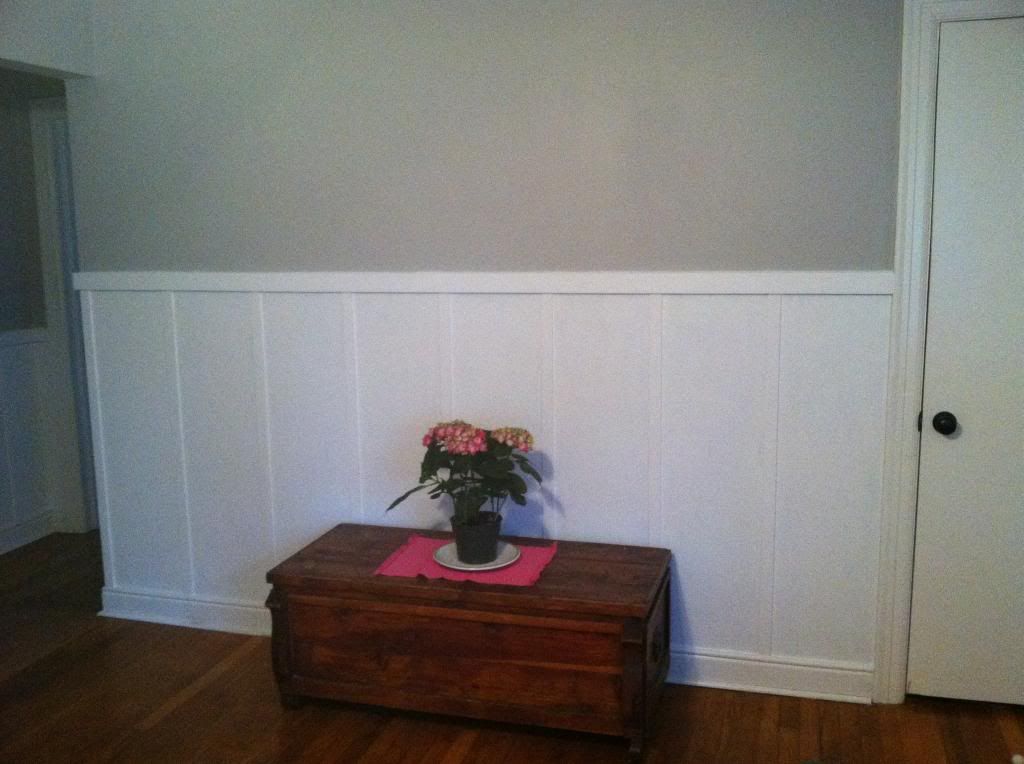
Reveal!


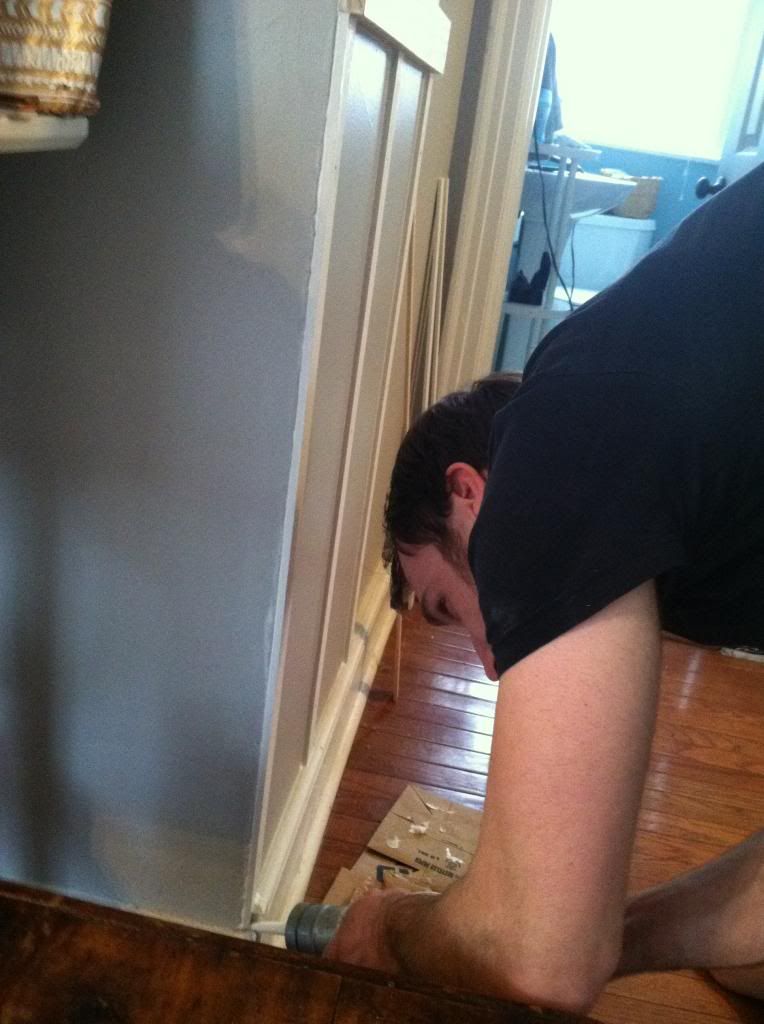
We've never really caulked anything before but it was definitely a worthwhile step. We didn't use any wood filler or putty to fill any gaps or anything we just used the caulk for that as well. Once we finished this main wall we moved into the actual hall and did that as well. We didn't want it to dominate the whole hall so we did it at a shorter height on the other wall. Initially we worried it might look odd, but we think it looks great. 

Our total cost was around $45-55 for about 20ft of wall. To be honest, that was partly due to the fact that on our second stop to get supplies our local Home Depot had trouble figuring out how to price match their own across-town store, decided to just knock $5 off of the total (when it should have been like a dollar), and somehow came up with a figure of $5.14 for what should have been about sixteen bucks. So I guess you could factor another ten dollars in there.

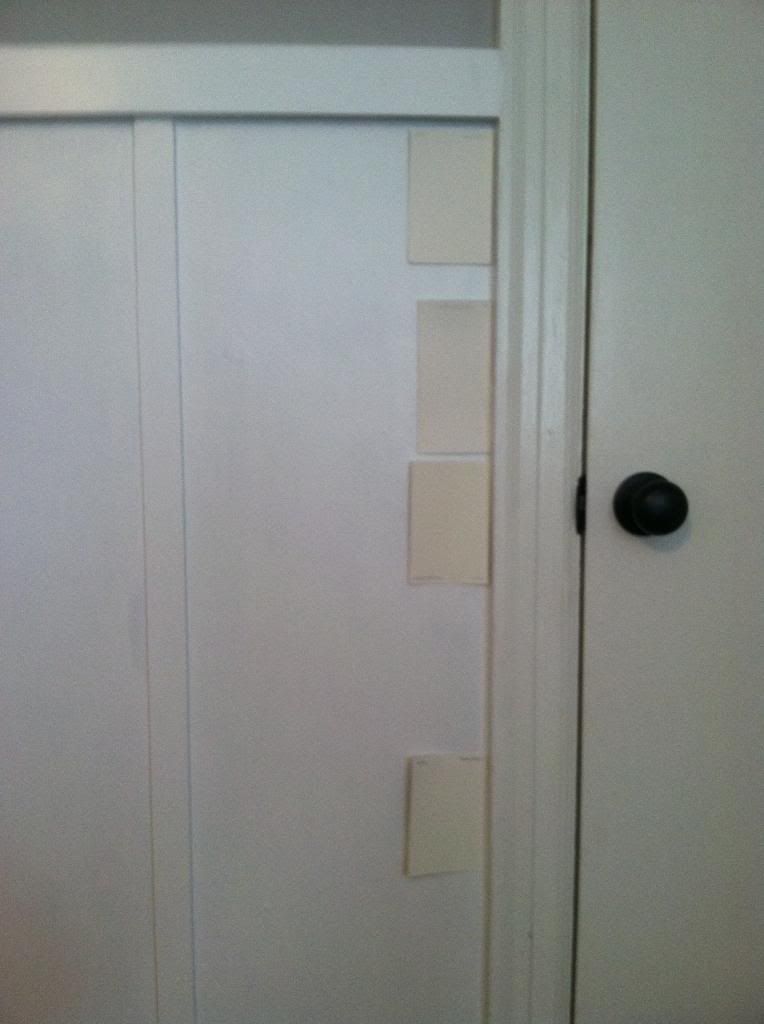
Another moment of honesty: We're not actually done. We're pretty unhappy with our choice of whites. It doesn't match the existing trim so we're auditioning for replacements. At this point we believe we've found the replacement but we haven't bought it and put it up yet so we'll see. *fingers crossed*


The whole project was quick, we knocked it out in about four days, it was inexpensive, and we think it's maaaaarvelous! We joke that it's like installing an optical illusion because it actually makes it look like we have a hallway down from the  bathroom door instead of just (bam!) walking straight into the bedroom. 

Now, if we could just pull off a similar illusion that would make our overgrown backyard .....disappear!

*flourish*


Oh, wait, that takes actual work ...

Friday, December 20, 2013

Happy Holidays!

So, I just wanted to drop in to say that we're still here. We've been so busy with a new baby plus the holidays that we just haven't had a lot of time for house stuff. I've done some bamboo clearing in the backyard, we painted the remaining room (we'll share that sometime), and we've done a few other piddly things but not much else has happened. Rest assured, though, that we will be back at it soon. We'll get back in the swing of knocking things off the list and sharing our progress.

In the meantime here's a little Christmas greeting from our family I whipped up in Paint (Yeah Boy).

Wednesday, September 18, 2013

I've got a Sinking feeling

Shortly after we moved into our house we noticed that our bathroom sink was a bit of a slow drainer. It didn't seem terribly serious, probably something that we could take care of with a little baking soda and white vinegar.

I kept meaning to give it that treatment...

It got worse...

Finally I did it, but either I just waited too long or it was too big of a job for that method because it didn't seem to do much for it at all. Now it seems like it backs up every time we use it and it takes forever to drain. I feel like the fact that it still ends up draining is a good thing but it's still definitely something that needs to be taken care of.

Finally I broke down and decided to disassemble the u-bend behind the sink to clean it. In preparation I read up on the process online didn't shave for a week to show the sink I was manly and meant business.

Now, if you've been following our blog here you've probably seen pictures of our bathroom before and might have even noticed how ridiculously close our pedestal sink is to the wall. In fact it's so close that the plunger apparatus has actually scratched the wall where it sticks out the back. (That's something I plan on fixing by cutting it shorter so it clears the wall without a problem)

I managed to shift the pedestal of the sink and open up the space slightly but I still couldn't fit a bucket under the pipes. Instead I ended up putting some plastic bags under the pipes with some towels under that. It actually worked well.


The process was really pretty simple. I just unscrewed both ends of the u-bend pipe.


Then it popped right off... and smelled foul.


Then I unscrewed the nut holding the plunger apparatus in and finagled it out of the hole.


Then I looked around for a toothbrush. Meredith reminded me that mine was looking a bit ratty so I downgraded it to cleaning tool. I picked up the u-bend and what do you know?

Nothing in it. Not a hair.

I tried brushing out the pipe going into the wall and got nothing so I stuck a coat hanger in there. Still nothing.

I stuck the toothbrush up the drain pipe and didn't feel any resistance so I got up and looked through it.
I could see right through.

Well crud.
There's no crud.

Which left me at a dead end.

I figured the next step was to get a plumber's snake and try that so a few days later I tried again with one I borrowed from my uncle. I had shaved my beard so it came as no surprise when I could only get the snake to go a couple feet down the pipe.


It was at this point Meredith decided to show the sink (and apparently me) we meant business and took over the job. She got the snake to go in it's full length, but when she pulled it back out this is all that came out:


Yup. Dirty water. That's it.

I decided to go down into the crawlspace to see if I could open it up down there and use the snake (in case it just wasn't reaching the clog). When I got down there this is what I saw (sorry for the bad picture):


Aside from the supply lines the only thing that could possibly go to the sink is that 4" iron beast on the left and it disappeared into the floor above. There was no way I could open that up and snake it. I think we've reached our first project that went above a DIY solution.

Boo.

We're going to try a couple more things before calling a plumber, namely: I'm starting that sink on a vinegar and baking soda regimen (just in case repeating the process might loosen it), we're researching alternate declogging options (has anyone tried anything like this?), and if all else fails we might actually try some Drano. *gasp* I know, I know, harmful to the pipes, the environment, etc. Maybe we'll try an all natural one like this first (in fact I might try this before anything else), but if it doesn't work... so help me.

On the bright side, if we do have to call a plumber to get this fixed and they have to replace any pipes (yeah I know, this bright side is a stretch) I might see how much it would take to get them to move the toilet since that's one of the bigger (read: third tier) things I'd love to do, and it might be a little less if we can get it done with some other work. We'll see.

Has anyone else solved an issue like this? Did you have to resort to calling a professional or did you find a wonder product that took care of everything?

Friday, September 13, 2013

A Moment with Grayson


Grayson with a "drink drink".
  Our house has been busy with prepping for that moment when the new baby will arrive. We've still been doing some things around the house and we'll probably still share those things with you but the home improvement/blog side of things has been slowing down to allow us to focus on other areas. In fact, when the baby does come I can't promise we won't just take a week off.

I know Meredith usually posts these Grayson moments but I wanted to share one of my favorites.

The other day we were getting in the car and as usual I was buckling Grayson into his car seat. Meredith was sitting in the front flipping through radio stations trying to find some music he might like. As I set him in his seat he just looked towards Meredith and said, "I can lift you up. Show you where to be. Remember that?"

Huh?

Meredith looks over, flips the radio back a couple stations and what song is playing? Safe and Sound, by Capital Cities. He immediately started bobbing his head to the music and we both busted out laughing.

In case you're unfamiliar with the song, the lyrics go:

I could lift you up
I could show you what you want to see
And take you where you want to be
You could be my luck
Even if the sky is falling down
I know that we'll be safe and sound
We're safe and sound


What kind of plans do you have for the weekend? I've got some more painting to do and I might crawl under the house! More on that later.

Tuesday, September 10, 2013

Workin' on Our Night Moves


....err, stand. Nightstand, that is. 

(I just couldn't resist the Bob Segar reference. And now I'm paying the price; that song has been stuck in my head all day.)

So, last weekend we were doing the thrift store rounds (I think my dream day involves picking up some coffee, a loaf of some kind of fruit and nut bread and trolling thrift stores....where I find an amazing vintage table/painting/ceramic rabbit, which leads me to a taping of Antiques Roadshow, where they breathlessly inform me that my furniture/art/tchotchkes is worth millions!

And then we would go get ice cream.)


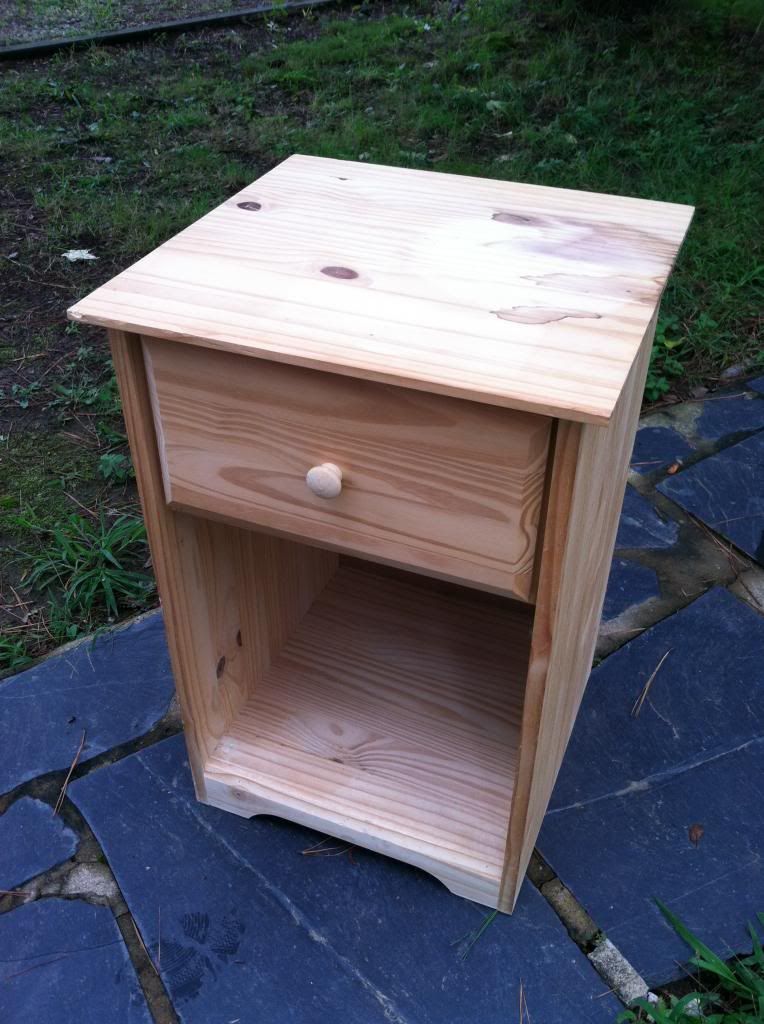
While this particular Goodwill trip did not yield our million-dollar find, we did spot this pretty nifty nightstand.


Solid wood. Unfinished. $10. 

Sold.


This is where our story takes a turn. Kind of like West Side Story. This first half is all singing and jazzy snaps. 

And then somebody stabs Russ Tamblin

And, as far as I'm concerned, that's where the movie ends. 

So, if you're like me, you may want to close this browser window and pretend this nightstand story has a happy ending, with Joseph and I dancing around it, ala The Jets in happier times. (Lots of jazz hands.)

I thought it would look great to paint the (poor, innocent) nightstand in the color I had originally intended for the closet.

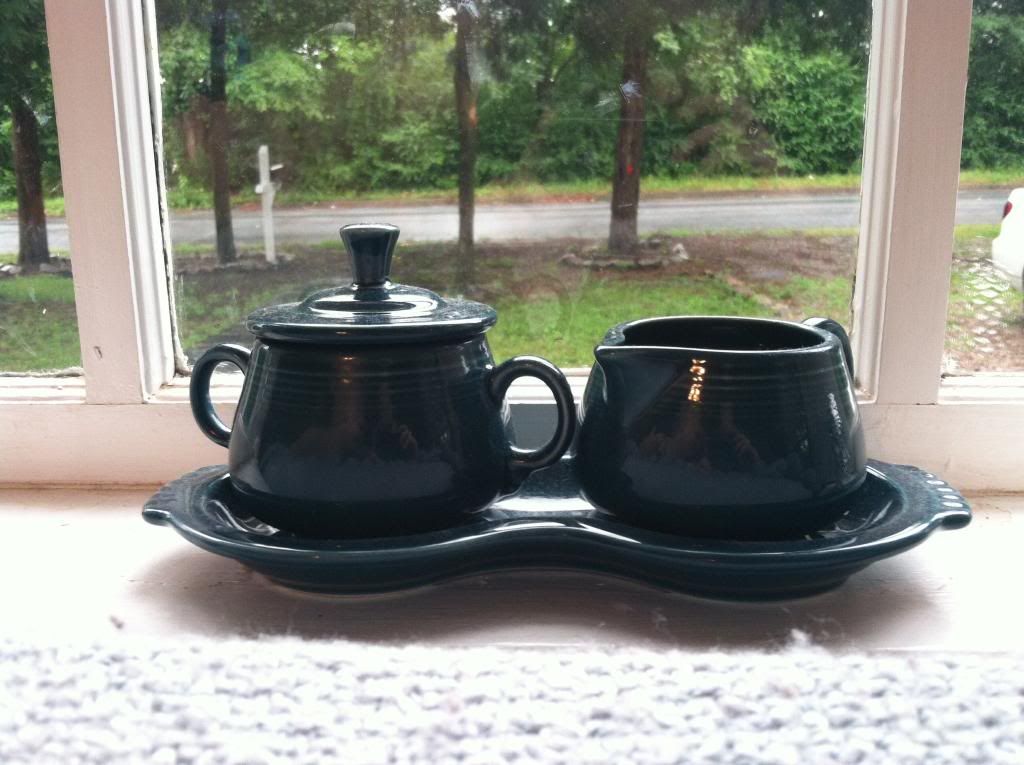
Close to this:

I still maintain that this deep blue-green would look great with our light grey/yellow color scheme. 

 
But I'll probably never know. 


This time around, I thought the color I had looked at before (Peacock Tail by Behr) was a touch too blue, so I found something with heavier green undertones.

Via

 
Tropical Skies by Behr

(Have you gathered that we have a fondness for Behr? We like that their basic flat and eggshell finishes are No VOC and their Kitchen and Bath is Low VOC.)

Because my husband is very supportive, and when I get a project in my head I'm crazy-annoying, the next day he was out front priming and painting our newest addition.


In hindsight, a primer intended for darker paint would probably have been better, but we just used what we had (in fact this step might be solely responsible for our troubles). After one coat, it looked like this:
Ah that sweet, sweet sponge painted effect.
And my face looked like this:

Yay facial expression reenactments!

Joseph said it looked like it belonged in a doctor's office circa 1992.

But a second coat, a second coat we assured ourselves, would fix everything. 

Back to painting. 

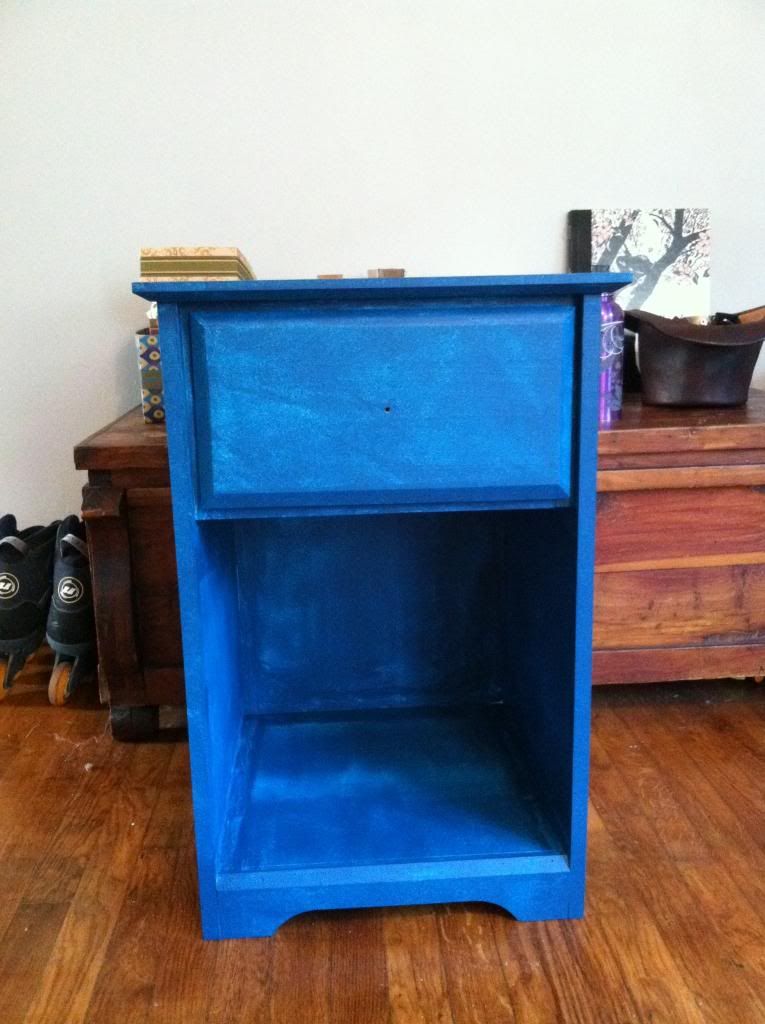
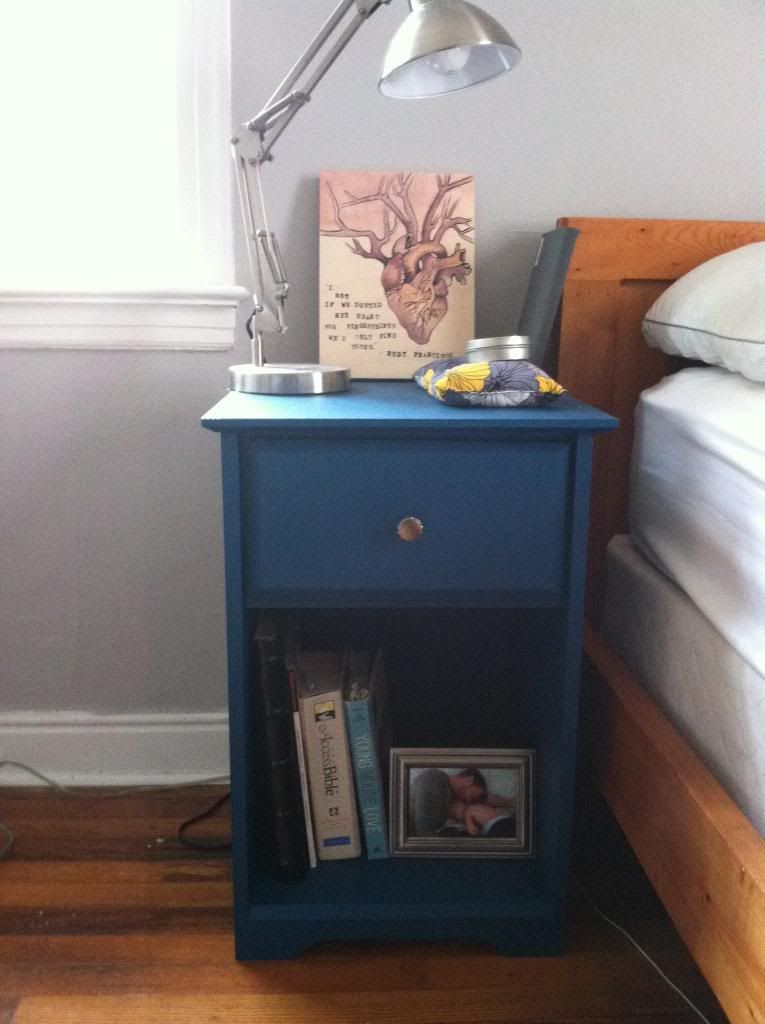
And, in the end, it looked like this:


And my face looked like this:


So, not the happy ending we had pictured, but not....terrible. (Kind of like the end of West Side Story. This nightstand is our Maria.)

It's definitely more teal than Juniper. It still has shades of the 1990s. But once we put the knob on and covered it with our junk....it's not bad. 

Its not great. 


But it's not bad. 

Maybe it'll grow on me. 

Maybe if I pair it with some faux potted plants, mottled gray carpeting and burgundy office chairs. 

*shudder*