Tuesday, August 20, 2013

Oh Well

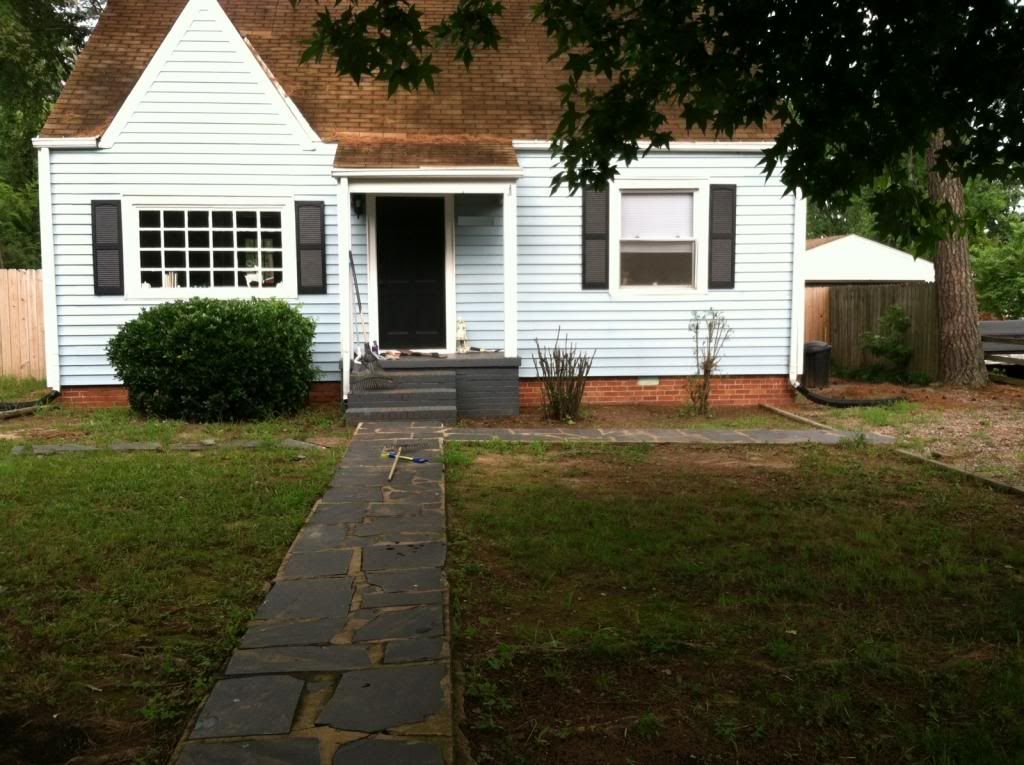
One of the first things we noticed when we were looking at our house was that it had a well. Not only did it have a well but it had a well with a broken cover.

Now, don't get me wrong, I don't have anything against wells. Truth be told, I much prefer drinking well water to drinking city water. That being said, wells open up whole cans of worms that I wasn't sure we wanted to deal with on our first house. Worms like having to worry about your personal water table level and not overtaxing it, worrying about what's in your soil and having to get it tested, losing water when your electricity goes out and the pump can't run, etc. These issues were potentially even bigger with the fact that the cover was broken.

So the first thing we did was check to see whether or not the well was still in use. It was not. I was slightly relieved.

Any remaining doubt about where our water comes from vanished when we got our first bill. Maybe the well would have been nice after all...

Regardless of whether or not the well was in use, something had to be done about the broken lid. We can't have our neighbor Timmy falling in there one day (side note: we don't actually have a neighbor Timmy). Luckily for me a bunch of cases of QB300 had been damaged at work and had to be thrown out! QB300 is a construction adhesive and I figured before we spent the money to replace the cover I could try gluing it together... with free glue!

Thankfully the cover was split almost perfectly in half and was pretty much all there. It was still incredibly heavy. Like, "it was all I could do to even move half of it at a time" heavy. I pulled both pieces off and realized that the well itself was a tad "deteriorated" on one side. Boo. I pressed ahead because at this point that's not something I can deal with and it really doesn't change the fact that the lid needs to be fixed.
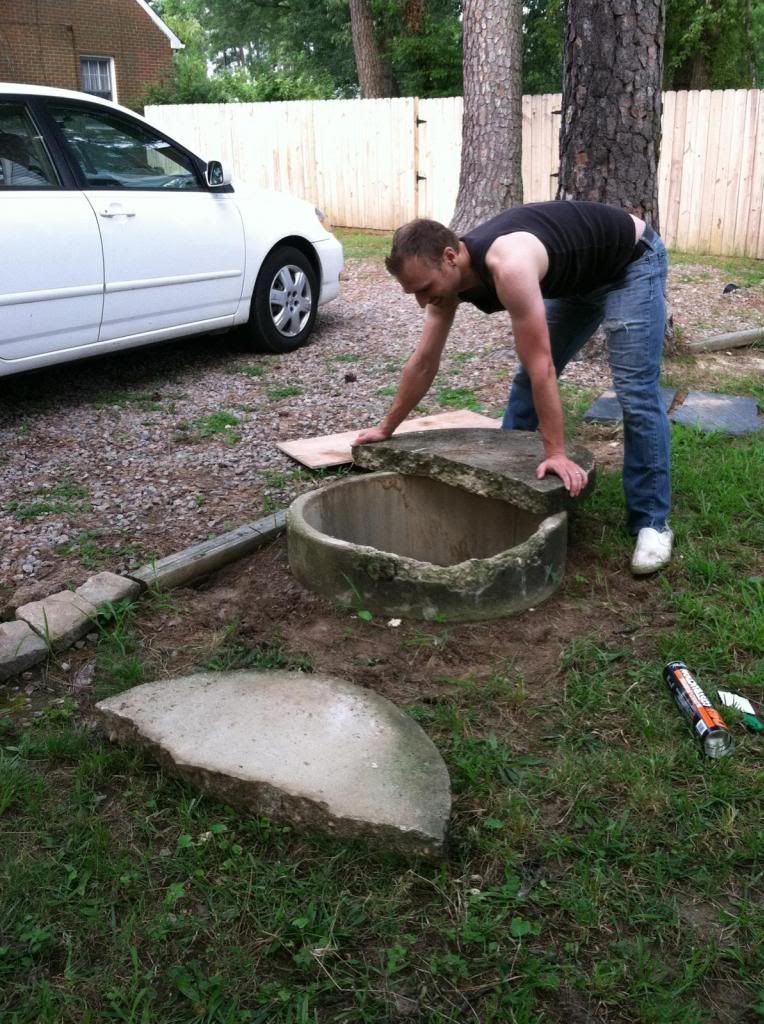


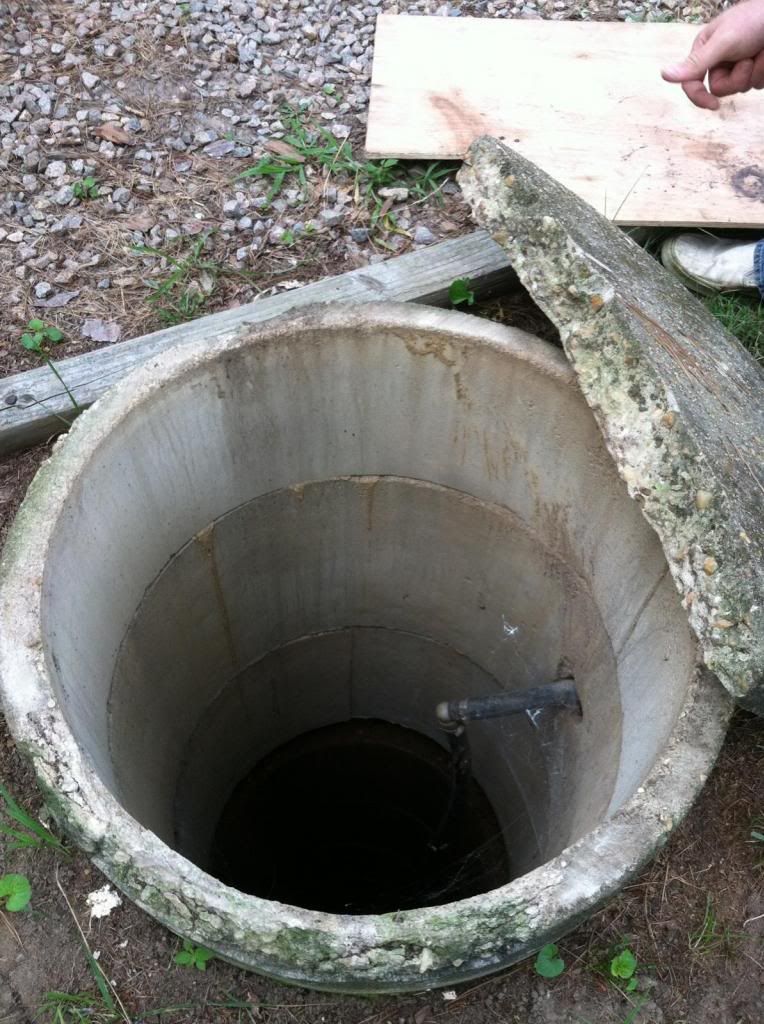
I put a board over the well while I had the cover off, just to make myself feel better, but not before getting a good look down there first. Ooooh a pipe! Yeah, I don't know anything about what I'm looking at.


The glue was in a 29oz caulk tube. I don't have a giant sized caulk gun, but the tubes were in pretty bad shape anyway so all I did was cut the tube open and use a plastic spreading tool (it's actually something meant to smooth bubbles out when applying tape) to spread the glue on the broken edge of the concrete. I thought it needed a good amount of pressure to help the seal so I balanced it on top of itself on it's side so it would create its own pressure.



This ended up not really working since I would have had to hold it like this for hours for the glue to set up and I held it there for somewhere around five minutes. As soon as I laid it down it came back apart.

Instead I just positioned both pieces on top of the well and Meredith and I pushed them together. Then I smeared more glue on it to make sure that the crack was completely filled. I would have loved to have one of those perfect seams that just snapped together and became almost undetectable but the condition of the edge wasn't THAT good.

Now our well has a ugly cool stripe across the top, but we're hoping to maybe paint it a little down the road to improve it's looks just a little more.

The important part is that the cover is fixed!



Even though I let it dry for days before I did this it was still slightly terrifying.

Monday, August 19, 2013

A Quick Question...

On Friday I said we were going to paint a table this weekend.

Well, we did not. 

But that's okay! Because now I get to ask you about it. 

So, this:


is our Coffee Table. We inherited it from a very generous family and we've been happy with it (at various points it's also been a TV stand and a gaming table) but now that we're settling in to a house of our own, we're feeling the need to....how do you say....paint this baby!

The only problem we're having is deciding exactly what color/colors would work best. Our original plan was to paint the entire thing white, with a light grey top and a distressed white pattern on the top. Like this:

Swiped from the Young House Love book.

But then we looked around our house and realized: We have a lot of grey. And white. 

So, now I feel a little stuck. I like the idea of incorporating a pop of color (maybe on the top, instead of grey) but still using a distressed white pattern? And then we remembered we got some free Clark & Kensington paint last year in a deep eggplant, so maybe that could work. (Our couch had purple corduroy throw pillows.) But what about an orange? Or a coral-y pink? I just don't know. (Picture me throwing up my hands and questioning the Heavens, ala King Lear.) First World Problems, you know...they warrant such drama. *grin*

Anyway, I thought I'd see if anyone (with a better decorating sense than I) had any ideas. 

Otherwise, I might go crazy and decide I might need to paint it to coordinate with this lamp:


For more hideous lighting specimens click here.


Friday, August 16, 2013

A(nother) Moment with Grayson

Grayson, our two-and-a-half-year-old, never ceases to amuse us. (Sometimes we wish he would so that we can tell him with a straight face why splatter painting with cottage cheese or picking up milk with your fingers isn't always a good idea. I mean, there's a time and a place for everything...usually, for activities like these, it would be after Mommy and Daddy have had their coffee....and also won the lottery.)

So, because it's Friday, I thought I would share with you a couple of moments from this week that made us smile. 


Grayson and Mamma, sitting in the car in Nana's driveway.

Mamma: (turning around to face Grayson) Boo!

Grayson: (overcome with laughter) What??

Mamma: (ditto) Boo! 

Grayson: (dissolving in hysterics. I'm just that funny.) What??!

Mamma: (feeling very silly, does this again)

Grayson: Wha....Wha....What's wrong with you?

*****

Grayson, Mamma and Daddy, driving down the road, listening to a Top 40 Station. (Grayson likes dance music, or anything with a good beat.) A song with some suggestive lyrics comes on. 

Mamma and Daddy sit awkwardly, each wondering if we should change it or if that would cause an issue.

We sit for another minute. 
This song really is terrible. 

Grayson: I don't like this song.

Mamma and Daddy laugh so hard we almost have to pull over. 

****

I hope that made you chuckle. And, if it didn't, lie and tell me that it did. 

Have a happy Friday and a lovely weekend! We've got some mulch to spread, some dead plants to haul, a table to paint and some shelves to install. 

Sounds like a good time. 

Tuesday, August 13, 2013

Bushwhacked


As soon as my wife thought of this title she got so excited that we could make a Firefly reference that I'm pretty sure she danced. I'm one lucky guy.

Anyways, on to the bushwhacking in question! Can anyone tell me what's wrong with this picture?


Anyone? Here, I'll use my incredible MS Paint skills to help point it out for you...


What the heck are those? I mean, aside from terrible foundation hedges that is. they don't even match the other side! It gets worse too. It's hard to tell from the picture but those two bushes aren't even. One of them is at least a foot back from the other. Not only that but there are two stubby off-shoots behind those as well.

We'd really like to improve the curb appeal of our house and figured that one way to do it would be to get rid of these wonky mismatched bushes. As much as we actually like the bush on the other side it wouldn't match whatever we replace these two with (at least size-wise). We also thought it might be nice to scale back to something smaller so we're not fighting an endless battle to keep it in check.

So, after careful consideration we decided to take them out and replace them with something more appealing.

Except, that's not really how it happened. Really what happened is that we decided we wanted to get rid of them and one day my wife texted me this picture:


Followed by this one:


Yes. While I was at work she was murdering our hedges.

That evening we finished "trimming" the other side and discovered a secondary bush in side the large bush. You can see it's trunks at the side of the bush nearest the shovel in this picture. It was pretty ridiculous.


So, now that we were officially "doing this" I got out the spade and went to town.

I'll be honest, I didn't really know what I was doing, and it wasn't easy, but they're gone now. We didn't really take many "in progress" shots because frankly it was just a lot of me digging rather unprofessionally around each bush, grumbling about all the roots, and prying and hacking things up.


For a slightly more "in-depth" break down of what I did:
  • I started by digging up the dirt around the bush
  • Each time I found a root I pulled up as much of it as I could and if I couldn't pull it all up I cut it off with my hatchet.
  • As I removed more dirt and pulled more roots free I pushed the bush back and forth in different directions to loosen it up.
  • Once it was loose enough I just pushed it all the way over until the remaining roots broke and it popped free.


So... Bright... Need... Tan...


You can't really see it but there's a root going all the way from the bush to the glove at the bottom of the picture.

From start to finish the only tools we used were a pair of manual hedge clippers, a flat edged shovel, and a hatchet. I tried to get as much of the root system up as I could just in case it decided to be persnickety and come back, but the hatchet came in handy when it went too deep to bother digging up. It might also be good to note that my "method" is probably only good if you don't care about replanting whatever you're digging up.

I did find some interesting things while digging up the area. For instance, after raking out all of the pine needles we discovered about a thousand tiny pieces of shattered glass, a silver dime from when this house was only two years old, and what appears to be a mostly deteriorated welcome mat that someone decided they didn't want anymore and they should just kick off the side of the porch into a bush and leave there forever.


You can't really tell from this side, but that was once a welcome mat.


And here's the final result!


Does it look great? Well, no not exactly yet...

Should I at least finish cleaning up the rubbish around there? You betcha! But I'll get to that later...

Does it look way better than the scraggly bushes that we had before? YES!

From here the plan is to go get some boxwoods. Our original thought was to use pea gravel as ground cover under the hedges, but I'm not sure the ol' wallet is quite ready for that stage so we might just add that later. Unless anyone has piles of pea gravel they're just looking to get rid of... Anyone?

*crickets*

If I had a Million Dollars...

(This is posting later than it should because I, Joseph, took too long to publish it.)

There are a lot of things I'd do with...
...a Million Dollars.


(Are Dr. Evil impressions cool again? So uncool they're cool? Like Dr. Evil Hipsters? Can I make that a thing? 

...

Can you tell it's very early in the morning?)

But last night all I wanted to do with my dollars was go on a shopping spree at Arhaus. 


So, join me for a brief foray into dreamland....

(In case you haven't noticed, this post is fairly 
pointless, feel free to skim. Or skip it entirely.)


How beautiful is this book? I think I would just 
frame it. Or, for $70 possibly just place it in a 
case and press my face against the glass every so 
often.


Joseph thought this would make a great curtain.
Like, "Ooh, what a pretty distressed brown curtain."
*close curtains*
"Surprise! We're science-y!"


Is this not the most beautiful manly media 
cabinet you've ever seen? And at $5,400 it's a real bargain.


The weird face Joseph is making totally says, 
"This lamp makes me look at all other lamps 
with newfound disdain because they are not 
this lamp." It had a counter-weight on the cord (
which I at first thought was a grenade and then 
thought was a cocktail shaker) and its industrial
 look makes me want to put it on the desk 
in the office on my Airship. 


Blue lamps. Glass birds. Oranges. 

= Happiness. 

*riff on the bongo drums*


So, thank you for joining me on my imaginary 
shopping spree. I promise this blog will return 
to what passes for normal sometime this 
afternoon when Joseph returns to tell you 
about our War of the Roses Shrubbery. 

But, until then, do you have a store where you 
would spend your Imaginary Fortune? 
(Honestly, I change my mind so often... I'd also 
go broke in Target, Anthropologie,
 Crate & Barrel....) It's probably better my 
decorating budget stays where it is. 

I still want to be able to fit in my house


I couldn't resist tacking this picture on, too. 
Look how handsome they are! 
(Even Gray in his blurriness). 

The loves of my life.

Friday, August 9, 2013

A Grayson Moment

And now, because it's Friday and occasionally it's a good idea to take a break from all the house stuff, we pause and bring you: A Moment with Grayson.

Grayson is our two and a half year-old and he is constantly reminding helping us to take a step back and just enjoy how wonderful the little, everyday things are. Which is so very good for me. 

Here is a moment from yesterday that made us smile:

Grayson, standing in the doorway of the kitchen, running his fingers over his chin slowly.

Mama: Grayson, are you okay?

Grayson: Yeah, I am. *pause* I'm just itching my beard. 


Oh, that boy....he cracks us up. 

Does anybody have any fun DIY plans for this weekend? Or just fun plans in general? Tell us so we can copy you! Haha! I'm kidding. 


I think our plans involve finally (finally!) digging up that last, sad, monster of a bush in front of our house. (Then we can share our bush whacking adventures! Oh, joy!) and maybe some more painting. Is there anything a fresh coat of paint can't fix? Oh! And we're on a quest! (Goody! I love quests!) A quest for dining chairs.  


So, happy Friday and have a lovely weekend! 

Thursday, August 8, 2013

The British Invasion (of the mind)

Has anyone else been jonesing for a British fix lately? I've never been much of an Anglo-phile, all those reserved, proper personalities and men with no chins. (No, thank you, Mr. Darcy, I have a previous engagement with Dr. Jones.)


But lately I find myself yearning for tea time, bonnets and an afternoon of catching up on Downton Abbey.

Maybe it's the desire for everything in my life to be neat and tidy, in its proper place ala Mary Poppins. Or maybe it's finding out our next little one is going to be a girl that's brought out some hidden part of me that loves foofy skirts and bows.

Maybe I'm still reeling from the Royal Baby.

Whatever the reason, I finally gave in yesterday to both my desire for organization and my yearning for something British.

So, while Grayson napped, I fixed myself a giant mug of tea (a beaker? Is that right Hyacinth?), put on Love Actually (apparently I was also in the Christmas spirit), and got my craft on.

After spiffy-ing  up our closets this weekend I was seriously excited to put everything back in its own labeled, color-coded bin. (Ha! I can dream, right?) Alright, really I just wanted bins that, in a flurry of "people will be here any minute" I could chuck things in and it would still look nice.

But, here's the thing about bins, they're expensive! At least, in the style and size I was looking for. A 6" x 12" basket seemed to average around $15 a pop. And I wanted many, many baskets!

How, oh, how to solve my terrible problem?

(Sorry, I was having a Wuthering Heights moment.)

Joseph had brought home several small-ish cardboard boxes from work the other day and I thought, "I bet I can cover those in some pretty fabric and they'd work just fine." And I figured free boxes and fabric that I already had = not a lot to lose.

This is what I started with:


So attractive, right? Well, I mean, great bone structure.

Aaaand this is what it looked like after I cut it in half with a box cutter:


I liked that, by cutting this one in half, I could get two matching boxes, but you could cut just the top off for a deeper storage space (for books or DVDs) or turn it on its side for a wider, shallower bin.

Then I just took some extra cotton fabric we had lying around, roughly cut out a piece for each side of the box and the bottom (with some over hang to cover the seams) and, using good old Elmer's Glue, glued the pieces to the box. 

I chose to attach the smaller ends first, then the longer sides (with the edges folded under to hide my raggedy cutting) and then the bottom (again folding the edges under).


As I went along I also used a hot glue gun every so often to more securely attach the fabric. (I liked starting with Elmer's Glue, though, because it's more forgiving if you want to reposition the fabric.)


Waiting and Weighting...

Ta-da!


Or maybe more like "Eh, not bad..."


If I do another one I will probably go out and pick up some felt for the inside. It's easy to cut, doesn't fray and it's pretty durable. As it was yesterday I only had bits and pieces of fabric to work with (and I wanted to keep this free. I always feel like I'm impressing Joseph more if I can say, "See what I just threw together today? Oh, it was nothing. And, also, it was free. Oh, what's that? You want to take me out for a fancy dinner and then buy me flowers and a puppy? Oh, well, if you really want to...")
So I ended up using some purple corduroy for the bottom and then just some gray card stock for the sides. I figured since I wasn't planning on storing anything damp inside the paper would be fine.

So, when Joseph got home the floor still looked like this:


There was no dinner. And the table was covered in fabric scraps and empty tea cups. But there was a happy wife to greet him. (Which may have been a side effect of all the caffeine in that tea...or maybe the residual sappy- ness from my British movie fix. But, for blog purposes, I'll credit the satisfaction of making this basket.)

And here's how it looks in our linen closet (it holds my hair dryer and flat irons):


This is what's on deck for today:


Hello, Target basket. Hope you like silver....