
So, the other week we made an impromptu trip to Ikea. *cue the angelic choir* Let me just say that I am so glad we have to drive an hour and a half to get there, otherwise my shopping would get very dangerous, very quickly. Our mission was to pick up curtains and some (cheap-o) dining chairs.
Mission accomplished!
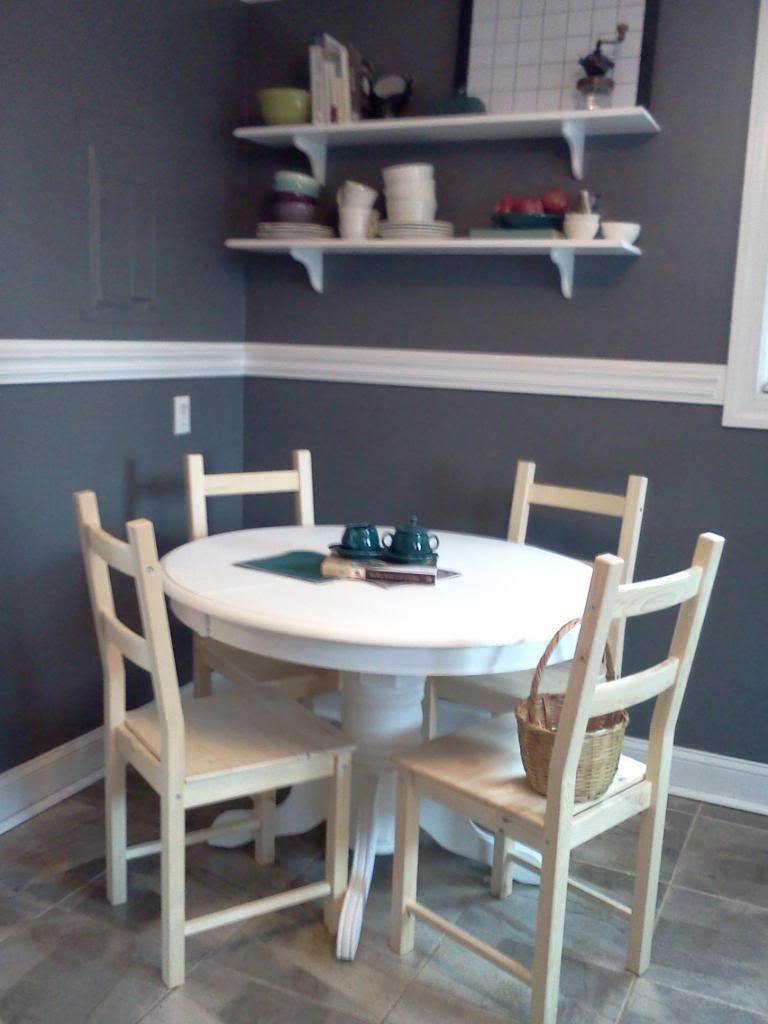 |
| Our unstained chairs around our newly painted Craigslist table. |
 |
| Yes that's a toy chainsaw on our brand new couch. |
 |
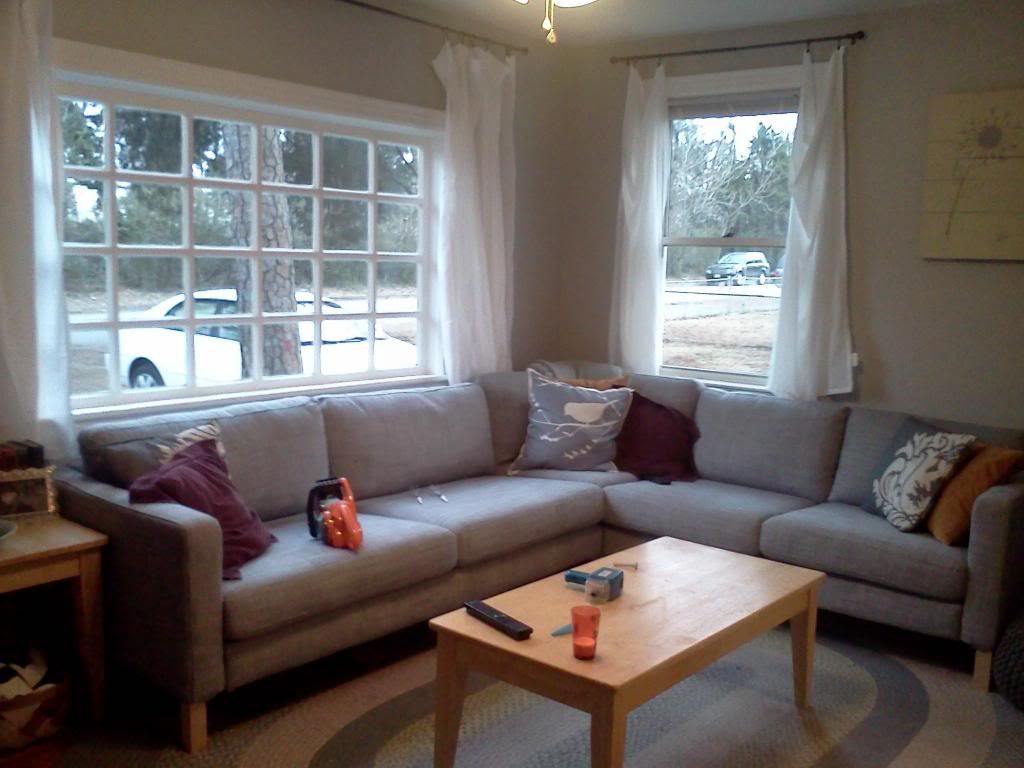
| Yes that's a boy in our brand new curtains. |
Is it me or do curtains make it seem like you're a real adult? Confession: this is the first time I've ever had curtains. It's a heady experience. I touch them a lot.
Probably too much.
Anyway, we also ended up buying a Karlstad sofa (with an Isunda grey cover) because we happened to spot it in the as-is section just as we were leaving. He has a small crack in the frame of the corner piece, but it was an easy fix, and his price was, consequently, quite nice.
Anyway, once we got the curtains and the couch moved in, our living room looked a little....imbalanced.
We've talked about several options: a picture wall (like the Young House Love hallway here), honeycomb shelves (like these from A Beautiful Mess) but we just couldn't find the motivation to invest the time. Or money.
Enter: Board and Batten
There are so many fantastic B&B tutorials to be found on the Internet that I won't bore you with too much of ours; suffice to say we drew heavily from this one (again from Young House Love) with a dash of this one (from DecorChick).
To show that we're not completely lazy boggers here's a quick rundown of our process:
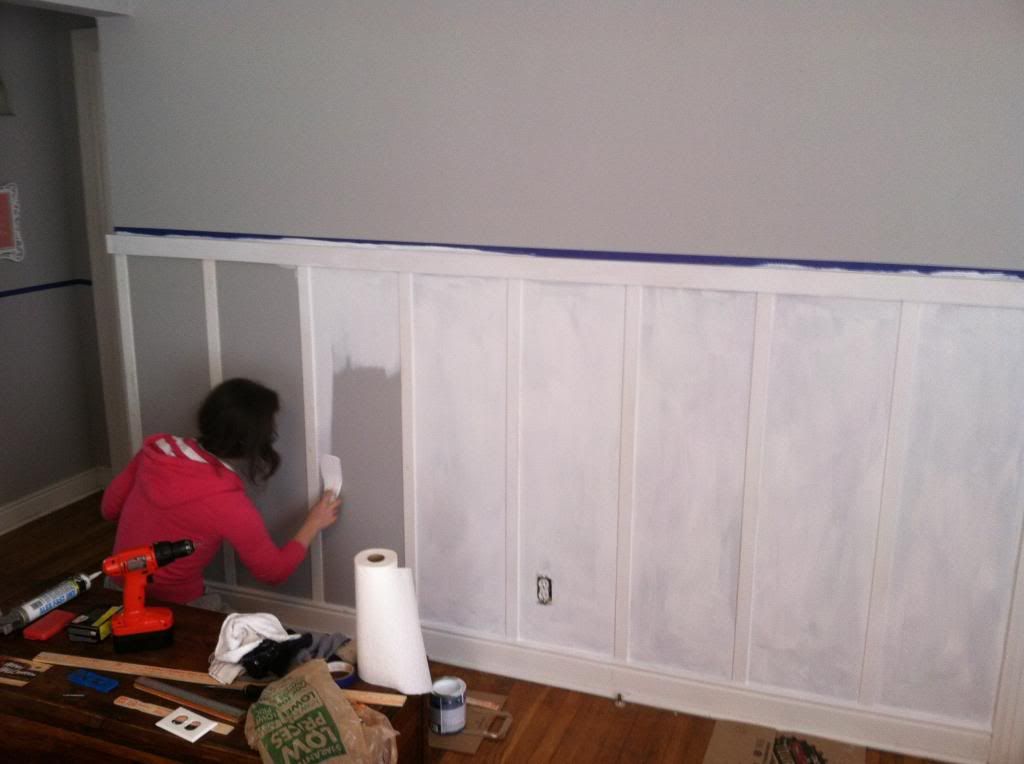
Measure the distance and decide on the spacing (the spacing is about 1 part math 1 part preference)

Tape lattice strips in place and then nail them each in (we used a level to make sure they were straight).
Tape the top board in place to make sure it was straight (once again using the level) and then nail it in.
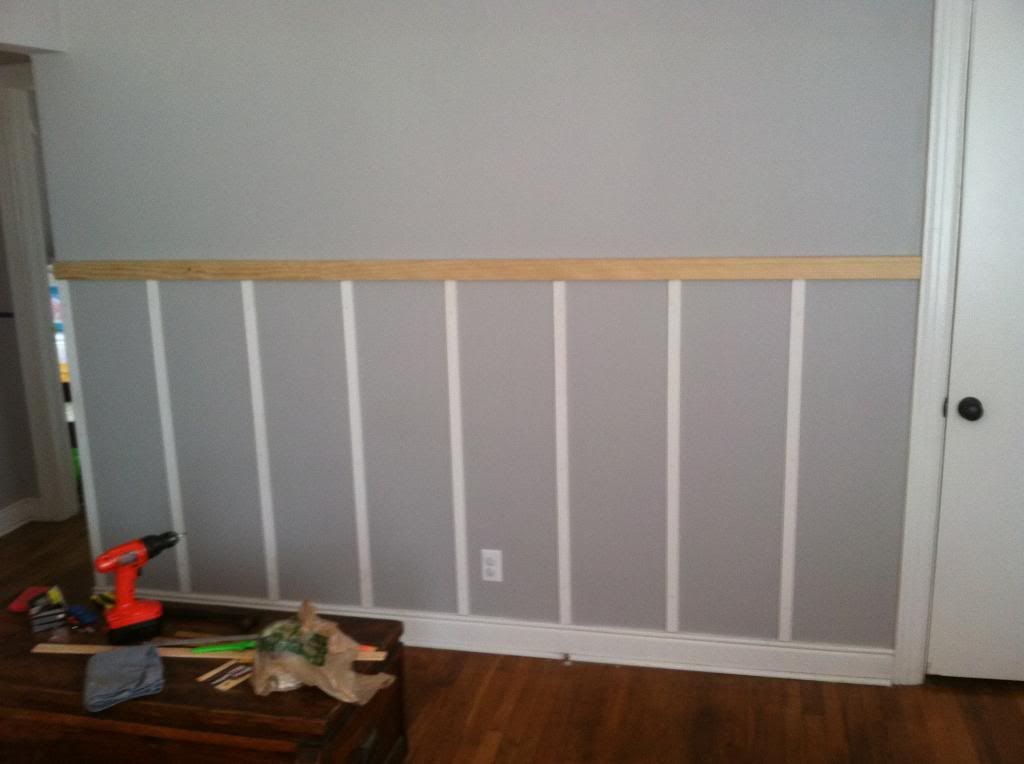
Caulk.
Paint.
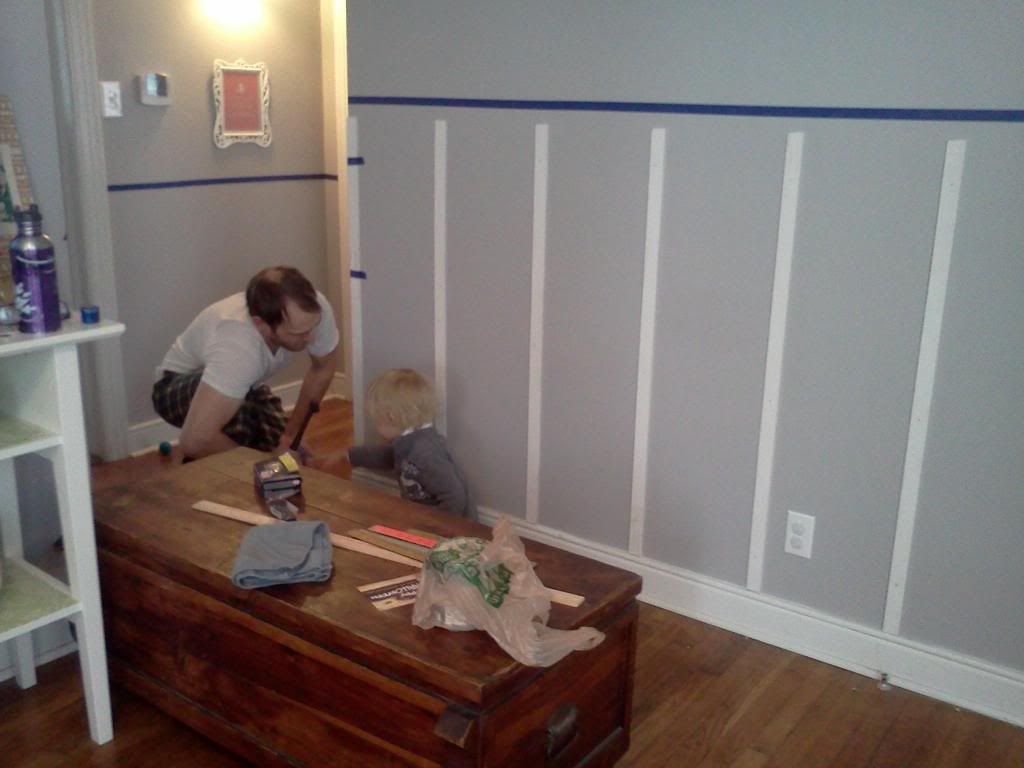
Measure the distance and decide on the spacing (the spacing is about 1 part math 1 part preference)
Tape lattice strips in place and then nail them each in (we used a level to make sure they were straight).
 |
| Jammie Time! |
Tape the top board in place to make sure it was straight (once again using the level) and then nail it in.
Caulk.
Paint.
Reveal!
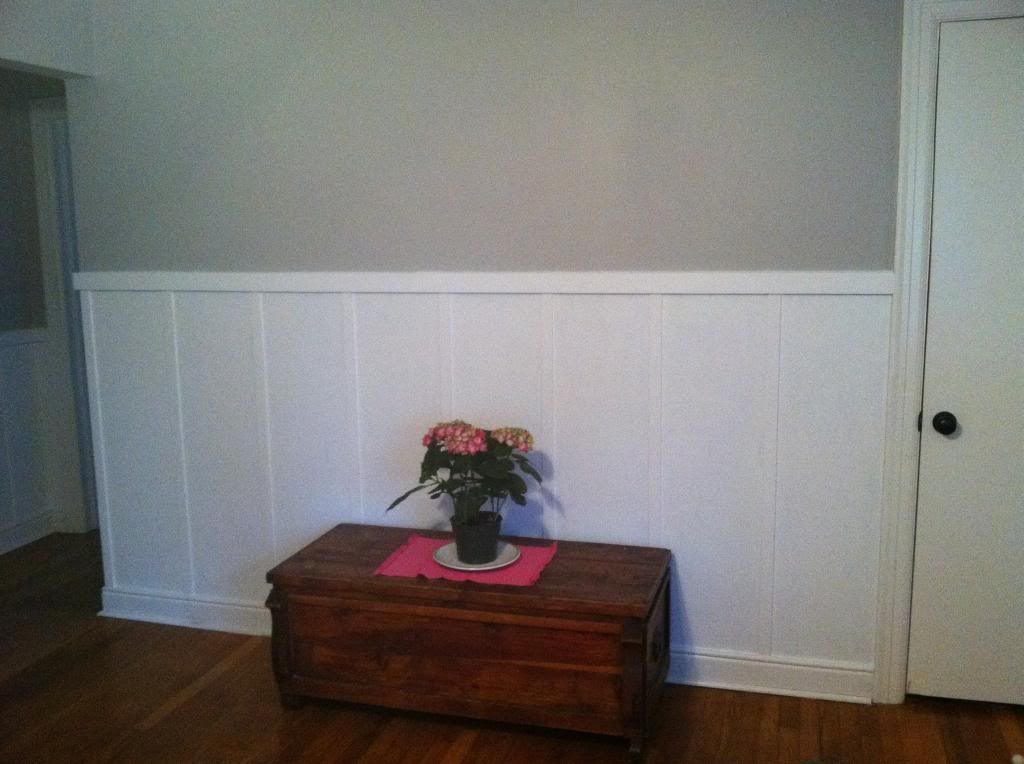
We've never really caulked anything before but it was definitely a worthwhile step. We didn't use any wood filler or putty to fill any gaps or anything we just used the caulk for that as well. Once we finished this main wall we moved into the actual hall and did that as well. We didn't want it to dominate the whole hall so we did it at a shorter height on the other wall. Initially we worried it might look odd, but we think it looks great.
We've never really caulked anything before but it was definitely a worthwhile step. We didn't use any wood filler or putty to fill any gaps or anything we just used the caulk for that as well. Once we finished this main wall we moved into the actual hall and did that as well. We didn't want it to dominate the whole hall so we did it at a shorter height on the other wall. Initially we worried it might look odd, but we think it looks great.
Our total cost was around $45-55 for about 20ft of wall. To be honest, that was partly due to the fact that on our second stop to get supplies our local Home Depot had trouble figuring out how to price match their own across-town store, decided to just knock $5 off of the total (when it should have been like a dollar), and somehow came up with a figure of $5.14 for what should have been about sixteen bucks. So I guess you could factor another ten dollars in there.
Another moment of honesty: We're not actually done. We're pretty unhappy with our choice of whites. It doesn't match the existing trim so we're auditioning for replacements. At this point we believe we've found the replacement but we haven't bought it and put it up yet so we'll see. *fingers crossed*
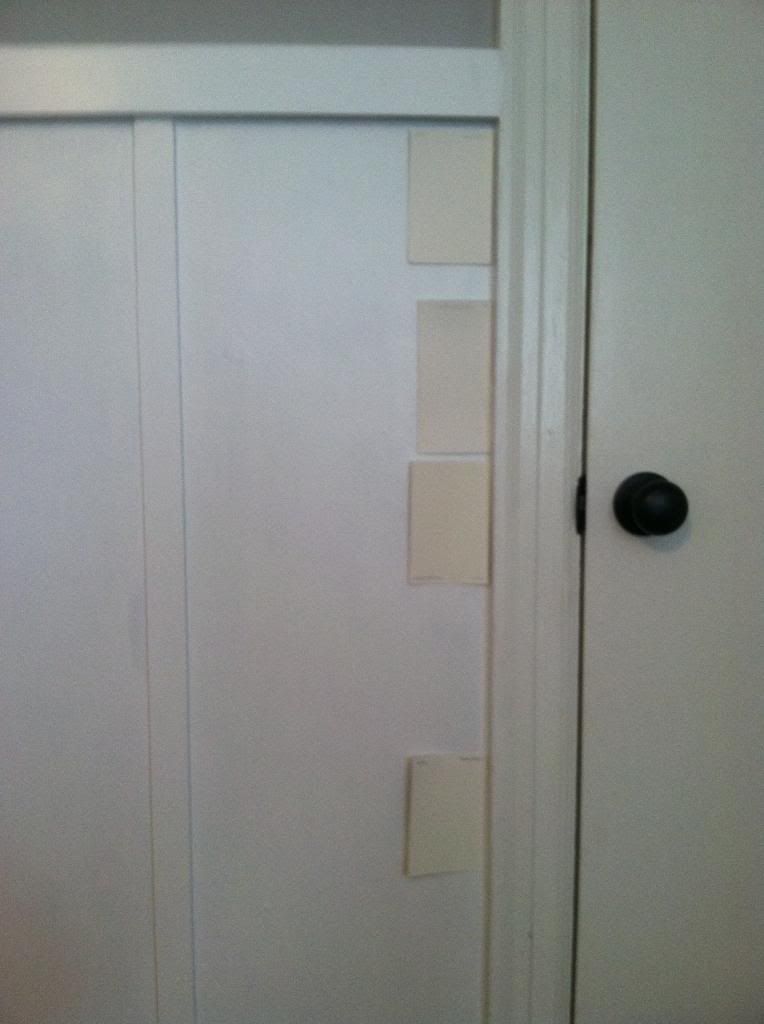
Another moment of honesty: We're not actually done. We're pretty unhappy with our choice of whites. It doesn't match the existing trim so we're auditioning for replacements. At this point we believe we've found the replacement but we haven't bought it and put it up yet so we'll see. *fingers crossed*
The whole project was quick, we knocked it out in about four days, it was inexpensive, and we think it's maaaaarvelous! We joke that it's like installing an optical illusion because it actually makes it look like we have a hallway down from the bathroom door instead of just (bam!) walking straight into the bedroom.
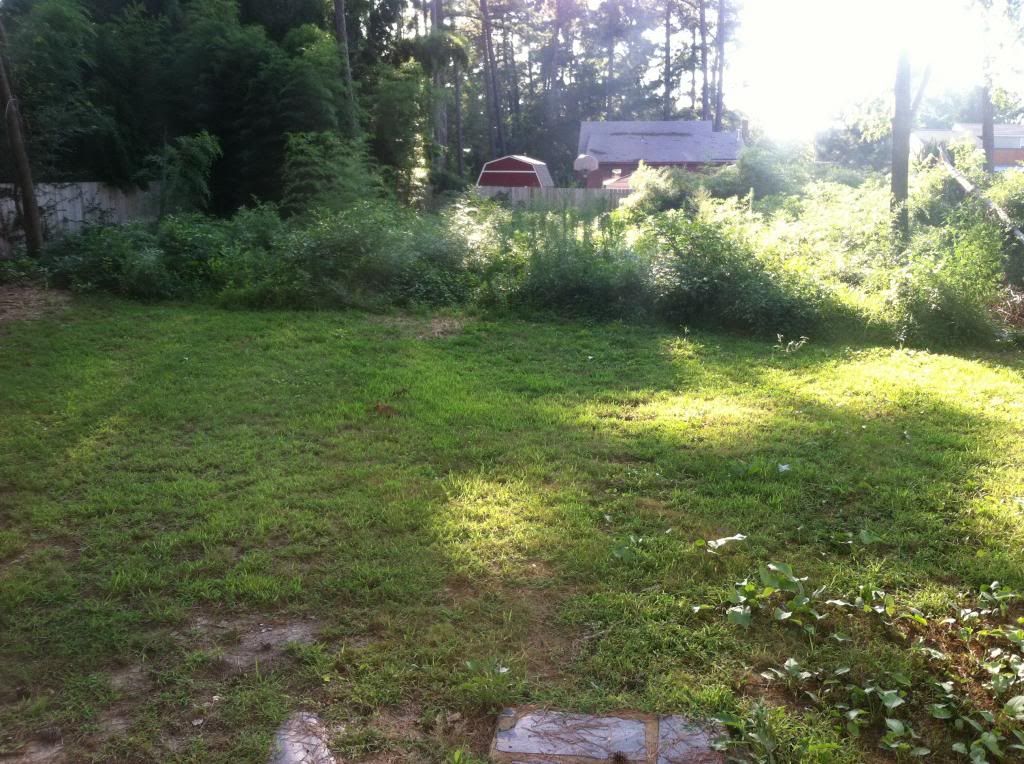
Now, if we could just pull off a similar illusion that would make our overgrown backyard .....disappear!
*flourish*
*flourish*
Oh, wait, that takes actual work ...
I love how that turned out! I'd love to do that in our house, but it wouldn't look as good with the wood trim.
ReplyDeleteAlso, I'm so glad you blogged about those honeycomb shelves! I LOVE them! I totally want to do them somewhere in our house now!
Ohmygoodness, you need to do those shelves. I have an unreasonable attachment to them and nowhere for them to go. Ditto for Vintage Revivals hexagonal/honeycomb wall. I want that sooo badly ..... But I think I'd need more house .
ReplyDeleteSo, did you guys do three walls? Also, matching whites is where your perfect color acuity comes in handy, Miss. It looks great! It's exciting to see it come together.
ReplyDelete